
RL V6-3.7L (2009)
Relay Box: Service and Repair
Under-Hood Fuse/Relay Box Removal and Installation
Under-hood Fuse/Relay Box Removal and Installation
Special Tools Required
-
Relay puller 07AAC-000A1A0
Removal
1. Do the battery terminal disconnection procedure. See: Starting and Charging/Battery/Service and Repair/Procedures
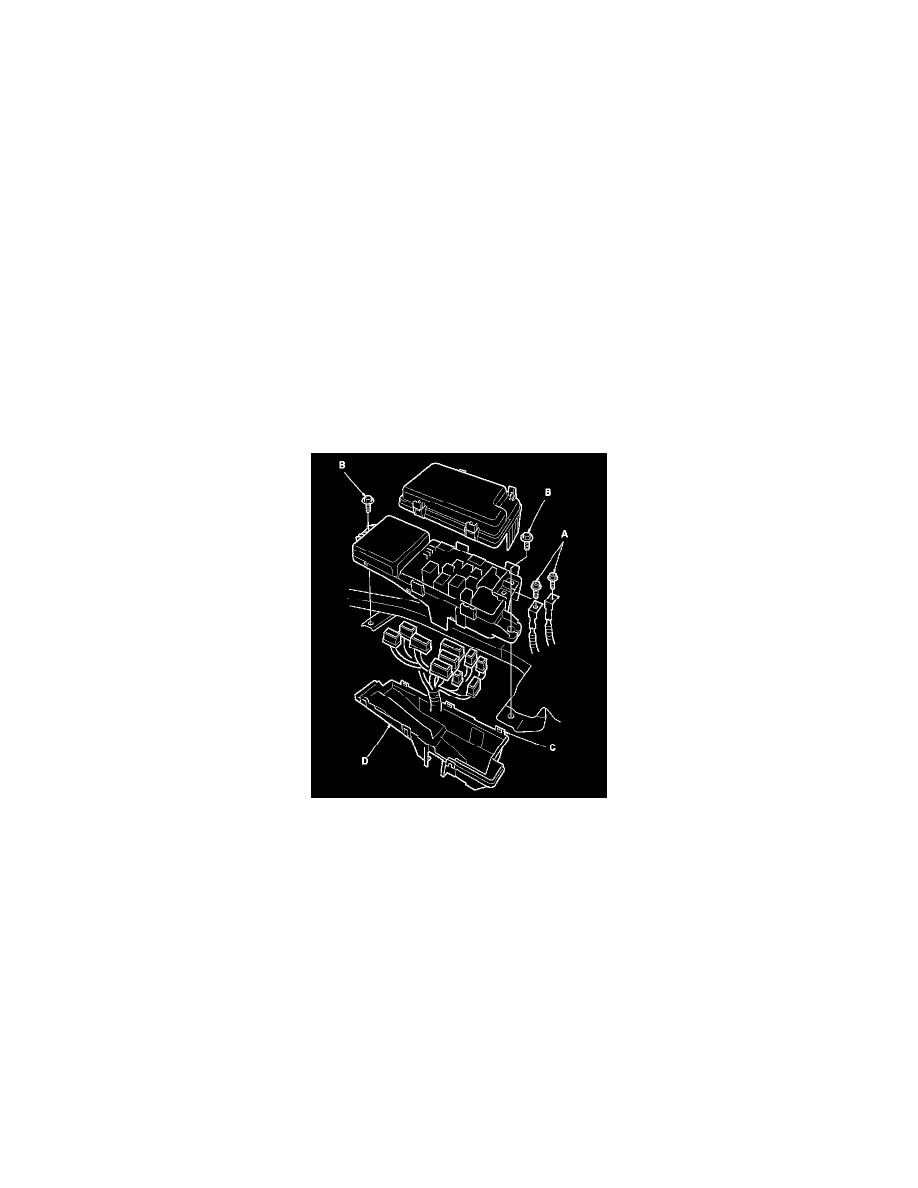
2. Remove the screws (A) for the alternator and battery cable terminals from the under-hood fuse/relay box.
3. Remove the two mounting bolts (B) from the under-hood fuse/relay box.
4. Release the tabs (C), and remove the bottom cover (D) from the under-hood fuse/relay box.
5. Disconnect the connectors from the under-hood fuse/relay box.
6. Carefully remove the relays using the relay puller.
NOTE: Do not use pliers. Pliers will damage the relays, which could cause the engine to stall or not start.
Installation
1. Install the relays and connect the connectors to the under-hood fuse/relay box, then install the under-hood fuse/relay box in the reverse order of
removal.
2. Install the removed parts in the reverse order of removal.
3. Do the battery terminal reconnection procedure. See: Starting and Charging/Battery/Service and Repair/Procedures
4. Confirm that all systems work properly.