
TL L5-2451cc 2.5L SOHC MFI (1997)
During the test-drive, attach the bracket and the weights to the steering wheel on the side opposite the pulling direction. For example, if the vehicle pulls
to the right, attach the bracket and weights to the left side of the steering wheel. Start with the maximum amount of weight on the steering wheel, and
remove the weights until the vehicle drives in a straight line.
When recording the pull on the worksheet, write down the direction of the pull (left or right) and the number of weights required to balance the pull (one
through six). For example, you have the bracket and two weights on the steering wheel. Record this as three weights.
NOTE:
The bracket counts as one weight.
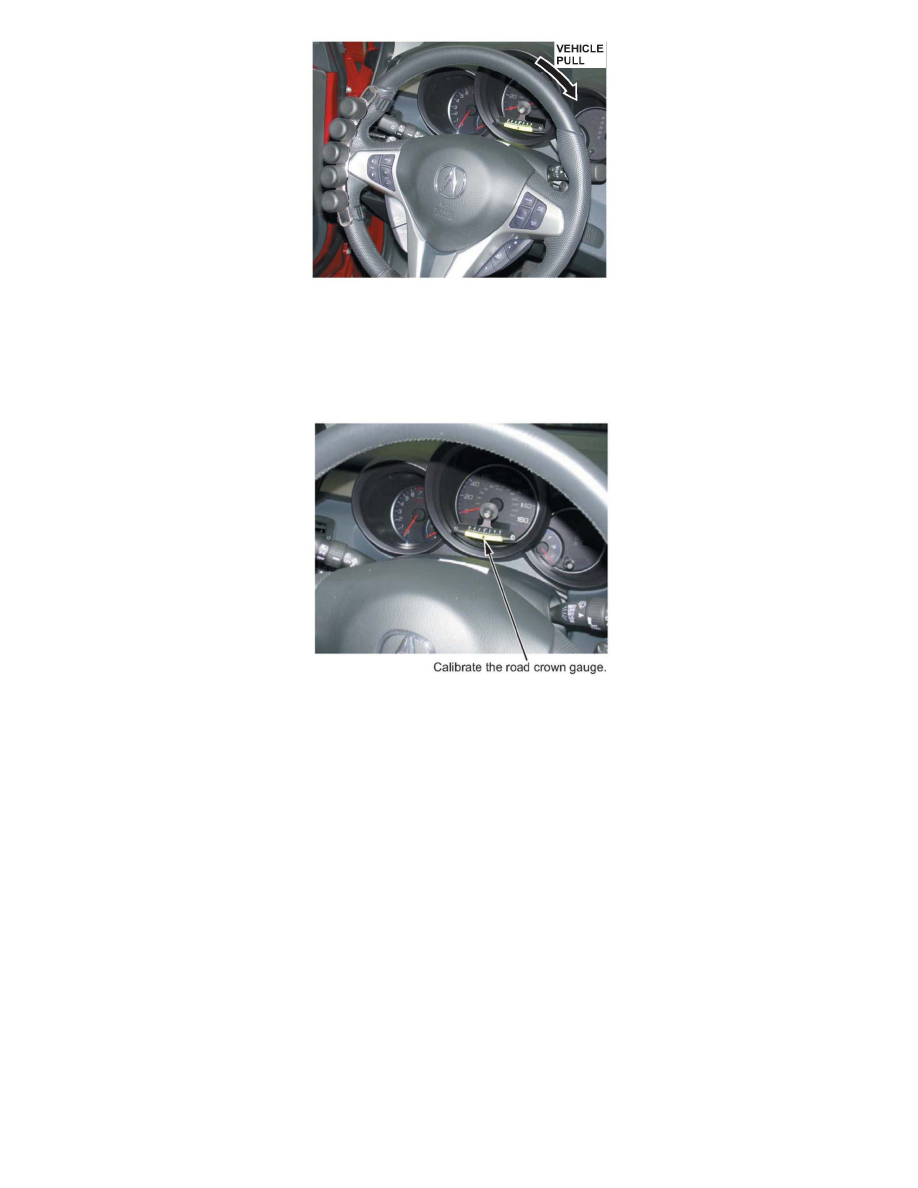
The road crown gauge measures the amount of road crown. Almost all roads have a crown to help drain water during rainstorms. Use the suction cup to
attach the road crown gauge bracket to the vehicle in a vertical position. If necessary, bend the bracket until the gauge is vertical. Once you attach and
align the road crown gauge, calibrate the gauge to zero. There are two ways to calibrate the gauge:
^
Park the vehicle on a level surface, such as an alignment rack, and calibrate the gauge by moving the gauge until the ball is on the zero mark.
^
If you do not have a perfectly flat surface, park the vehicle on a reasonably flat surface and note the gauge reading. Turn the vehicle 1800 and, with
the tires in the same spot, note the new gauge reading. Then move the gauge half of the difference. Example: Your first reading is +3 and, after
moving the vehicle, the gauge reads -1. The difference is 4 degrees. Position the gauge to read +1.