
ZDX V6-3.7L (2010)
Camshaft Oil Seal: Service and Repair
Camshaft Oil Seal Installation - In Car
Camshaft Oil Seal Installation - In Car
Special Tools Required
-
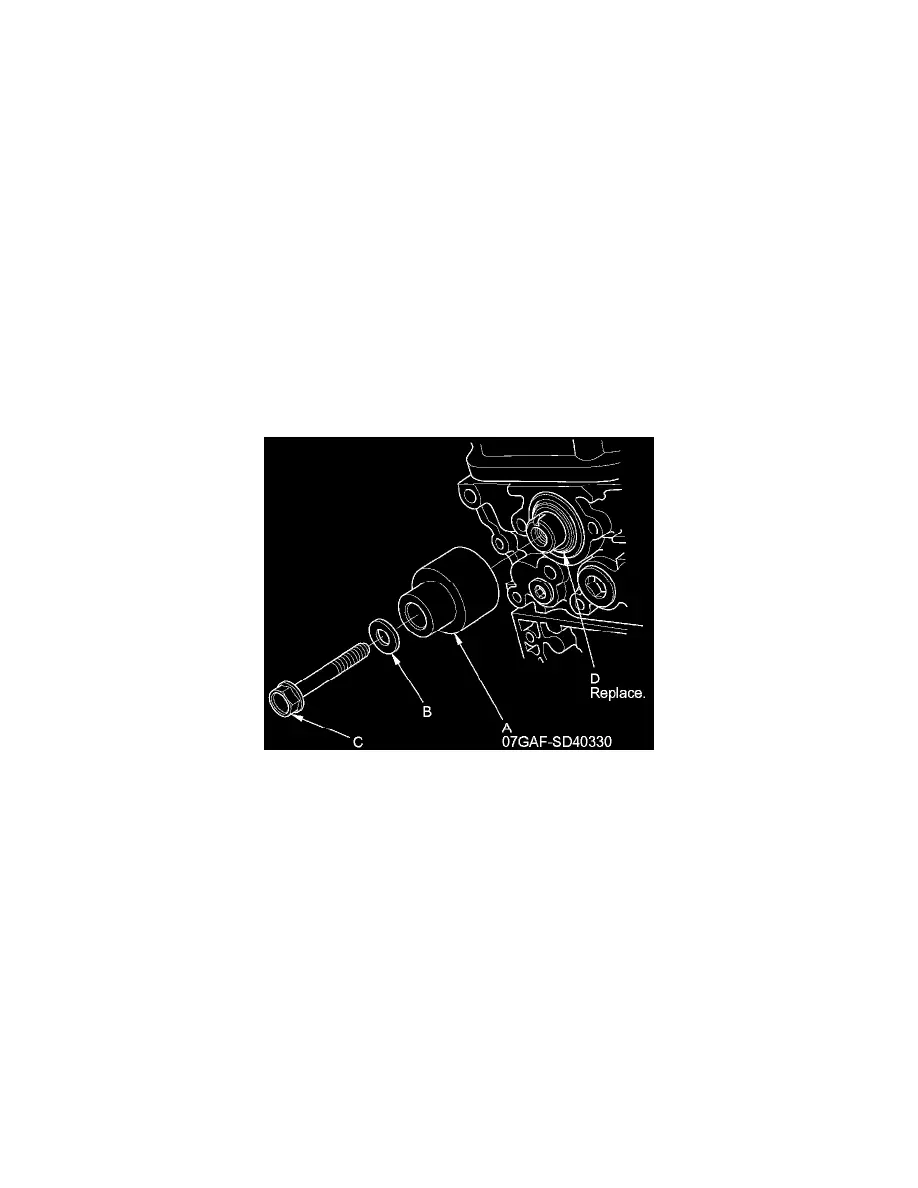
Ball Joint Remover/Installer 07GAF-SD40330
1. Remove the timing belt See: Timing Components/Timing Belt/Service and Repair/Timing Belt Removal.
2. Remove the camshaft pulley and the back cover See: Cylinder Head Assembly/Service and Repair/Removal and Replacement/Cylinder Head
Removal.
3. Remove the camshaft oil seal.
4. Clean and dry the camshaft oil seal housing.
5. Apply a light coat of new engine oil to the lip of the camshaft oil seal.
6. Using the ball joint remover/installer (A), a washer (B), and a 12 x 75 x 1.25 mm bolt (C), press in the new camshaft oil seal (D) about 0.5-1.5 mm
(0.020-0.059 in) below the surface of the cylinder head.
7. Clean the excess grease off the camshaft, and check that the oil seal lip is not distorted.
8. Apply new engine oil to the threads of the camshaft pulley mounting bolt. Install the back cover, then install the camshaft pulley:
-
Front See: Cylinder Head Assembly/Service and Repair/Overhaul/Camshaft, Rocker Arm Assembly, Camshaft Seal, and Pulley Installation
-
Rear See: Cylinder Head Assembly/Service and Repair/Overhaul/Camshaft, Rocker Arm Assembly, Camshaft Seal, and Pulley Installation
9. Install the timing belt See: Timing Components/Timing Belt/Service and Repair/Timing Belt Installation.