
ZDX V6-3.7L (2010)
5. Clean the mating surfaces of the brake disc and the inside of the wheel, then install the front wheels.
6. Lower the vehicle to the ground, and bounce the front of the vehicle up and down several times to stabilize the suspension.
7. Measure the camber angle.
-
If the measurement is within specifications, measure the toe-in.
-
If the measurement is not within specifications, go to step 8.
8. Raise and support the vehicle See: Vehicle Lifting/Service and Repair.
9. Remove the front wheels.
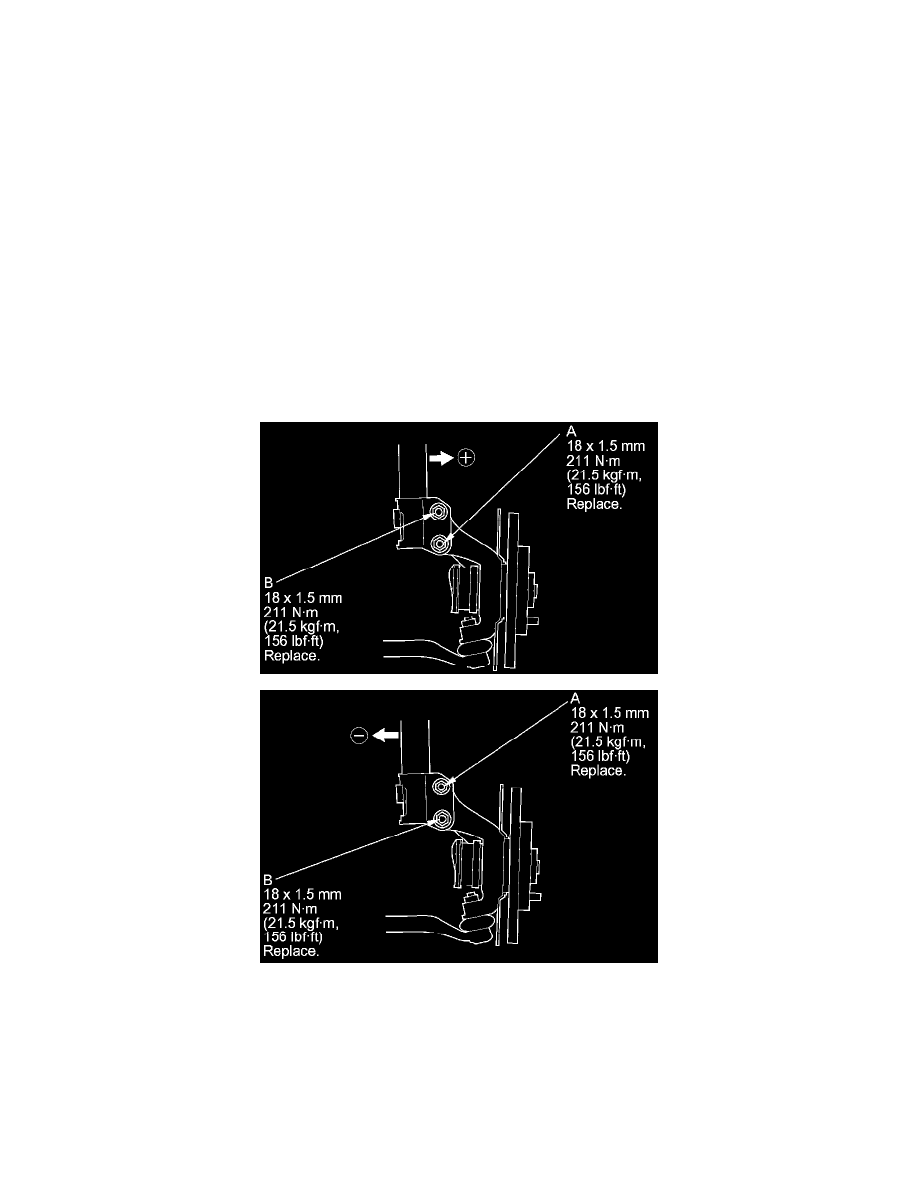
10. Replace the damper pinch bolt (A) with the adjusting bolt (B), to adjust the camber angle.
NOTE:
-
For positive camber adjustment replace the damper pinch bolt of the upper side with the adjusting bolt. Pull out the damper to create a positive
gain in the camber angle.
-
For negative camber adjustment replace the damper pinch bolt of the lower side with the adjusting bolt. Push in the damper to create a negative
gain in the camber angle.
11. Tighten the damper pinch bolt and the adjusting bolt while holding the flange nut to the specified torque.
12. Clean the mating surfaces of the brake disc and the inside of the wheel, then install the front wheels.
13. Lower the vehicle to the ground, and bounce the front of the vehicle up and down several times to stabilize the suspension.
14. Measure the camber angle. If the camber angle is not within specification, repeat step 8 through 13 to readjust the camber angle. If the camber
measurement is correct, measure the toe-in, and adjust it if necessary.
Front Toe Inspection/Adjustment