
ZDX V6-3.7L (2010)
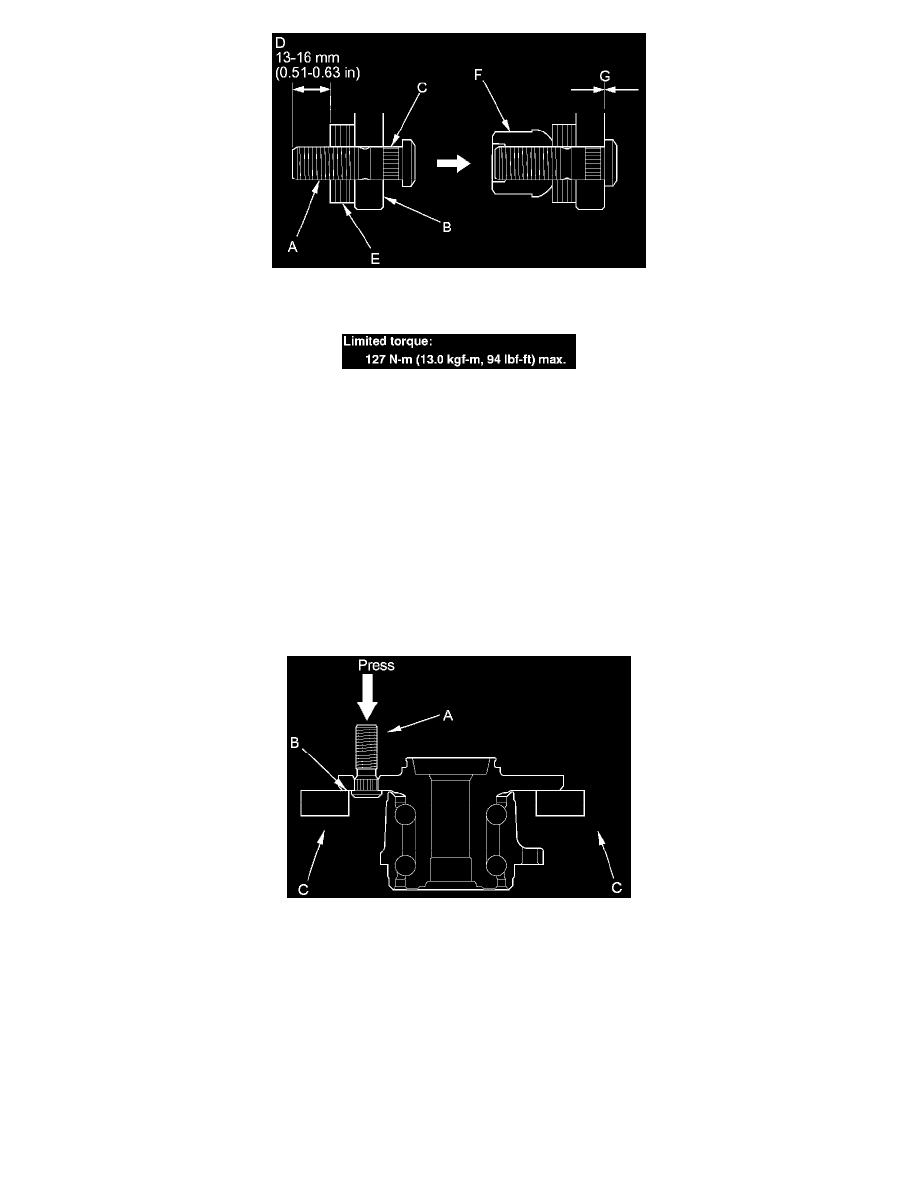
5. Tighten the nut until the wheel bolt is drawn fully into the hub. Do not exceed the maximum torque limit. Make sure there is no gap (G) between
the bolt and the hub.
6. Install the front brake disc See: Brakes and Traction Control/Disc Brake System/Brake Rotor/Disc/Service and Repair/Front Brake Disc
Replacement.
NOTE:
-
If you cannot tighten the wheel nut to the specified torque when installing the wheel, replace the front hub bearing unit as an assembly.
-
Before installing the wheel, clean the mating surfaces on the brake disc and the inside of the wheel.
Rear
1. Remove the rear hub bearing unit See: Suspension/Rear Knuckle/Service and Repair.
2. Separate the wheel bolt (A) from the hub (B) using a hydraulic press. Support the hub with hydraulic press attachments (C) or equivalent tools.
NOTE: Before installing the new wheel bolt, clean the mating surfaces on the bolt and the hub.
3. Insert the new wheel bolt into the hub while aligning the splined surfaces on the hub hole with the wheel bolt.
NOTE:
-
Degrease the area around the wheel bolt.
-
Make sure the wheel bolt is installed vertically in relation to the hub disc surface.
4. Install the wheel bolt using a hydraulic press until the wheel bolt shoulder is fully seated.
5. Install the rear hub bearing unit See: Suspension/Rear Knuckle/Service and Repair.
NOTE: If you cannot tighten the wheel nut to the specified torque when installing the wheel, replace the rear hub bearing unit as an assembly.