audi Workshop Repair Guides

Audi Workshop Service and Repair Manuals

Removing and installing cover for inner door panel > < Removing and installing front door
Adjusting door
Adjusting door
Special tools and workshop equipment required
   
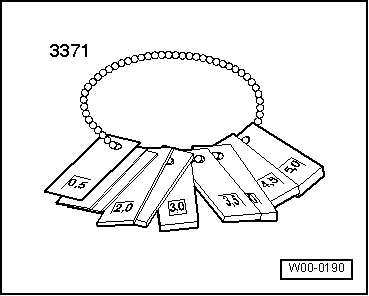
t  Setting gauge -3371-
  W00-0190
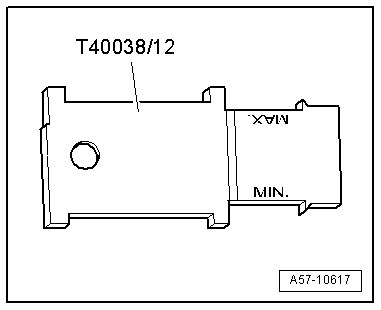
t  Template -T40038 /12-
t  The »min and max« markings are used to check the side adjustment.
t  The groove in the middle of the template is used to check the height of the door.
t  The 0.4 mm graduation is used to check the underhang of the door relative to the wing, and of the side panel to the door.
Checking lateral adjustment
–  Use template -T40038 /12- for check.
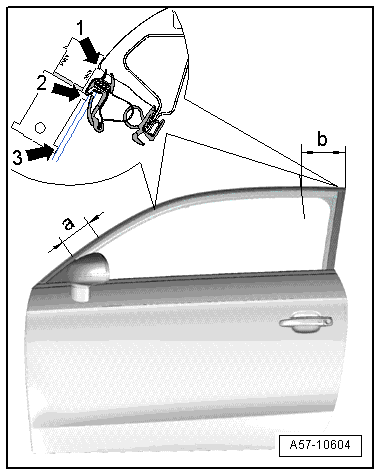
–  Position template at distance -a- = 20 mm and -b- = 100 mm.
  A57-10617
–  Lugs of template must make contact with roof at top -arrow 1-.
–  »Min« adjustment is correct when »points -1- and -3-« make contact.
–  »Point -2-« may show a gap.
–  »Max« adjustment is correct when »points -2- and -3-« make contact.
–  »Point -1-« may show a gap.
Checking adjustment of height
–  Slide template upwards until lugs of template make contact with roof.
–  Height is correctly adjusted when bottom edge of window guide is within width of template groove.
  A57-10604
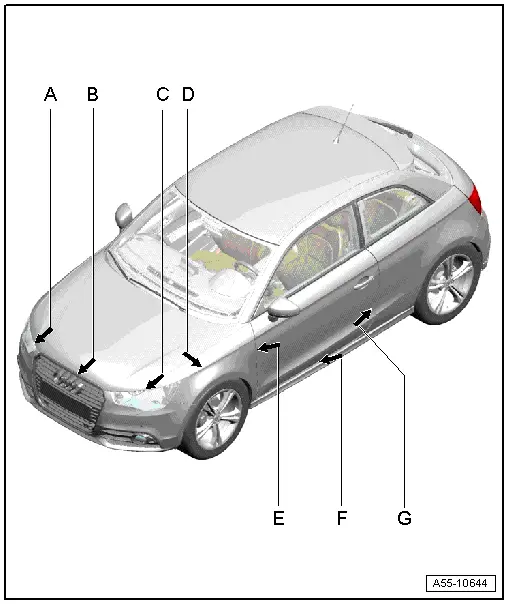
Gap widths for front door
  Note
t  All dimensions are given in »mm«.
t  All tolerance ranges for the dimensions are ± 0.5 mm.
t  The sides of the gap must be parallel (variation not more than 0.5 mm).
t  Dimension E = 3.5 mm
t  Dimension F = 5 mm
t  Dimension G = 3.5 mm
Driver side:
–  Remove dash panel trim (driver side) → Rep. gr.70.
–  Remove A-pillar trim (bottom) → Rep. gr.70.
–  Remove mounting for relay carrier (driver side) → Rep. gr.97.
Passenger side:
–  Remove glove box → Rep. gr.68.
Both sides (continued):
–  Remove connector point at A-pillar → Rep. gr.97.
  A55-10644
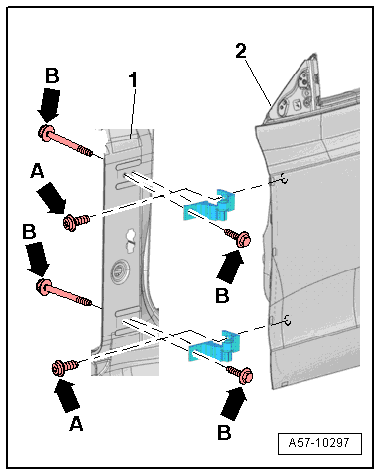
1. Longitudinal adjustment
–  Unscrew bolts -arrows B- at top and bottom of hinge and on A-pillar -item 1-.
–  Adjust door -2- lengthwise.
–  Tighten bolts -arrows B-.
l  Tightening torque → Chapter
Height adjustment
–  Loosen bolts (top and bottom) -arrows A- at hinge.
–  Adjust door -2- lengthwise.
–  Tighten bolts -arrows A-.
l  Tightening torque → Chapter
  A57-10297
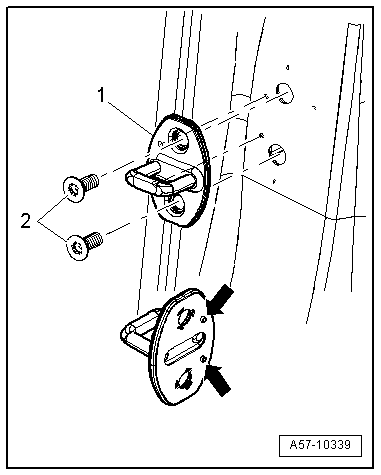
Adjustment via striker
  Note
t  The striker shim plate with the pins -arrows- must be positioned exactly in the hole.
t  After adjusting the striker, the pins must be sheared off cleanly.
–  Loosen bolts -2-.
–  Move striker -1- until door is flush with body contour.
  Note
t  The striker is only to be used for adjustment towards the centre of the vehicle.
t  Do not adjust the height of the door via the striker; otherwise the door lock will be damaged.
–  If adjustment is correct, striker should engage centrally in door lock.
–  Tighten bolts -2-.
l  Tightening torque → Chapter
  A57-10339

Removing and installing cover for inner door panel > < Removing and installing front door