audi Workshop Repair Guides

Audi Workshop Service and Repair Manuals

Gearbox mechanics,operation, construction,diff. > < Exploded view - clutch unit
Removing and installing clutch
Special tools and workshop equipment required
   
t  Counterhold tool -3067-
  W00-0026
t  Centring mandrel -T10086-
t  Grease for clutch plate splines -G 000 100-
Removing
l  Gearbox removed
–  Attach counterhold tool -3067- before loosening bolts.
–  Loosen bolts in small steps and in diagonal sequence.
–  Take off clutch pressure plate and clutch plate.
Installing
Installation is carried out in reverse sequence; note the following:
l  Tightening torque → Chapter „Exploded view - clutch unit“
  Note
t  Observe notes → Chapter.
  W00-1116
t  
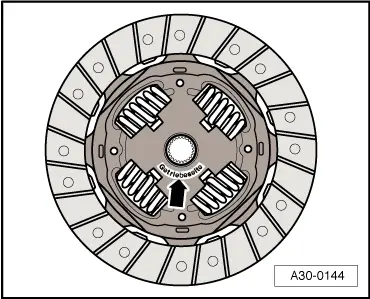
Installation position of clutch plate: protruding spring cage / marking „Getriebeseite“ (gearbox side), if provided, faces towards pressure plate.
t  
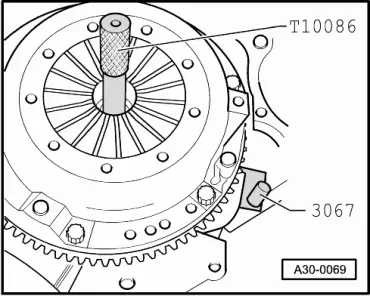
Clutch pressure plate friction surface and clutch plate lining must make full contact with flywheel. Only then insert bolts.
t  Check that dowel sleeves for centralising engine/gearbox are in the cylinder block; install if necessary.
t  If the dowel sleeves are not fitted, this will lead to gear-change problems, clutch malfunction and in some cases gearbox noise (gears will make rattling noises).
  A30-0144
–  Use counterhold tool -3067-.
–  Position clutch pressure plate on dowel pins.
–  Use centring mandrel -T10086- to centralise clutch plate.
–  Screw in all 6 bolts evenly by hand until bolt heads make contact with clutch pressure plate.
–  Tighten bolts in small steps and in diagonal sequence to avoid damaging centring holes in clutch pressure plate and dowel pins on flywheel.
  A30-0069

Gearbox mechanics,operation, construction,diff. > < Exploded view - clutch unit