Audi Workshop Service and Repair Manuals
HOME
FEATURES
MENU
INDEX
ABOUT US
Removing and installing flange shaft (right-side) >
< Exploded view - flange shafts and oil seals
A1
Power transmission
5-speed manual gearbox 02T
Final drive, differential, differential lock / Exploded view - flange shafts and oil seals
Removing and installing flange shaft (left-side)
Removing and installing flange shaft (left-side)
Removing and installing flange shaft (left-side)
Special tools and workshop equipment required
t
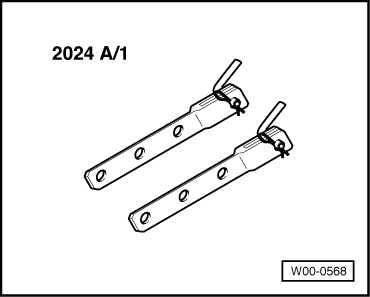
Hook -2024 A /1-
Removing
l
Gearbox in vehicle
–
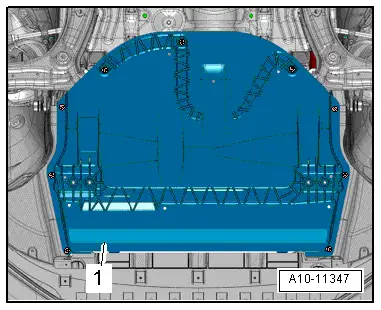
Remove noise insulation
-1-
→ General body repairs, exterior; Rep. gr.66
.
–
Remove wheel housing liner (front left)
→ General body repairs, exterior; Rep. gr.66
.
–
Unbolt drive shaft (left-side) from flange shaft on gearbox
→ Running gear; Rep. gr.40
.
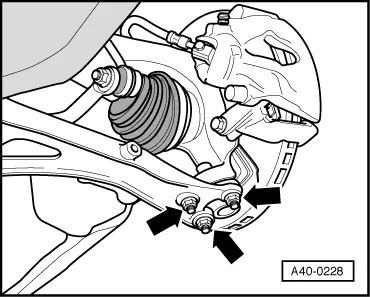
–
Remove nuts
-arrows-
securing swivel joint (left-side).
–
If fitted, unscrew nut on bracket for front left vehicle level sender -G78-.
–
Disengage swivel joint (left-side) from wishbone.
–
Swivel suspension strut (left-side) outwards and support with hook -2024 A /1- as shown in illustration.
WARNING
Risk of accident if parts of support are not properly secured.
Secure locking pin and swivel joint with retaining clip
-arrow-
and nut
-1-
.
–
Tie up drive shaft (left-side).
Note
Make sure you do not damage surface coating on drive shaft.
–
Remove bolt
-arrow-
securing flange shaft (left-side). To do so, screw two bolts into flange and counterhold flange shaft with suitable lever.
–
Pull out flange shaft together with spring, thrust washer and tapered ring.
Installing
l
Tightening torque
→ Chapter „Exploded view - flange shafts and oil seals“
Installation is carried out in reverse sequence; note the following:
–
Push flange shaft in against spring pressure and secure with bolt.
–
Install swivel joint (left-side) and bolt drive shaft (left-side) onto flange shaft of gearbox
→ Running gear; Rep. gr.40
.
–
Install wheel housing liner (front left) and noise insulation
→ General body repairs, exterior; Rep. gr.66
.
Power transmission
5-speed manual gearbox 02T
Final drive, differential, differential lock / Exploded view - flange shafts and oil seals
Removing and installing flange shaft (left-side)
Removing and installing flange shaft (right-side) >
< Exploded view - flange shafts and oil seals
 Note
Note
 WARNING
 Note
Note