audi Workshop Repair Guides

Audi Workshop Service and Repair Manuals

Removing gearbox (vehicles with 1.6 ltr. TDI engine) > < Removing gearbox (vehicles with 1.4 ltr. TFSI engine)
Removing gearbox (vehicles with 1.4 ltr. TFSI engine with supercharger)
   
Removing gearbox (vehicles with 1.4 ltr. TFSI engine with supercharger)
Special tools and workshop equipment required
t  Support bracket -10 - 222 A-
t  Adapters -10 - 222 A /19-
t  Removal lever -80 - 200-
t  Gearbox support -3282-
t  Pin -3282/29-
t  Adjustment plate -3282/59-

   
t  Extension -2024 A /1-
t  Engine and gearbox jack -V.A.G 1383 A-
t  Stepladder -VAS 5085-
t  Tensioning strap -T10038-
t  Engine support bracket, basic set -T40091-

   
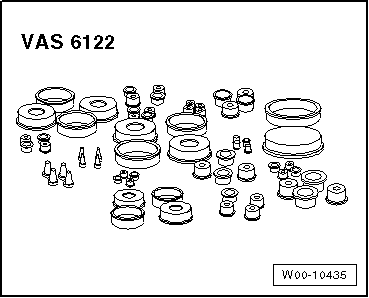
t  Engine bung set -VAS 6122-
Procedure
  Note
t  → Chapter „Repair instructions“.
t  → Chapter „Rules for cleanliness when working on the gearbox“.
t  Observe notes on dual clutch gearbox 0AM → Chapter.
t  Re-attach all cable ties at the same locations when re-installing.
–  Shift selector lever into position „P“.
  W00-10435
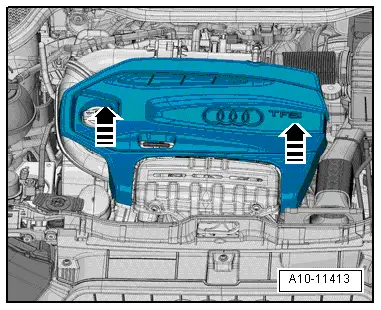
–  Pull off engine cover panel (front) -arrows- and remove towards front.
  A10-11413
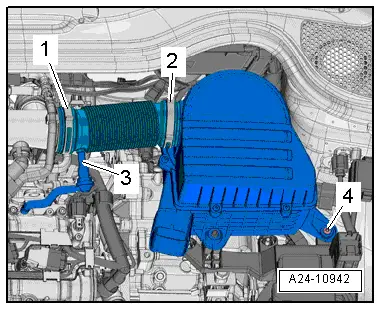
–  Remove air cleaner housing → Injection and ignition system; Rep. gr.24.
  A24-10942
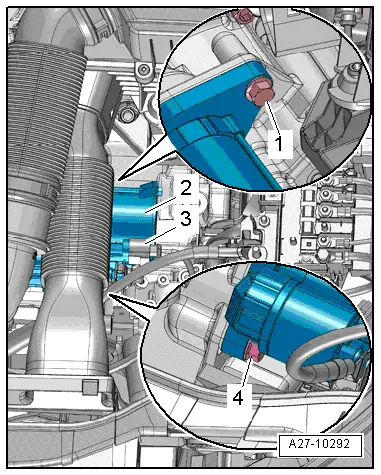
–  Remove starter → Electrical system; Rep. gr.27.
  A27-10292
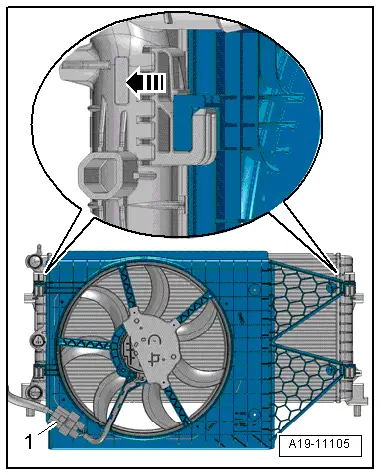
–  Remove radiator cowl → Engine, mechanics; Rep. gr.19.
  A19-11105
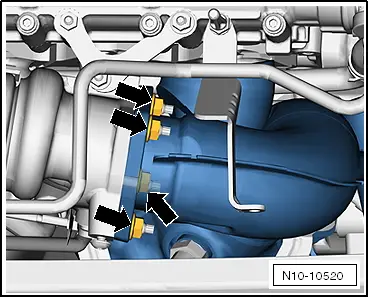
–  Remove catalytic converter with centre silencer → Engine, mechanics; Rep. gr.26.
  N10-10520
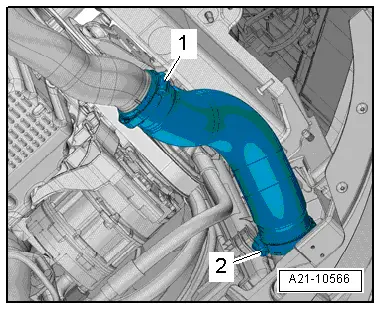
–  Release hose clips -1 and 2- and remove air intake hose.
–  Seal off open lines and connections with clean plugs from engine bung set -VAS 6122-.
  A21-10566
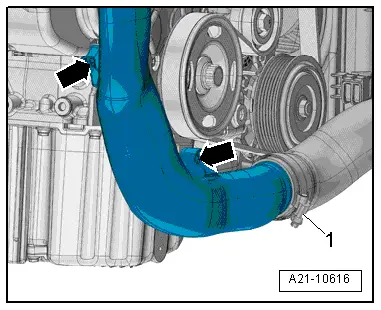
–  Remove bolts -arrows- and press air pipe (right-side) to side.
  Note
-Item 1- can be disregarded.
  A21-10616
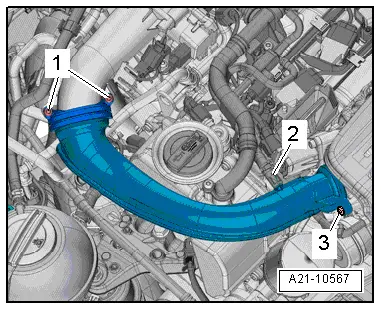
–  Remove bolts -1 and 3-.
–  Release hose clip -2-, detach air pipe (top right) and remove air intake hose.
  A21-10567
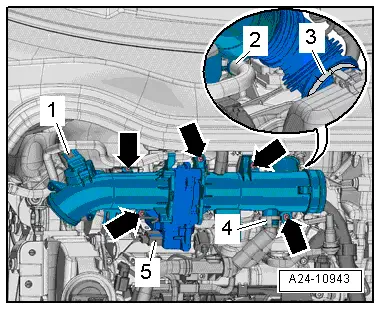
–  Unplug electrical connectors:
1 - Intake air temperature sender 3 -G520-
5 - Regulating flap control unit -J808-
–  Release hose clip -3- and move fuel hose -2- clear.
–  Remove bolts -arrows- and detach intake connecting pipe.
–  Press release tabs and disconnect crankcase breather hose -4-.
  A24-10943
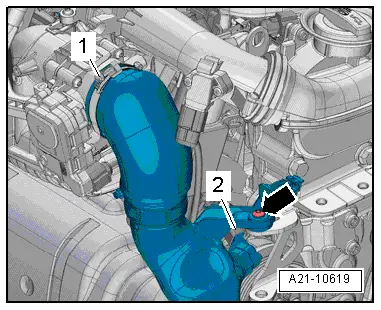
–  Unplug electrical connector -2- and release hose clip -1-.
–  Remove bolt -arrow-.
  A21-10619
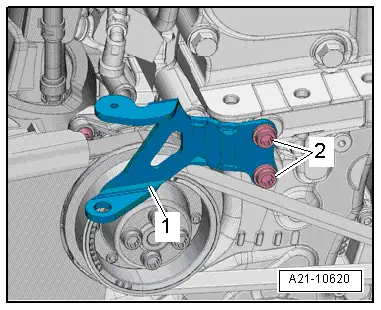
–  Unscrew bolts -2- and detach bracket -1- and air pipe (right-side).
  A21-10620
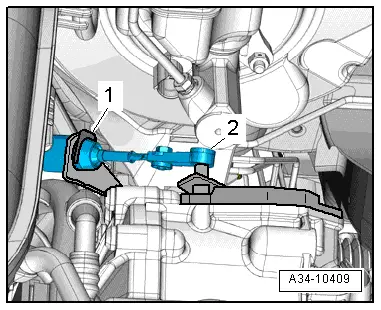
–  Pry selector lever cable -2- off gearbox selector lever using removal lever -80 - 200-.
–  Pull off retaining clip -1- for selector lever cable.
–  Detach selector lever cable from cable support bracket and move clear to one side.
  Note
Do not bend or kink the selector lever cable.
  A34-10409
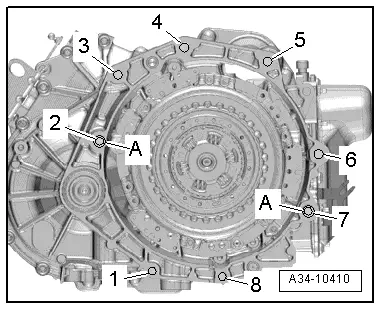
–  Remove bolts -3, 4, 5- securing gearbox to engine.
  A34-10410
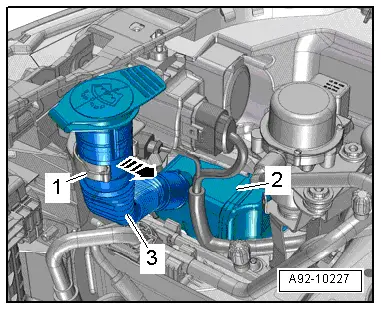
–  Pull filler neck -3- for washer fluid reservoir out of retaining clip -1--arrow- and move clear to one side.
–  Remove wheel housing liner (front left) → General body repairs, exterior; Rep. gr.66.
  Note
-Item 2- can be disregarded.
  A92-10227
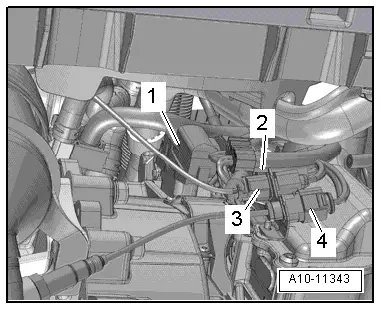
–  Take electrical connector -2- out of bracket.
  Caution
Risk of irreparable damage to gearbox components.
Never touch the contacts in the gearbox connector with your hands. Electrostatic discharge could cause irreparable damage to the control unit and, consequently, the mechatronic unit.
–  Touch a suitable earthed object with your hand (without gloves) to discharge any static electricity.
–  Unplug electrical connector -1- for mechatronic unit for dual clutch gearbox -J743-.
–  Take electrical connectors -2- and -3- out of bracket and unplug.
–  Remove all retainers from mechatronic unit for dual clutch gearbox -J743-.
–  Move electrical wiring harness clear on gearbox.
  Note
-Item 4- can be disregarded.
  A10-11343
–  Unbolt drive shafts (left and right) from flange shafts on gearbox → Running gear, front-wheel drive; Rep. gr.40.
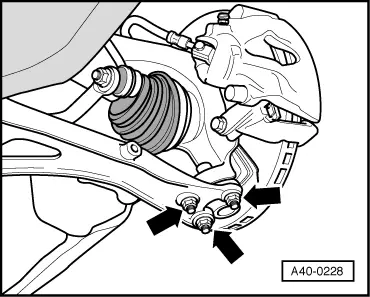
–  Remove nuts -arrows- securing swivel joint (left and right).
–  If fitted, unscrew nut on bracket for front left vehicle level sender -G78-.
–  Disengage swivel joints from wishbones.
  A40-0228
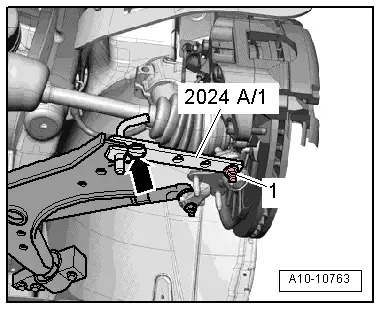
–  Swivel suspension strut (left and right) outwards and support with extension -2024 A /1-, as shown in illustration.
  WARNING
Risk of accident if parts of support are not properly secured.
Secure locking pin and swivel joint with retaining clip -arrow- and nut -1-.
–  Remove flange shaft (right-side) → Chapter.
  A10-10763
  WARNING
Risk of accident.
The bolted connection -1- must not be slackened.
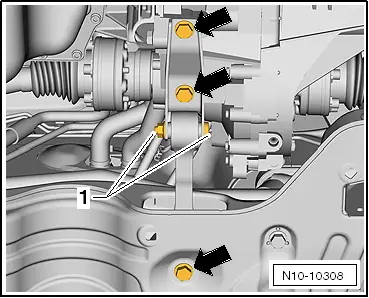
–  Remove bolts -arrows- and detach pendulum support.
  N10-10308
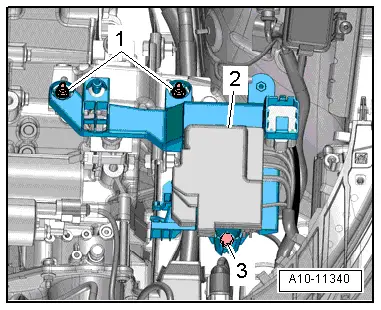
–  Remove nut -1- and bolt -3- and press electronics box -2- clear to one side.
  A10-11340
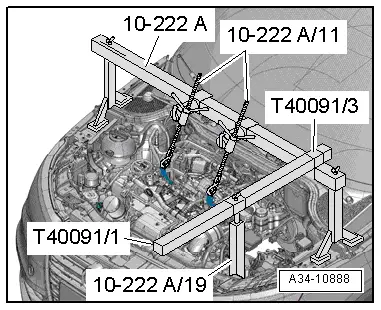
–  Set up support bracket -10 - 222 A- on top edges of body flanges (left and right) and on longitudinal member (left-side), as shown in illustration.
–  Attach hooks of spindles -10 - 222 A /11- to engine lifting eyes.
–  Take up weight of engine with spindles; do not lift.
  A34-10888
–  Remove engine mounting → Engine, mechanics; Rep. gr.10.
  A10-11344
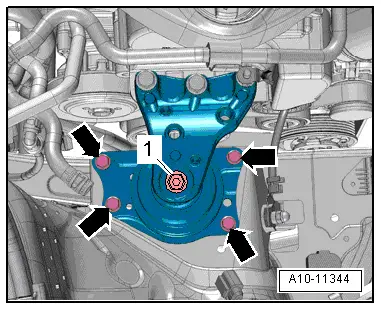
–  Remove bolts -arrows- from gearbox mounting.
  A10-11341
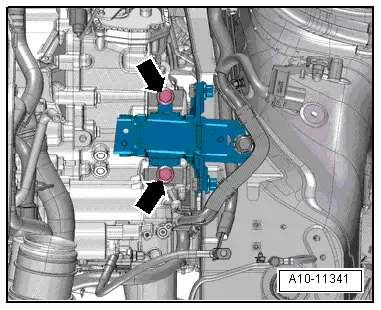
–  Lower engine/gearbox assembly using spindles of support bracket -10 - 222 A- until distance -a- is obtained between gearbox housing and gearbox mounting.
l  Dimension -a- = 100 ... 110 mm
  N34-11348
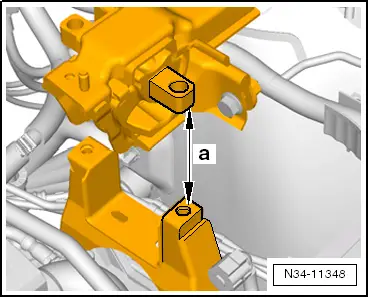
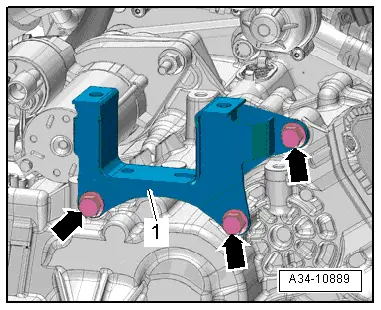
–  Remove bolts -arrows- and detach gearbox support -1-.
  A34-10889
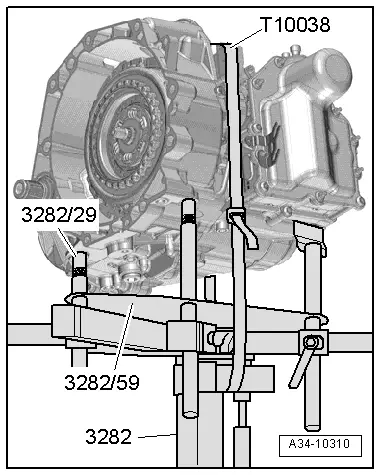
To remove dual clutch gearbox 0AM, set up gearbox support -3282- with adjustment plate -3282/59-.
–  Set up gearbox support -3282- on engine and gearbox jack -V.A.G 1383 A-.
–  Align arms of gearbox support according to holes in adjustment plate -3282/59-.
–  Secure support elements as illustrated on adjustment plate -3282/59-.
–  Place engine and gearbox jack -V.A.G 1383 A- underneath vehicle. The -arrow symbol- on the adjustment plate -3282/42- points in the direction of travel.
–  Align gearbox support -3282- parallel with gearbox.
–  Screw pin -3282/29- into gearbox.
–  Insert last support element in gearbox as illustrated.
–  Use tensioning strap -T10038- to secure gearbox.
–  Support gearbox by lifting from underneath with engine and gearbox jack -V.A.G 1383 A-.
  A34-10310
–  Remove remaining bolts -1, 2, 6, 7, 8- securing gearbox to engine.
–  Press gearbox off dowel sleeves.
–  Pull gearbox off engine.
–  Lift engine slightly with spindles and push towards right side of vehicle, paying attention to refrigerant lines.
–  Carefully lower gearbox using engine and gearbox jack -V.A.G 1383 A-.
–  While lowering gearbox, change position of gearbox using spindles on gearbox support -3282-.
  A34-10410

Removing gearbox (vehicles with 1.6 ltr. TDI engine) > < Removing gearbox (vehicles with 1.4 ltr. TFSI engine)