
A1
|
 Caution
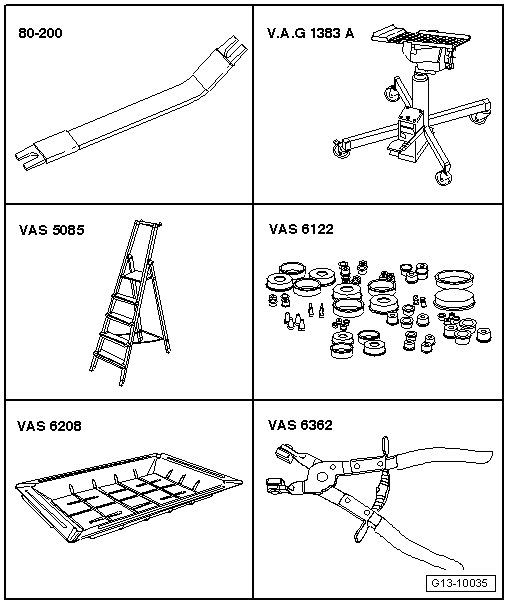
| Special tools and workshop equipment required |
| t | Removal lever -80 - 200- |
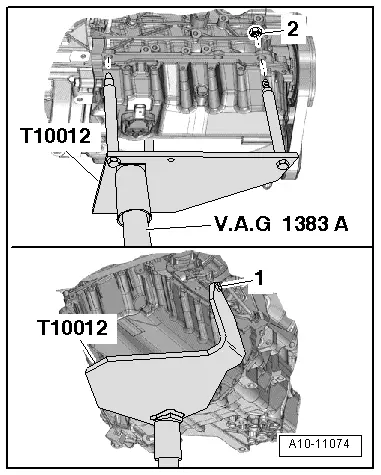
| t | Engine and gearbox jack -V.A.G 1383 A- |
| t | Stepladder -VAS 5085- |
| t | Engine bung set -VAS 6122- |
| t | Drip tray for workshop hoist -VAS 6208- |
| t | Hose clip pliers -VAS 6362- |
|
|
 Note
Note
|
|
|
|
 WARNING
|
|
|

|
|
|
|
|
|
|
|
|
|
|
|
|
Note |
|
|
|
|

|
|
|
|
|
Note
|
|
|
|
|
|
|
|
|
|
|
|
|
|
|
|
Note
|
|
|
|
|

|
|
|
|
|
|
|
Note
|

|
|
|
Note
|
|
Note
|

|
|
|
|
|
|
|
|
|
|

|
|

|
|
|
|
|
|
|
Note
|
|
|
|
|

|
Note
|
|
|
|
Note
|
|
|
|
|
|
Note
|
|
|
|
|
|