audi Workshop Repair Guides

Audi Workshop Service and Repair Manuals

Checking and servicing alternator > < Removing and installing alternator - vehicles with 1.4 ltr. TFSI engine with supercharger
Removing and installing alternator - vehicles with TDI engine
Special tools and workshop equipment required
   
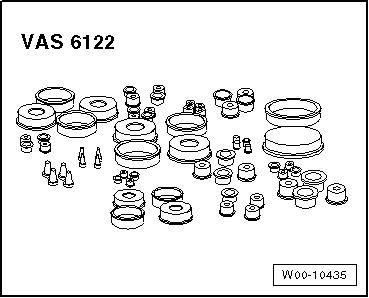
t  Engine bung set -VAS 6122-
  W00-10435
Removing
–  Disconnect earth cable from battery with ignition switched off → Chapter.
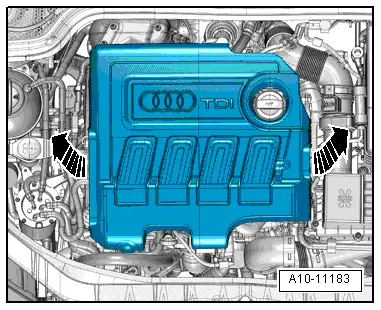
–  Detach engine cover panel -arrows-.
  A10-11183
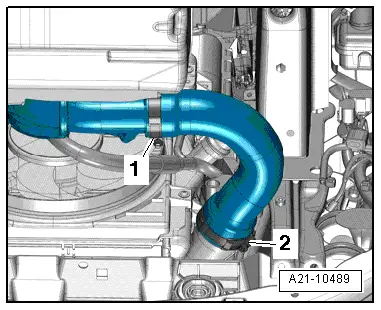
–  Release hose clips -1- and -2- and detach air hose.
–  Seal off open pipes and connections with clean plugs from engine bung set -VAS 6122-.
  A21-10489
–  Release hose clip -2-.
–  Remove bolts -arrows-.
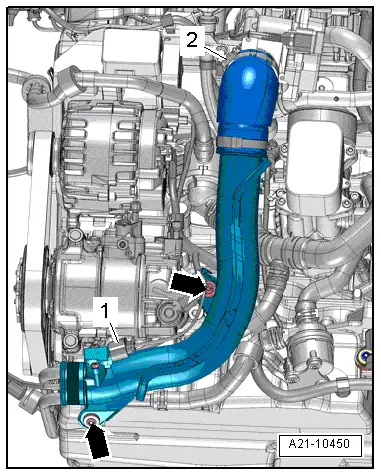
–  Unplug electrical connector -1- at charge pressure sender -G31-/intake air temperature sender -G42- and detach air pipe (right-side).
–  Remove poly V-belt → Rep. gr.13.
  A21-10450
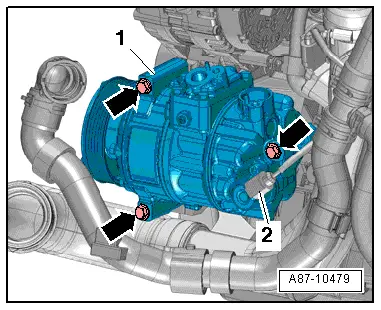
–  On vehicles with air conditioner, unplug electrical connector -2- at air conditioner compressor regulating valve -N280-.
  Caution
Risk of damage to air conditioner compressor and refrigerant lines/hoses.
Take care to avoid straining, kinking or bending refrigerant lines/hoses.
–  Unscrew bolts -arrows- and detach air conditioner compressor -1- (with pipe/hose assembly still connected).
  A87-10479
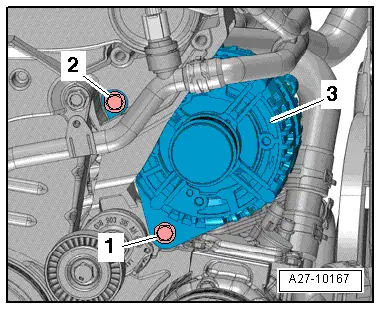
–  Remove bolt -2-.
  A27-10167
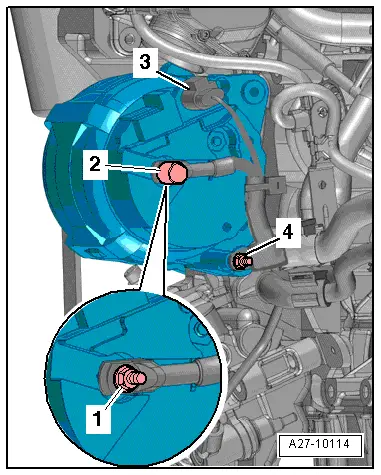
–  Swivel alternator forwards and unplug electrical connector -3-.
–  Pry off protective cap -2- and unscrew nut -1- for terminal 30/B+.
–  Unscrew nut -4- and pull off clamp.
  A27-10114
–  Unscrew bolt -1- and take out alternator -3- downwards and to the right; on vehicles with air conditioner, it is necessary to move air conditioner compressor to the left (as seen in direction of travel).
  Note
t  If the alternator sticks in the bracket, screw the bolts back in again down to the last 2 turns.
t  Tap carefully on bolt heads with flat side of hammer to release bushes of alternator mountings.
Installing
l  Tightening torque → Chapter
Installation is carried out in the reverse order; note the following:
–  To facilitate positioning of alternator, slightly drive back bushes for bolts.
  Note
t  Stiff alternator mount bushes must be freed; otherwise the clamping force of the bush will not be adequate even when the bolts are tightened to the correct torque.
t  Hose connections and air pipes/hoses must be free from oil and grease before fitting.
t  Secure all hose connections with the correct type of hose clips (same as original equipment) → Electronic parts catalogue.
–  Install air hoses with screw-type clips and air pipe → Rep. gr.21.
–  Install air conditioner compressor → Rep. gr.87.
–  Install poly V-belt → Rep. gr.13.
–  Connect battery. Steps required → Anchor.
–  Start engine and check that belt runs properly.
  A27-10167

Checking and servicing alternator > < Removing and installing alternator - vehicles with 1.4 ltr. TFSI engine with supercharger