audi Workshop Repair Guides

Audi Workshop Service and Repair Manuals

Oil pump and retaining frame - exploded view > < Lubrication system - exploded view
Removing and installing sump
Special tools and workshop equipment required
   
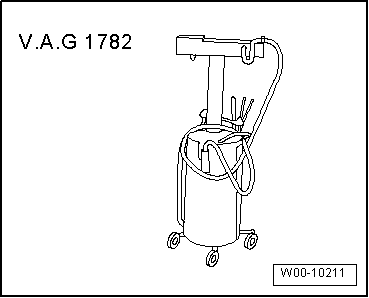
t  Used oil collection and extraction unit -V.A.G 1782-
  W00-10211
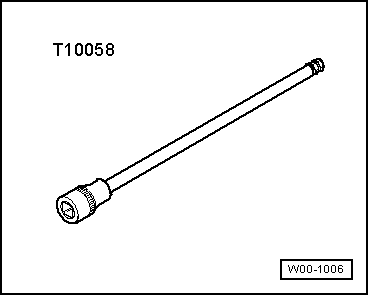
t  Allen key (long reach) -T10058-
t  Electric drill with plastic brush attachment
t  Sealant → Parts catalogue
t  Safety goggles
  W00-1006
Removing
–  Pull out oil dipstick.
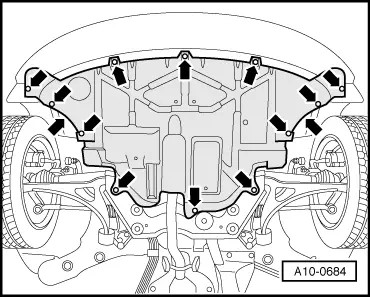
–  Remove noise insulation -arrows-.
–  Place used oil collection and extraction unit -V.A.G 1782- under engine.
–  Drain off engine oil.
  A10-0684
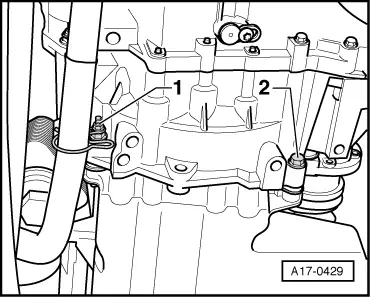
–  Unscrew bracket -1-.
  Note
Disregard -item 2-.
  A17-0429
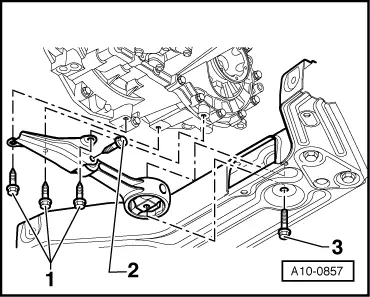
–  Unscrew bolts -1- for pendulum support.
  Note
Disregard -items 2 and 3-.
  A10-0857
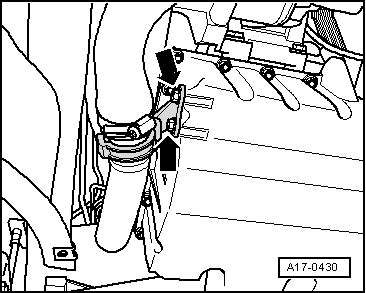
–  Unbolt bracket for air pipe from sump -arrows-.
  A17-0430
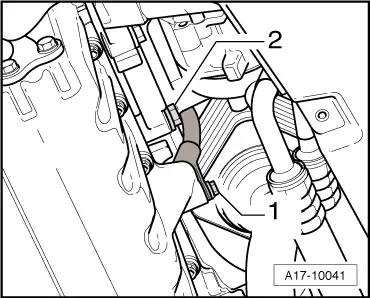
–  Remove bolt -1- securing connection for dipstick guide tube on sump.
  Note
Disregard -item 2-.
  A17-10041
–  Remove bolts -arrows- securing gearbox to sump.
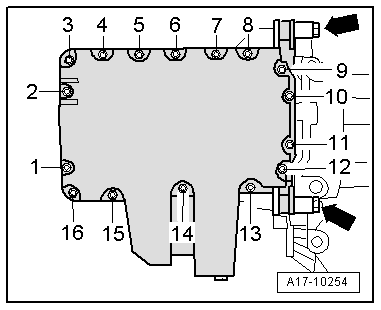
–  Slacken bolts -1 ... 16- in diagonal sequence and remove.
  Note
  A17-10254
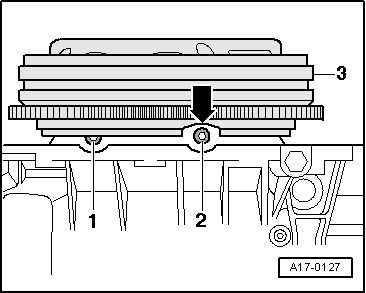
t  The bolts on gearbox end -1 and 2- are accessible via the recess -arrow- on the dual-mass flywheel -3- (turn the flywheel as required).
t  The bolts can be unscrewed using Allen key (long reach) -T10058-.
–  Take off sump; if necessary loosen it by striking lightly with a rubber hammer.
Installing
Installation is carried out in the reverse order; note the following:
  Note
Fit new O-ring to dipstick guide tube.
  A17-0127
  WARNING
Wear safety goggles.
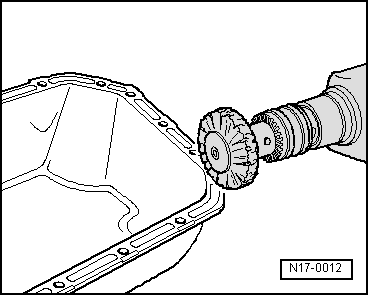
–  Remove sealant residue from sump and cylinder block using a rotating plastic brush or similar.
–  Clean sealing surfaces; they must be free of oil and grease.
  N17-0012
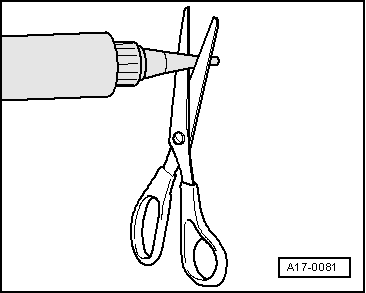
–  Cut off tube nozzle at front marking (nozzle approx. 2 mm Ø).
  A17-0081
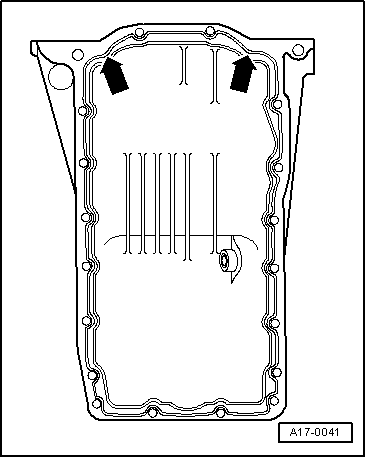
–  Apply bead of sealant onto clean sealing surface of sump as shown in illustration.
l  Thickness of sealant bead: 2 ... 3 mm
  Note
t  Sealant bead must not be wider than 3 mm, otherwise excess sealant could ingress into sump and clog strainer in oil intake pipe.
t  Take particular care when applying sealant bead in area of rear sealing flange -arrows-.
t  The sump must be installed within 5 minutes after applying sealant.
  A17-0041
–  Immediately install sump and tighten bolts in the sequence indicated:
1.  Tighten bolts -1 ... 16- securing sump to cylinder block in diagonal sequence initially to 5 Nm.
2.  Tighten bolts securing sump to gearbox -arrows-.
3.  Tighten bolts -1 ... 16- in diagonal sequence to final setting.
  Note
t  When installing sump with engine removed from vehicle, ensure that sump is positioned flush with cylinder block at flywheel end.
t  After fitting sump assembly, the sealant must dry for approx. 30 minutes. Then (and only then) fill the engine with engine oil.
–  Install pendulum support → Chapter.
–  Fill up with engine oil and check oil level → Chapter.
Tightening torques
  A17-10254
ComponentNm
Sump to:Cylinder block15
 Gearbox45
Oil drain plug30
Connection for dipstick guide tube to sump9
Air pipe to sump8


Oil pump and retaining frame - exploded view > < Lubrication system - exploded view