audi Workshop Repair Guides

Audi Workshop Service and Repair Manuals

Removing door handle > < Removing and installing operating rods for front door lock
General Body Assembly Exterior (Repair groups 50, 55, 57, 58, 60, 63, 64, 66)
Front door
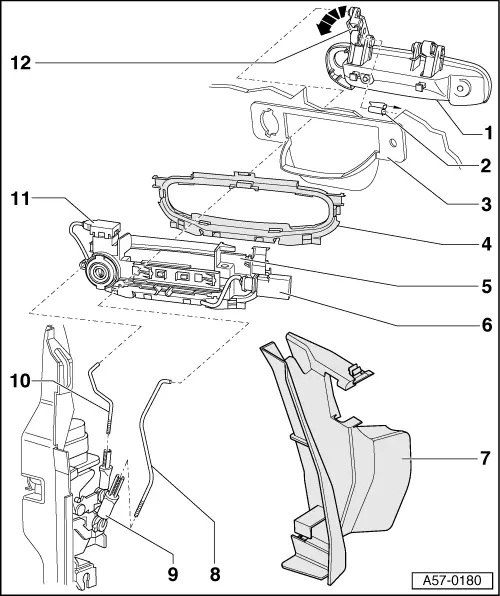
Front door handle - exploded view
 
A57-0180
  • Door handle
    • ◆ Remove door trim

=> General Body Assembly, Interior; Repair group 70; Door trims

    • ◆ Door sub-frame removed.
    • ◆ Removing
  • Locking pin
    • ◆ When installing, the securing spring must fully engage in spring catch.
  • Front door
  • Seal for door handle
    • ◆ Removing and installing => Fig.2
  • Door handle mount
    • ◆ Releasing => Page 57-32.
  • Connector
    • ◆ Vehicles with anti-theft alarm only.
 
A57-0180
  • Door lock cover
    • ◆ To remove, first unclip at top, then remove from door lock to rear at bottom.
  • Operating rod
    • ◆ Detach at clip -9- before removing door handle
  • Operating clip
    • ◆ Installation => Page 57-25.
  • Lock cylinder securing rod
    • ◆ Installation .
  • Microswitch
    • ◆ Vehicles with anti-theft alarm only.
    • ◆ Removing and installing => Fig.1.
  • Hinged lever
 
A57-0177

Fig.1    → Removing and installing microswitch

  • ‒ Door handle mount -1- removed.
  • ‒ Carefully release catches -arrows A- and detach microswitch -3- upwards.
  • ‒ Push catch -arrow B- back and remove connector from mount by pushing upwards.
  • ‒ Remove connector cable from seal -2-.
  • ‒ Ensure when installing that the cable is fully inserted into seal as shown.

 
A57-0178

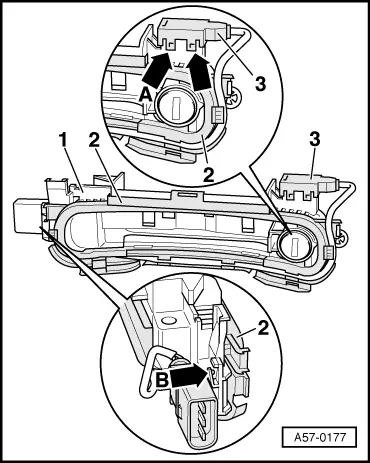
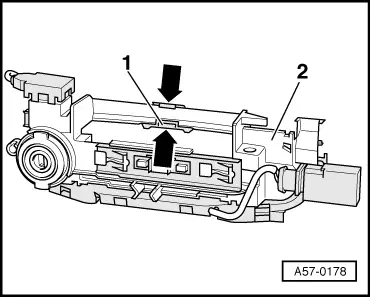
Fig.2    → Removing and installing door handle seal

  • ‒ Unclip and detach seal to remove.
  • ‒ When installing, the seal must engage fully in mount -arrow- to guarantee absence of leaks.

Removing door handle > < Removing and installing operating rods for front door lock