audi Workshop Repair Guides

Audi Workshop Service and Repair Manuals

Renewing oil seals for inner and outer input shafts > < Adjusting position of clutch engagement bearings "K 1" and "K 2"
Installing dual clutch
Special tools and workshop equipment required
   
t  Support bridge -T10323-
  W00-10386
t  -T10356/5- from assembly tool -T10356-
  W00-10491
t  Puller -T10373-
  W00-10617
t  Thrust piece -T10376-
t  Adhesive -AMV 195 KD1 01-
Procedure
l  Tightening torques → Chapter „Exploded view - dual clutch“
  Note
Renew bolts which are tightened by turning through a specified angle.
  Caution
Risk of damage to the clutch and other components!
Clutch components must be free of oil and grease when installing!
  Note
The following four steps are only necessary if the position of the engagement bearings did not have to be adjusted.
  W00-10614
–  Insert retainer for engaging levers.
  N30-10246
–  Install small engaging lever with clip.
  Note
In earlier gearboxes this clip may not be fitted,.
  N30-10260
–  Tighten bolts for small engaging lever.
  N30-10247
–  Insert large engaging lever.
–  Check that both engaging levers are seated correctly.
  Caution
Risk of damage to the clutch and other components!
The positions of the engagement bearings must be adjusted correctly.
The adjustment procedure can only be performed before installing the clutch.
The position of the engagement bearings must be adjusted in the following cases:
t  Clutch has been renewed.
t  Engaging levers have been renewed.
t  Retainer for engaging levers has been renewed.
t  Engagement bearings have been renewed.
If one of the procedures listed above has been performed, the positions of the engagement bearings „K 1 and K 2“ must be adjusted → Chapter and the shims with the correct thicknesses (as determined above) must be inserted before continuing.
Do not continue assembly unless the adjustment is correct!
If no new components have been installed, the "old" shims can be re-inserted.
Fit only one shim on each engagement bearing when adjusting.
  N30-10264
–  First fit either old shim or new shim „SK1“-item 2- (thickness of new shim as determined above) and then insert small engagement bearing -1-.
  A30-10142
l  The small engagement bearing only fits in one position due to the 4 grooves.
  N30-10232
–  Check that small engagement bearing is installed correctly and grooves are seated properly by turning it -arrows-.
  N30-10261
–  Fit either old shim or new shim „SK2“-item 1- (thickness of new shim as determined above).
–  To prevent shim from slipping out of seat when inserting clutch, fix it in place with three drops of adhesive -AMV 195 KD1 01--arrows-.
  A30-10143
–  Turn back spindle of puller -T10373-.
  Caution
Risk of damage to adjusting mechanism of clutch.
The clutch is self-adjusting. Shocks can affect the adjusting mechanism. Do not allow the clutch to drop into the gearbox when installing it.
–  Insert clutch in gearbox using puller -T10373-, as shown in illustration.
  N30-10241
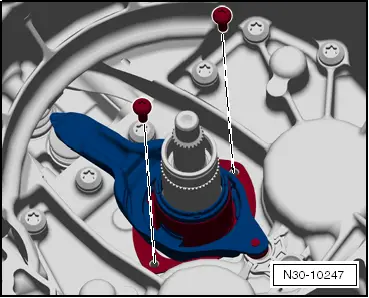
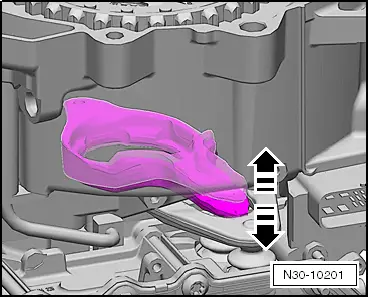
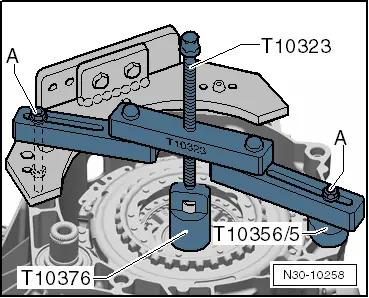
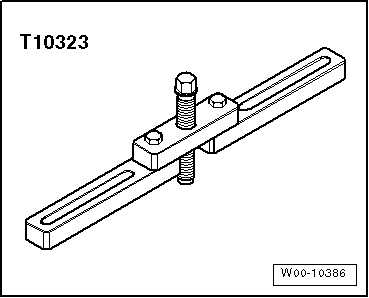
–  Set up support bridge -T10323- so it is parallel to gearbox flange, as shown in illustration.
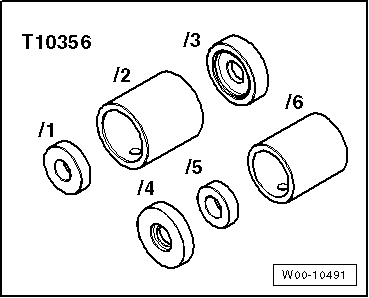
–  If necessary, use e.g. -T10356/5- of assembly tool -T10356- as a spacer.
–  Fit bolts -A- hand-tight.
  Note
Secure bolts -A- with nuts as required.
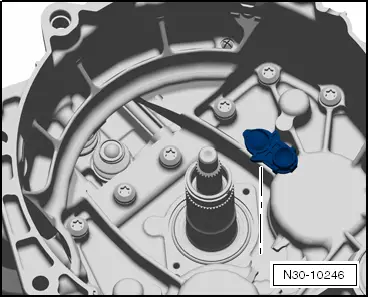
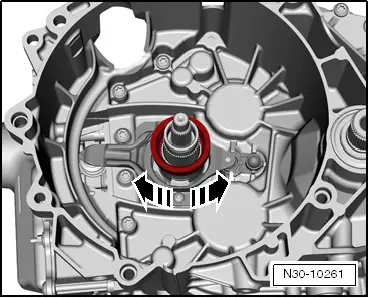
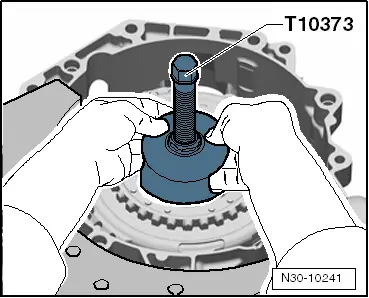
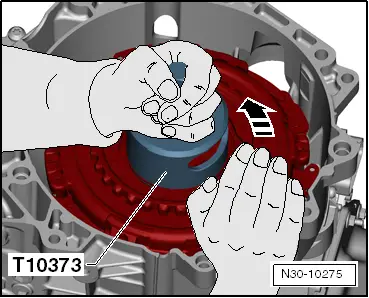
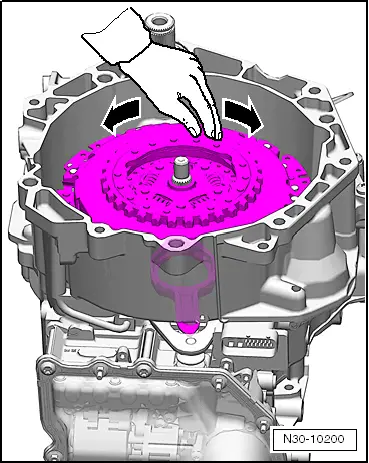
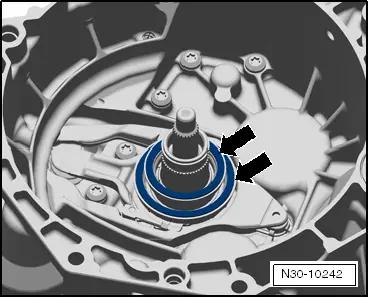
–  Press on clutch as far as stop.
  Note
Place a hand on the clutch when pressing it on. You will be able to feel a slight grating or juddering movement. This indicates that the clutch is being pressed in to a press fit. You can also feel when the clutch reaches its stop and is fully seated.
  N30-10258
–  Take hold of circlip using circlip pliers, as shown in illustration.
l  Installation position of circlip: narrow part of gap is at the top
  N30-10172
–  Insert circlip -arrow-.
  Note
If the circlip cannot be inserted, this means that the clutch has not been pressed onto the stop properly.
  N30-10238
–  Turn clutch against puller -T10373--arrow- by hand (without a tool) so that clutch moves into operating position at this point already.
  Note
t  After it has been pressed on, the clutch is seated on the input shaft at the bottom stop; this is not the ideal position.
  N30-10275
t  The clutch should only be pulled up far enough so it touches the circlip.
  Note
Only turn the clutch by hand (without a tool); in this way the clutch will slide against the circlip.
  N30-10293
–  Insert hub.
l  The hub has one large tooth -arrow- and can only be fitted in one correct position.
l  The large tooth has a marking on the engine side.
  N30-10250
–  Install circlip -arrow- on hub.
l  Gap of circlip must face »lug« on clutch.
  N30-10160
–  Turn clutch by hand; observe small engaging lever when turning.
  N30-10200
l  The small engaging lever should be absolutely still while the clutch is being turned. It should not move up and down.
  Note
t  If the small engaging lever moves up and down, the shim is not seated correctly.
t  In this case, the clutch must be removed again → Chapter.
  N30-10201
t  Check shims -arrows-.
t  The shims must be seated correctly and must not be damaged.
  N30-10242
–  Remove both plugs and fit breather caps -arrows- again.
–  Dispose of unused shims.
–  After installing the gearbox, run the Basic setting complete function in Guided Functions → Vehicle diagnostic tester.
  N30-10235

Renewing oil seals for inner and outer input shafts > < Adjusting position of clutch engagement bearings "K 1" and "K 2"