
A3 Mk2
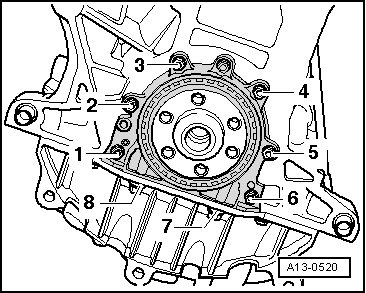
| Rear sealing flange and dual-mass flywheel - exploded view |
 Note
Note| Servicing clutch → Rep. gr.30 |

| 1 - | Bolt |
| q | For dual-mass flywheel/drive plate |
| q | 60 Nm + 90° (1/4 turn) further |
| q | Renew |
| 2 - | Dual-mass flywheel |
| q | Removing and installing dual-mass flywheel → Chapter |
| q | Can only be installed in one position. Holes are off-set |
| 3 - | Intermediate plate |
| q | Must be positioned on dowel sleeves |
| q | Do not damage/bend when assembling |
| q | Is fitted onto sealing flange → Fig. |
| 4 - | Bolt |
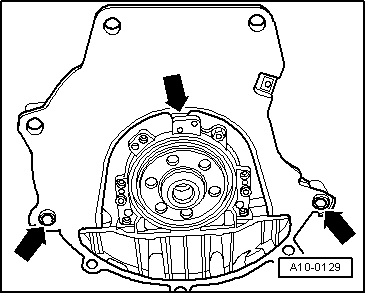
| q | Tightening sequence → Fig. |
| 5 - | Sealing flange with oil seal (rear) |
| q | Renew only as complete unit |
| q | Use guide sleeve provided when fitting |
| q | Removing and installing → Chapter |
| q | Do not lubricate/grease sealing lip of oil seal |
| q | Before installing, remove oil residue from crankshaft journal with a clean cloth. |
| q | Guide sleeve is not to be removed until sealing flange has been slipped onto crankshaft journal |
| 6 - | Dowel pin |
| 7 - | Bolt |
| q | Tightening sequence → Fig. |
| 8 - | Cylinder block |
| q | Removing and installing crankshaft → Chapter |
| q | Dismantling and assembling pistons and conrods → Chapter |
|
|
|
|