audi Workshop Repair Guides

Audi Workshop Service and Repair Manuals

Removing and installing vibration damper > < Removing and installing poly V-belt
Removing and installing bracket for ancillaries
Special tools and workshop equipment required
   
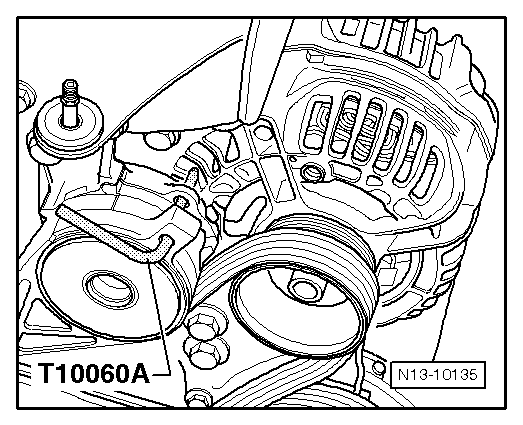
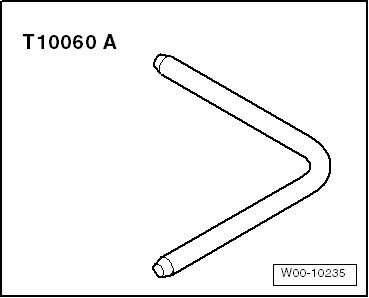
t  Locking pin -T10060A-
  W00-10235
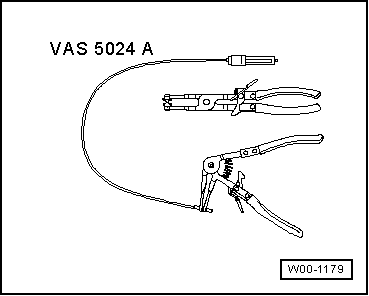
t  Spring type clip pliers -VAS 5024 A-
Removing
–  Detach engine cover panel with air cleaner → Rep. gr.24.
  W00-1179
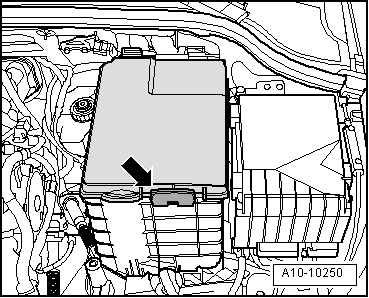
–  Remove the cover above the fuse box (press release tabs -arrows-).
  WARNING
Observe notes on the procedure for disconnecting the battery → Electrical system; Rep. Gr. 27.
  A10-10250
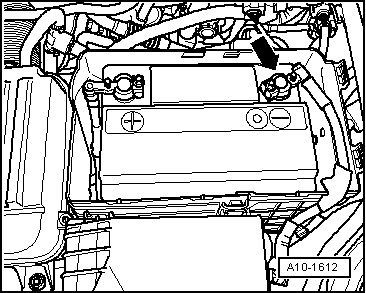
–  With ignition switched off, disconnect battery earth cable -arrow-.
  A10-1612
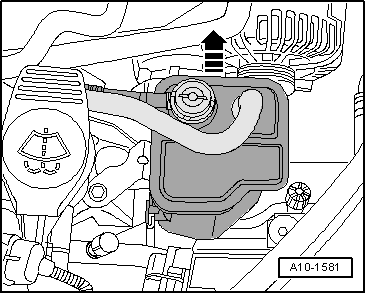
–  Lift out activated charcoal filter from retainer with pipes connected -arrow- and lay aside.
  Note
Before removing, mark direction of rotation of poly V-belt with chalk or felt-tip pen. If the belt runs in the opposite direction when it is refitted, this can cause breakage.
  A10-1581
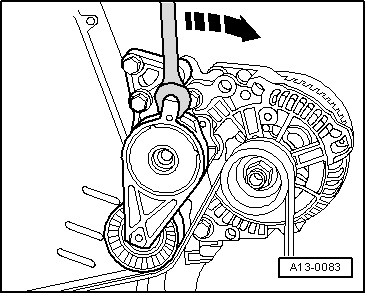
–  To slacken poly V-belt, turn tensioner in -direction of arrow-.
  A13-0083
–  Lock tensioner in position with locking pin -T10060A-.
–  Take off poly V-belt.
  N13-10135
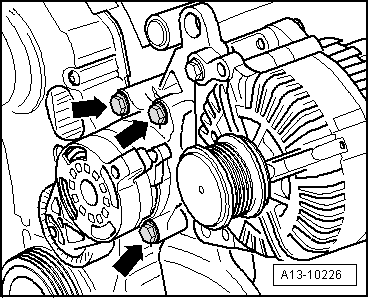
–  Remove tensioner for poly V-belt -arrows-.
–  Discharge refrigerant system → Rep. gr.87.
–  Remove alternator → Electrical system; Repair group 27.
–  Remove noise insulation → Rep. gr.50.
  A13-10226
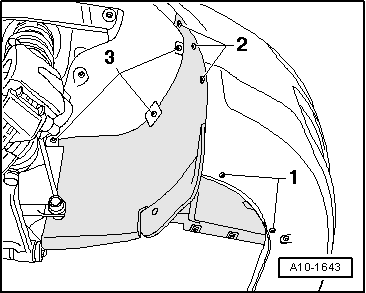
–  Remove noise insulation (right-side) -fasteners 1 ... 3-.
–  Remove air conditioner compressor → Rep. gr.87.
  A10-1643
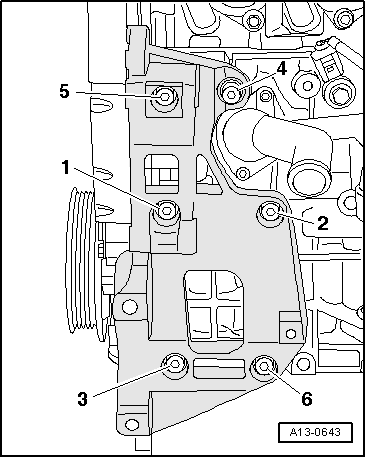
–  Detach bracket for ancillaries: bolts -1 … 6-.
Installing
Installation is carried out in the reverse order; note the following:
l  Tightening torques → Chapter
  A13-0643
–  Tighten bolts in the sequence -1 ... 6-.
–  Install alternator → Electrical system; Repair group 27.
–  Install air conditioner compressor → Rep. gr.87.
–  Install poly V-belt → Chapter.
–  Connect battery. Procedures required → Electrical system; Repair group 27.
  A13-0643

Removing and installing vibration damper > < Removing and installing poly V-belt