
A3 Mk2
|
|
|
|

|
|
|
 Note
Note
|
|
|
|
|
|
|

|
Note
|
|
| Component | Nm | ||||
| Front exhaust pipe to exhaust manifold | 25 1)2) | ||||
| Drive shaft heat shield to cylinder block | 35 | ||||
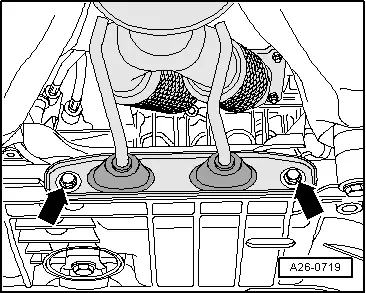
| Bracket for exhaust system to subframe | 23 | ||||
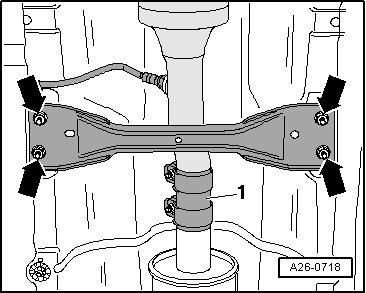
| Front tunnel cross-piece to body | 23 | ||||
| |||||