audi Workshop Repair Guides

Audi Workshop Service and Repair Manuals

Removing and installing exhaust gas temperature sender 4G648 > < Removing and installing exhaust gas temperature sender 1G235
Removing and installing exhaust gas temperature sender 3G495
Removing and installing exhaust gas temperature sender 3 -G495-
Special tools and workshop equipment required
   
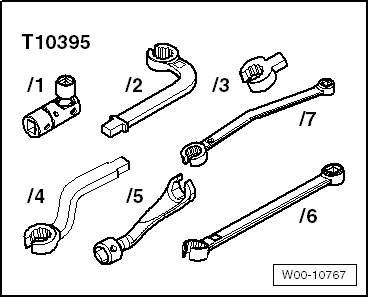
t  Tool set, 17 mm -T10395-
  W00-10767
Removing
–  Remove Lambda probe -G39- → Rep. gr.23.
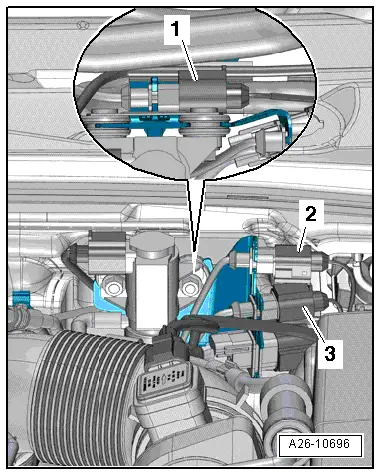
–  Unplug electrical connector -1- for exhaust gas temperature sender 3 -G495- and move electrical wiring clear.
  Note
Disregard -items 2, 3-.
  A26-10696
–  Unscrew exhaust gas temperature sender 3 -G495--item 1- using a tool from tool set, 17 mm -T10395-.
  Note
Disregard -items 2, 3-.
Installing
Installation is carried out in the reverse order; note the following:
l  Tightening torque → Chapter „Exhaust gas temperature control - exploded view“
  Note
Fit all cable ties in the original positions when installing.
  Caution
Risk of malfunctions caused by improperly secured exhaust gas temperature senders.
The threads of the exhaust gas temperature senders -G495- and -G648- are coated. It is important that you do NOT coat them additionally with high-temperature paste and that you tighten them to the specified torque.
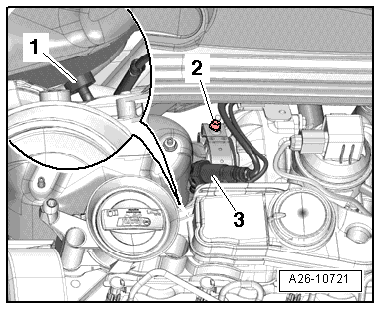
  A26-10721
Installation position of temperature sender -G495--item 1-:
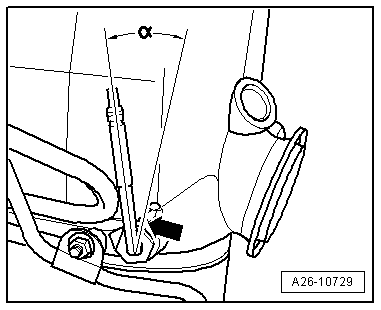
l  Angled section of pipe faces towards left side of vehicle.
l  Angle -α- between pipe and marking -arrow- = approx. 17°.
–  Install Lambda probe -G39- → Rep. gr.23
  A26-10729

Removing and installing exhaust gas temperature sender 4G648 > < Removing and installing exhaust gas temperature sender 1G235