WARNING | Risk of injury caused by refrigerant. |
| The air conditioner refrigerant circuit must not be opened. |
|

Caution | Make sure that condenser and refrigerant pipes and hoses are not damaged. |
| Do NOT stretch, kink or bend refrigerant lines and hoses. |
|
| –
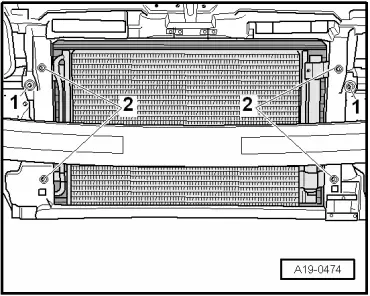
| Remove bolts -1- for charge air cooler and -2- for condenser. |
| –
| Pivot charge air cooler slightly to the rear, disengage from mountings by pulling upwards, and take out from below. |
| Installation is carried out in the reverse order; note the following: |

Note | t
| If there are slight impressions on the fins, refer to → Chapter. |
| t
| Hose connections and air pipes and hoses must be free of oil and grease before assembly. |
| t
| To ensure that the air hoses can be properly secured at their connections, spray rust remover onto the worm thread of used hose clips before installing. |
| –
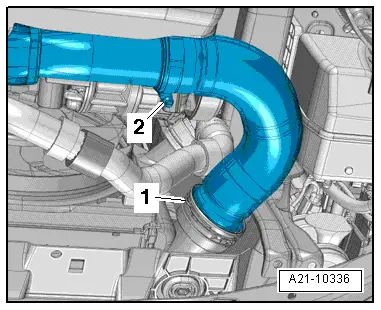
| Install air hose with plug-in connector → Fig.. |
|
|

|

 Note
Note

 Note
Note