audi Workshop Repair Guides

Audi Workshop Service and Repair Manuals

Cylinder block (gearbox end) > < Sealing flange (pulley end) - exploded view
Renewing sealing flange (pulley end)
Special tools and workshop equipment required
   
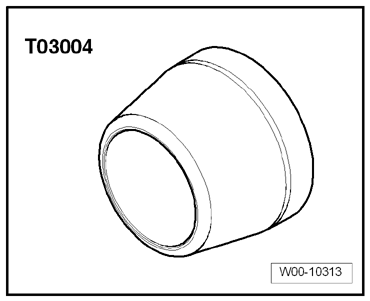
t  Assembly sleeve -T03004-
t  Electric drill with plastic brush
t  Safety goggles
t  Sealant → Electronic parts catalogue
  W00-10313
Procedure
l  Tightening torques → Fig. „„Sealing flange (pulley end) - tightening torque and sequence““
–  Remove vibration damper → Chapter.
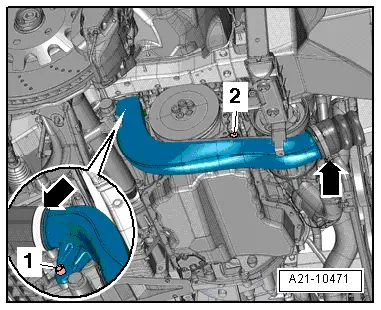
–  Remove bolts -1- and -2-.
–  Release hose clips -arrows- and remove air pipe.
  A21-10471
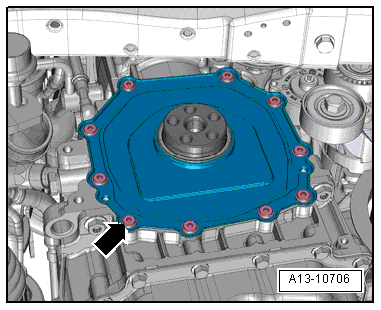
–  Remove bolts -arrows-.
–  Carefully release sealing flange from bonded joint.
  Note
Renew sealing flange.
  Caution
Make sure sealant residue does not enter lubrication system.
Cover open area of cylinder block with a cloth.
  WARNING
Protect eyes against injuries.
Wear safety goggles.
–  Use e.g. rotating plastic brush to remove sealant residue on cylinder block.
–  Clean sealing surfaces and crankshaft journal; they must be free of oil and grease.
  Note
Do not additionally oil or grease sealing lip of oil seal in sealing flange.
  A13-10706
  Caution
Risk of damage to oil seal in sealing flange.
To make sure sealing lip of oil seal is folded over when installing, the following procedures must be performed.
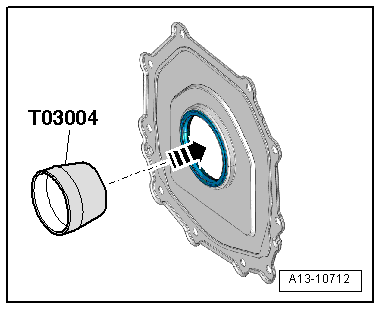
–  Open out sealing lip of oil seal in sealing flange using assembly sleeve -T03004- as shown in illustration.
l  Small diameter faces oil seal.
  A13-10712
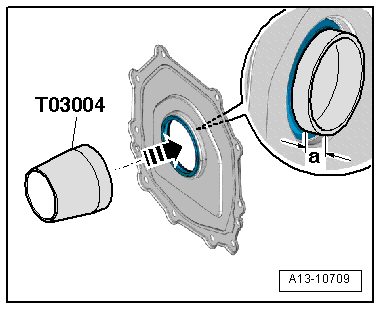
–  Detach assembly sleeve -T03004- after a short while, turn over and insert in oil seal again.
l  Large diameter faces oil seal.
l  Assembly sleeve -T03004- must protrude by distance -a- at inside of flange
l  Distance -a- = approx. 3 mm.
  Note
  A13-10709
Note the use-by date of the sealant.
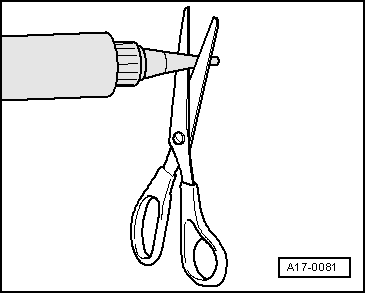
–  Cut off nozzle of tube at front marking (nozzle Ø approx. 2 mm).
  A17-0081
  Caution
Make sure lubrication system is not clogged by excess sealant.
The bead of sealant must not be thicker than specified.
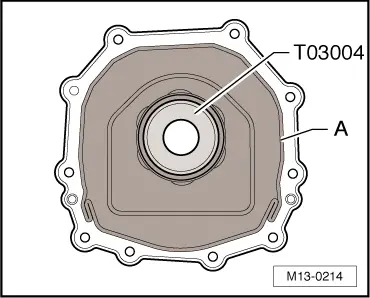
–  Apply bead of sealant -A- onto clean sealing surface of sealing flange as shown in illustration.
l  Width of sealant bead: 2.5 ... 3 mm
l  The bead of sealant must project approx. 1.0 mm above the sealing surface.
  Note
The sealing flange must be installed within 5 minutes after applying the sealant.
  M13-0214
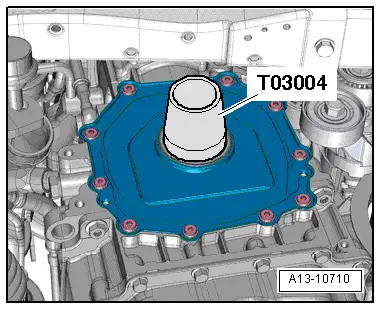
–  Use assembly sleeve -T03004- to carefully fit sealing flange onto crankshaft journal and press onto cylinder block evenly (note centring collar on left and right).
  A13-10710
–  Tighten sealing flange → Fig..
–  Install air pipe → Chapter.
–  Install vibration damper → Chapter.
  A13-10706

Cylinder block (gearbox end) > < Sealing flange (pulley end) - exploded view