audi Workshop Repair Guides

Audi Workshop Service and Repair Manuals

Checking charge air system for leaks > < Charge air cooler - exploded view
Removing and installing charge air cooler
Special tools and workshop equipment required
   
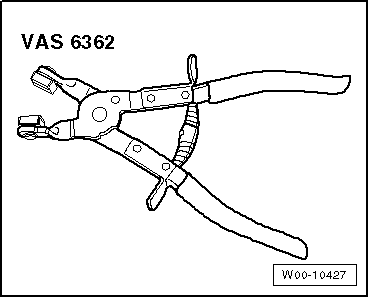
t  Hose clip pliers -VAS 6362-
  W00-10427
Removing
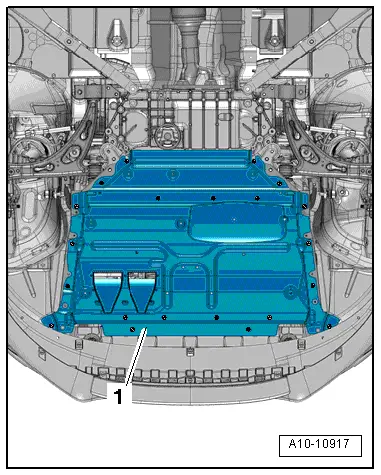
–  Remove noise insulation -1- → Rep. gr.66.
–  Remove bumper cover (front) → Rep. gr.63.
  A10-10917
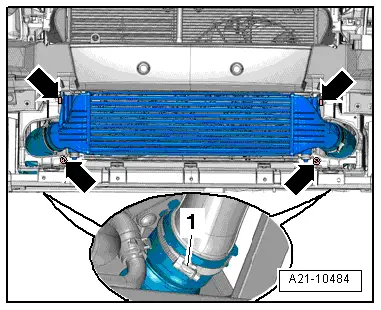
–  Release hose clips -1- (left and right) and remove air hoses.
–  Remove bolts -arrows- and detach charge air cooler.
Installing
Installation is carried out in the reverse order; note the following:
Tightening torques
l  → Chapter „Charge air cooler - exploded view“.
l  → Chapter „Radiator and radiator fans - exploded view“.
  Note
t  If there are slight impressions on the fins, refer to → Chapter.
t  Hose connections and hoses for charge air system must be free of oil and grease before assembly.
t  Secure all hose connections with the correct type of hose clips (same as original equipment) → Electronic parts catalogue.
t  To ensure that the charge air hoses can be properly secured at their connections, spray rust remover onto the worm thread of used hose clips before installing.
–  Install front sections of wheel housing liner (front) → Rep. gr.66.
–  Install bumper cover (front) → Rep. gr.63.
  A21-10484

Checking charge air system for leaks > < Charge air cooler - exploded view