
A4 Cabriolet Mk2
| Exploded view of front bumper up to Model Year 2005 |
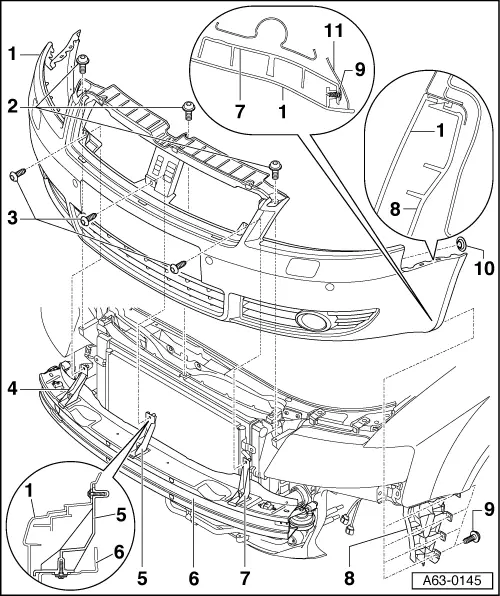
| 1 - | Bumper cover |
| q | Removing and installing → Chapter |
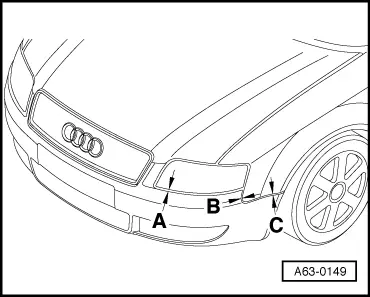
| q | Adjustment with respect to bonnet → Chapter |
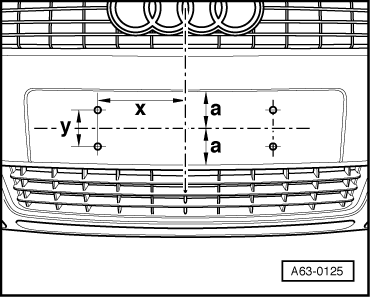
| q | Making number plate attachment holes → Fig. |
| q | If a new cover is fitted, number plate attachment holes are only to be drilled in marked positions/number plate is only to be attached at the corresponding locations. |
| q | Joint dimensions → Fig. |
| 2 - | Bolt |
| q | 6 Nm |
| 3 - | Bolt |
| q | 3 Nm |
| 4 - | Right support |
| 5 - | Centre support |
| 6 - | Cross member |
| q | Removing and installing → Chapter |
| 7 - | Left support |
| 8 - | Guide |
| q | Removing and installing → Fig. |
| 9 - | Bolt |
| q | 1.5 Nm |
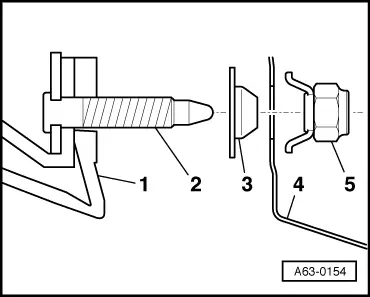
| 10 - | Grommet |
| q | 2x |
| q | Insert in wing before fitting bumper cover → Fig.. |
| 11 - | Wheel housing liner |
|
|
 Note
Note
|
|