
Removing and installing front door trim for A4 Cabriolet Mk2
| Removing and installing door trim |
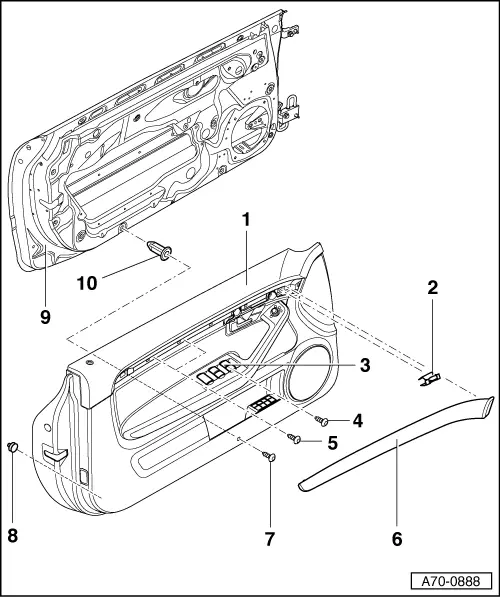
| 1 - | Door trim |
| t | Removing |
| – | Remove triangular trim for treble loudspeaker → Chapter. |
| – | Remove trim panel -6- → Chapter. |
| – | Remove bolts -5- (there may be 2 or 4 bolts fitted). |
| – | Remove window regulator switch module -3- → Rep. gr.96. |
| – | Unscrew bolt -4-. |
| – | Unscrew bolt -7-. |
| – | Unclip door trim -1- starting at bottom. |
| – | Disengage door trim -1- upwards. |
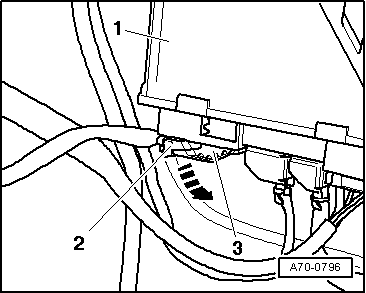
| – | Unplug connector at window regulator control unit → Fig. |
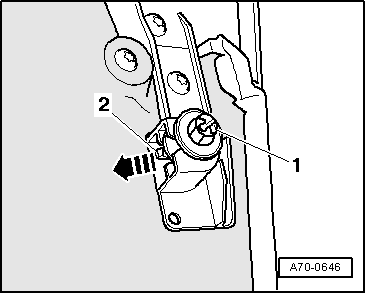
| – | Disengage Bowden cable for interior door handle → Fig. |
| t | Installing |
| – | Make sure expanding nut -10- is clipped into door shell -9-. |
| – | Make sure all clips -8- (8x) are in position on inside of door trim. Renew damaged clips -8- → Fig.. |
| – | Make sure all clips -2- (6x) are in position on outside of door trim -1-. |
| – | Continue installing door trim -1- in reverse order of removal. |
| 2 - | Clips (6x) |
| 3 - | Window regulator switch module |
| 4 - | Bolt |
| 5 - | Bolts (2x) |
| 6 - | Trim strip |
| 7 - | Bolt |
| 8 - | Clips (8x) |
| 9 - | Door shell |
| 10 - | Expanding nut |
 Note
Note
|
|
|
|
|
|