audi Workshop Repair Guides

Audi Workshop Service and Repair Manuals

Servicing selector mechanism > < Installing torque converter
Electrical/electronic components and fitting locations
   
Diagnostic connector
Fitting location: The diagnostic connector is located below the knee padding on the left side of the steering wheel.
The following components can be tested in the “Guided Fault Finding” routine using vehicle diagnostic, testing and information system -VAS 5051 A-.
  A01-0201
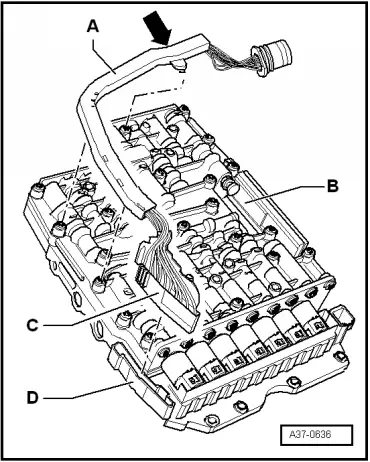
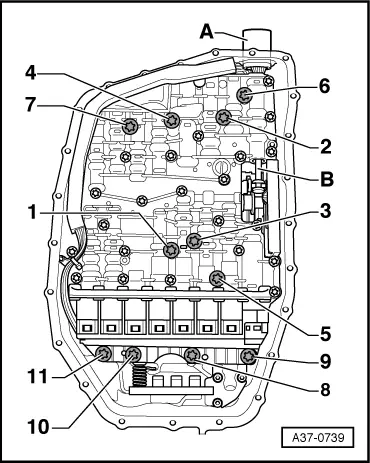
Mechatronic unit, automatic gearbox control unit -J217-, multi-function switch -F125-, gearbox input speed sender -G182- and gearbox output speed sender -G195-
Fitting location: the mechatronic unit is bolted to the underside of the gearbox housing and covered by the gearbox oil pan.
The mechatronic unit incorporates the hydraulic control system, the electronic control unit and the sensors and actuators as a complete synchronised unit. This includes:
t  Automatic gearbox control unit -J217-
t  
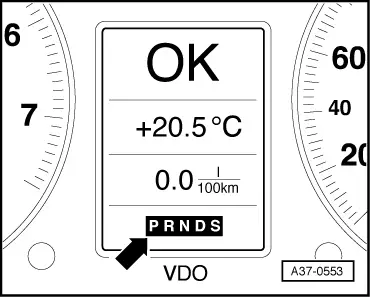
Multi-function switch -F125-
t  Gearbox input speed sender -G182-
t  Gearbox output speed sender -G195-
The “mechatronic” unit can only be replaced as a complete unit.
  Note
All components mentioned are tested via Self-diagnosis.
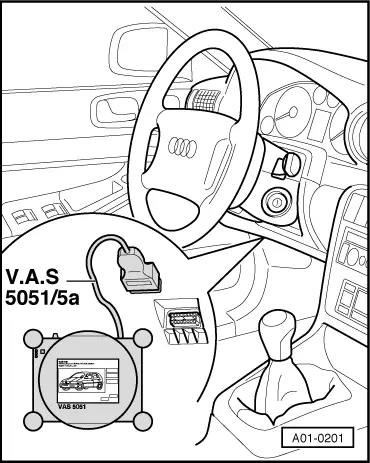
–  Removing and installing mechatronic unit → Chapter
  A37-0739
Internal gearbox wiring harness
Fitting location: the wiring harness -A- with connector -C- is attached to the mechatronic unit -B-.
–  Removing and installing wiring harness → Chapter.
  A37-0636
Selector lever position display -Y6-
Fitting location: integrated into instrument cluster
  Note
The selector lever position display -Y6- can only be renewed together with the instrument cluster.
  A37-0553
tiptronic switch -F189-
t  Fitting location: The tiptronic switch -F189- is integrated in the printed circuit -1- of the symbol panel, which is located in the selector mechanism cover.
t  Comprises 3 Hall sensors actuated by a magnet on transverse slide of sliding cover.
1 - Tip-down sensor
2 - Sensor for tiptronic recognition
3 - Tip-up sensor
  Note
  A37-10966
t  In the event of faults, first check that magnet is properly secured on the transverse slide -C- of sliding cover, renew sliding cover if necessary. Always check wiring before renewing symbol insert with integrated printed circuit. On vehicles with multi-function steering wheel the buttons on the steering wheel and their wiring connections must also be checked.
t  Ignore -item A- and -item B-.
–  Removing and installing tiptronic switch -F189- → Chapter.
  A37-0326

Servicing selector mechanism > < Installing torque converter