
A4 Cabriolet Mk2
| Exploded view - dismantling and assembling differential |
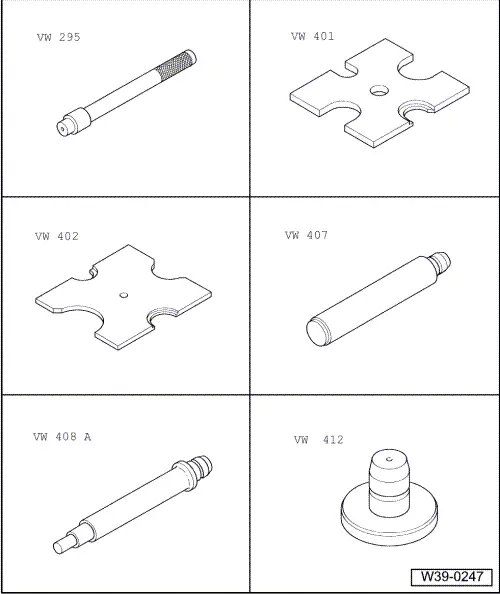
| Special tools and workshop equipment required |
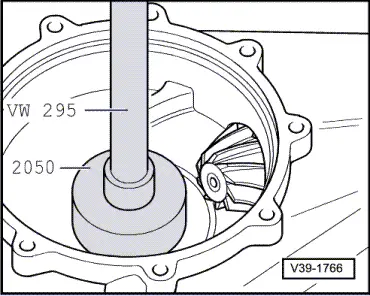
| t | Drift -VW 295- |
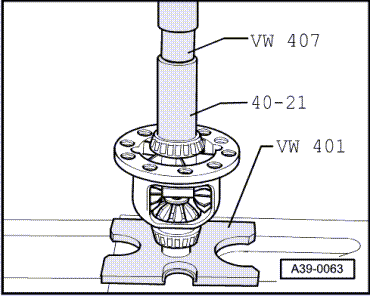
| t | Thrust plate -VW 401- |
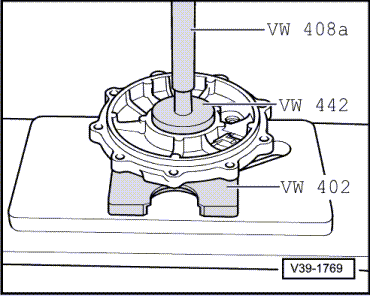
| t | Thrust plate -VW 402- |
| t | Press tool -VW 407- |
| t | Press tool -VW 408 A- |
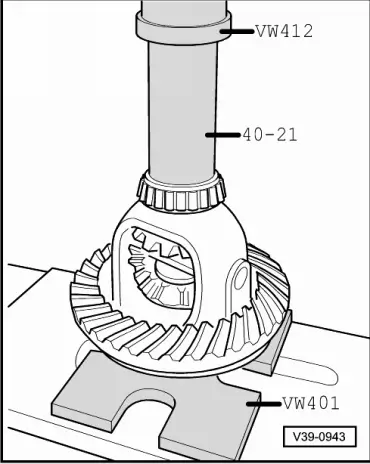
| t | Press tool -VW 412- |
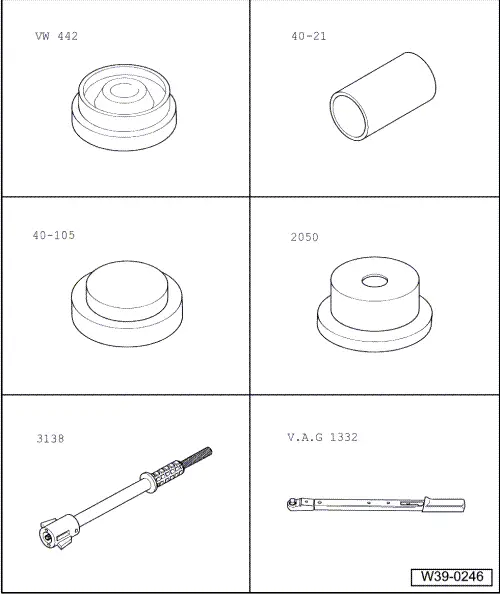
| t | Press tool -VW 442- |
| t | Press tool -40-21- |
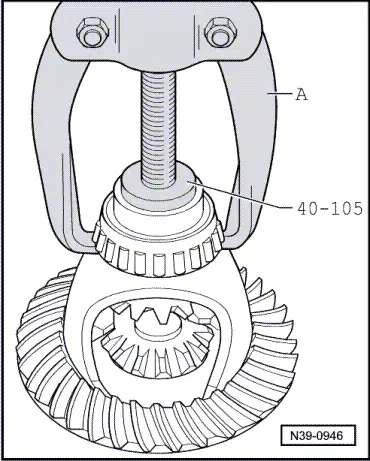
| t | Thrust plate -40-105- |
| t | Thrust piece -2050- |
| t | Drift -3138- |
| t | Torque wrench -V.A.G 1332- |
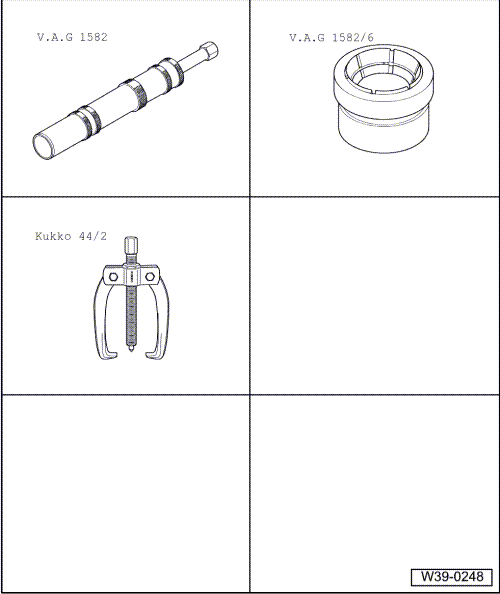
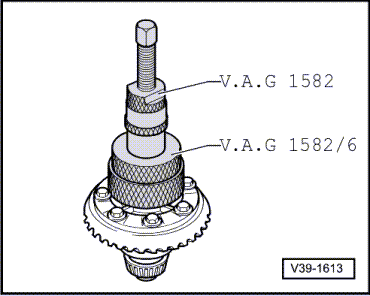
| t | Tapered roller bearing puller -V.A.G 1582- |
| t | Adapter -V.A.G 1582/6- |
| t | Puller -Kukko 44/2- |
| Heat tapered roller bearing inner races to 100°C before installing. |
| Always renew both tapered roller bearings together. |
| The differential must be adjusted → Chapter if the tapered roller bearings, differential cage, rear final drive cover, final drive gear set or the final drive housing are renewed. |
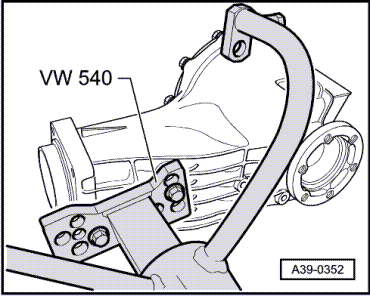
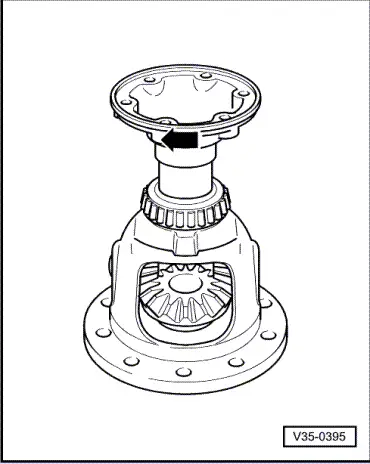
| Clamp rear final drive in assembly stand → Fig. |
| 1) | Adjustment work is required if these components are renewed → Chapter |

| 1 - | Cover for rear final drive → Note |
| 2 - | O-ring |
| q | Always renew |
| q | Lubricate with oil when installing |
| 3 - | Rear final drive housing → Note |
| 4 - | Shim S1 |
| q | Note thickness |
| q | Table of adjustments → Chapter |
| 5 - | Small tapered roller bearing outer race → Note |
| q | Driving out → Fig. |
| q | Pressing in → Fig. |
| 6 - | Small tapered roller bearing inner race → Note |
| q | Pulling off → Fig. |
| q | Pressing on → Fig. |
| 7 - | Hexagon bolt, 60 Nm then turn 45° further |
| q | Always renew |
| q | Lightly tighten bolts then tighten in diagonal sequence to correct torque |
| q | For correct version, refer to → Electronic parts catalogue |
| 8 - | Differential cage → Note |
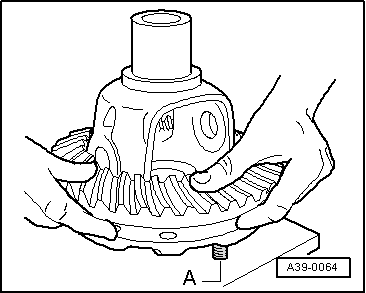
| 9 - | Crown wheel → Note |
| q | Is paired with pinion shaft (final drive gear set) |
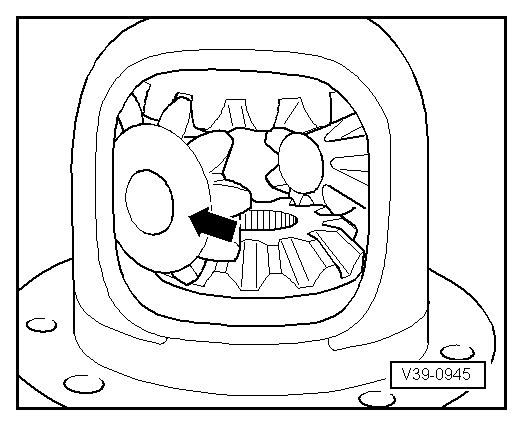
| q | Drive off with a drift → Fig. |
| q | Fitting on differential cage → Fig. |
| q | For correct version, refer to → Electronic parts catalogue |
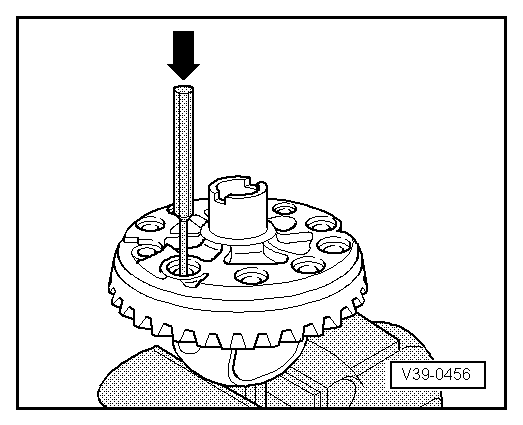
| 10 - | Spring pin |
| q | For securing differential pinion pin |
| q | Drive in flush |
| 11 - | Large tapered roller bearing inner race → Note |
| q | Pulling off → Fig. |
| q | Pressing on → Fig. |
| 12 - | Large tapered roller bearing outer race → Note |
| q | Driving out → Fig. |
| q | Pressing in → Fig. |
| 13 - | Shim S2 |
| q | Note thickness |
| q | Table of adjustments → Chapter |
| 14 - | Threaded piece |
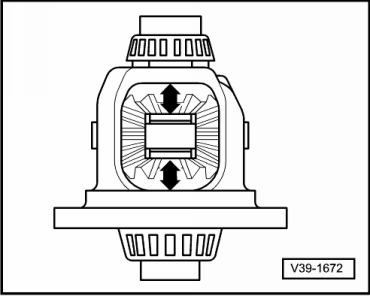
| 15 - | Sun wheel |
| q | Installing → Fig. |
| q | Adjusting → Fig. |
| 16 - | Planet pinion |
| q | Installing → Fig. |
| 17 - | Differential pinion pin |
| q | Drive out with drift |
| 18 - | Shim |
| q | Determining thickness → Fig. |
| 19 - | Thrust washer |
| q | Check for cracks |
|
|
|

|
|
|
|
|
|
|
 WARNING
|
|
|
|
|

|
|
|
|
|
|
|
|
|
| Shim thickness (mm) | ||
| 0.50 | 0.70 | 0.90 |
| 0.60 | 0.80 | 1.00 |
|
|
|