audi Workshop Repair Guides

Audi Workshop Service and Repair Manuals

Measuring and marking radial run-out at flange for propshaft > < Removing and installing propshaft on Audi A8
Detaching and attaching propshaft at rear final drive
Special tools and workshop equipment required
   
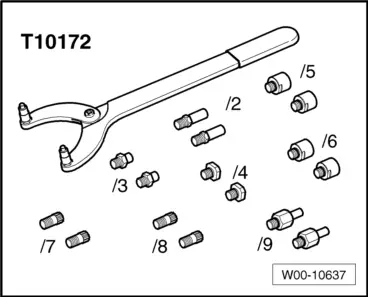
t  Counterhold tool -T10172- with adapters -T10172/5-
t  High-temperature grease -G 052 133 A2-
Detaching propshaft from rear final drive
t  Please refer to notes → Chapter.
t  Repairs on the propshaft should be carried out on a two pillar hoist.
  W00-10637
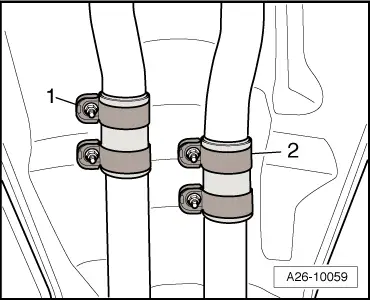
–  Release clamps -1- and -2- and remove rear section of exhaust system → Rep. Gr.26.
  A26-10059
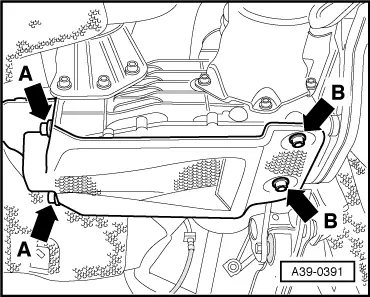
–  If fitted, remove cover for rear final drive -arrows A and B-.
  A39-0391
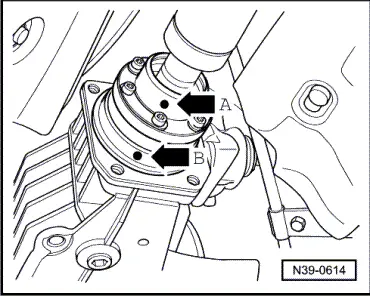
–  Check whether there is a factory marking (coloured dot) on the propshaft flange and on the rear final drive flange.
–  If not, mark position of propshaft flange -arrow A- in relation to rear final drive flange -arrow B- with paint marker.
  N39-0614
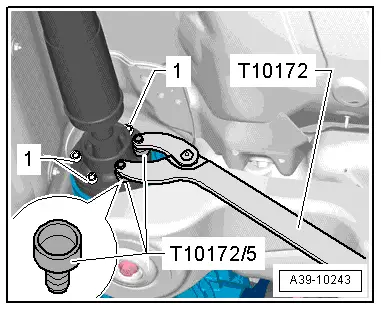
–  Remove bolts -1- (6x) on rear CV joint.
–  Use counterhold tool -T10172- with adapters -T10172/5-.
  A39-10243
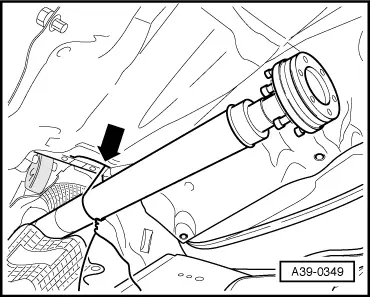
–  Separate propshaft from rear final drive and tie up -arrow-.
Attaching propshaft to rear final drive
Perform installation in reverse sequence of removal. Note the following:
t  Remove old, dried-out high-temperature grease from CV joints and flanges for propshaft. Put in exactly the same quantity of fresh high-temperature grease -G 052 133 A2-.
t  Clean remaining locking fluid out of tapped holes in flange shaft on rear final drive. The threads can be cleaned with a thread tap. Otherwise the securing bolts can shear off when they are screwed in.
t  After detaching the propshaft from the rear final drive, the additional balancing washer (thicker washer) that may be fitted between the lock plate and one of the securing bolts must not be reinstalled.
t  Always install new securing bolts for propshaft (self-locking bolts).
  A39-0349
–  Gasket for propshaft on rear final drive flange must be renewed. Degrease sealing surface and glue on new gasket.
–  Make sure that the marks on the propshaft flange -arrow A- and on the rear final drive flange -arrow B- are in line.
  N39-0614
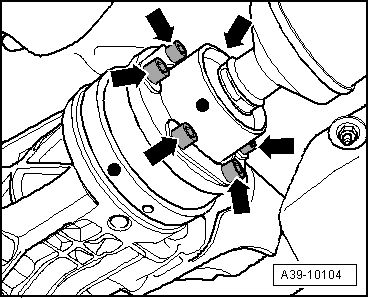
–  Bring propshaft into position at rear final drive and fit new bolts -arrows-.
  A39-10104
–  Tighten bolts -1- securing propshaft on rear final drive to specified torque → Item.
–  Use counterhold tool -T10172- with adapters -T10172/5-.
  A39-10243
–  Install cover for rear final drive (if previously removed). Tightening torques: -arrows A- → Item and -arrows B- → Item.
–  Install rear section of exhaust system → Rep. Gr.26.
  A39-0391

Measuring and marking radial run-out at flange for propshaft > < Removing and installing propshaft on Audi A8