audi Workshop Repair Guides

Audi Workshop Service and Repair Manuals

Removing dual-mass flywheel or flywheel for automatic gearbox 01J > < Renewing crankshaft oil seal (pulley end)
Removing and installing sealing flange (front)
Special tools and workshop equipment required
   
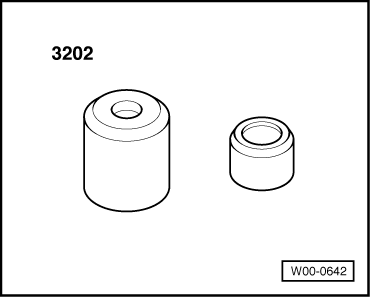
t  Fitting sleeves -3202-
  W00-0642
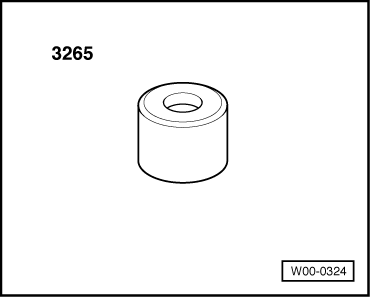
t  Fitting sleeve -3265-
t  Drip tray
t  Electric drill with plastic brush attachment
t  Safety goggles
t  Sealant → Parts catalogue
  W00-0324
Removing
–  Remove toothed belt → Chapter.
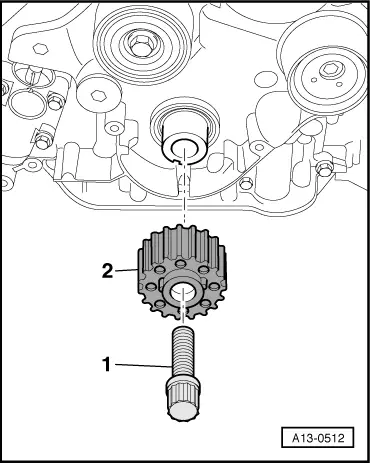
–  Unscrew central bolt -1- for crankshaft sprocket -2-.
–  Detach toothed belt sprocket.
–  Remove sump (bottom section) → Chapter.
  A13-0512
–  Place a drip tray underneath.
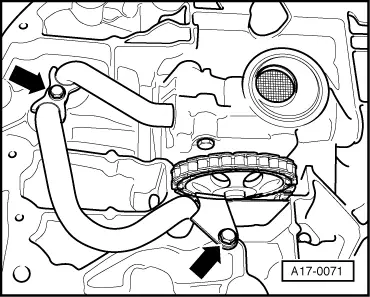
–  Unbolt brackets -arrows- for oil supply pipes and pull off long oil supply pipe from below.
  A17-0071
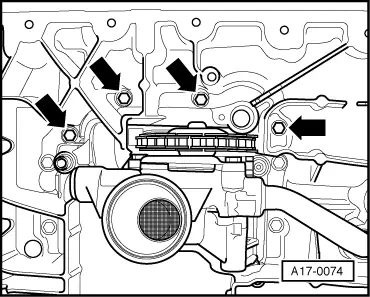
–  Unscrew 4 bolts -arrows- from sump (top section).
  A17-0074
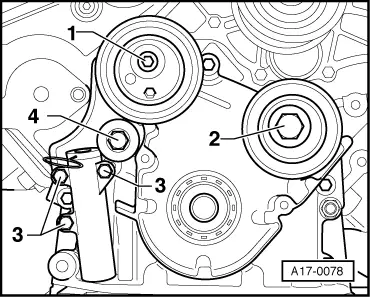
–  Remove idler roller -2-, tensioning roller -1-, tensioning lever -4- and tensioner -3-.
  A17-0078
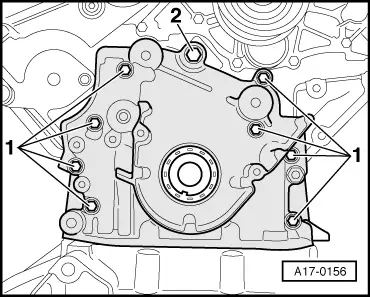
–  Remove bolts -1- and -2-.
–  Pull off sealing flange (front).
–  Drive out oil seal with flange removed.
Installing
Installation is carried out in the reverse order; note the following:
  Note
Renew O-rings.
–  Remove sealant residue from front part of sump (top section) and, if necessary, from cylinder block.
  A17-0156
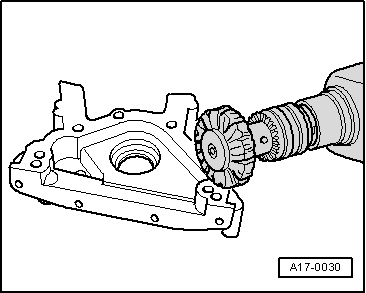
–  Remove sealant residue on sealing flange using rotating plastic brush or similar.
  WARNING
Wear safety goggles.
–  Clean sealing surfaces; they must be free of oil and grease.
  A17-0030
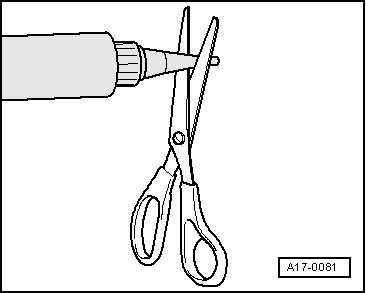
–  Cut off nozzle of tube at front marking (Ø of nozzle approx. 3 mm).
  A17-0081
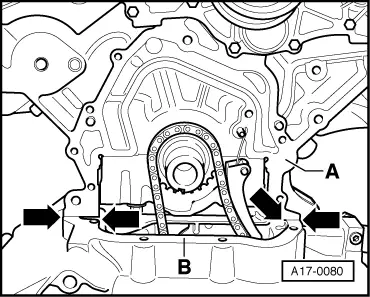
–  Attach gasket to dowel pins on sealing surface -A-.
  Note
Do not apply sealant to sealing surface -A- on cylinder block.
–  After attaching gasket, apply a small sealant bead in each case at edges between arrows on left and right.
  Note
The sealing flange must be installed within 5 minutes after applying sealant.
  A17-0080
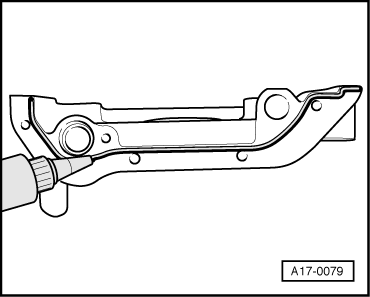
–  Apply the bead of sealant onto the clean sealing surface of the sealing flange as illustrated.
l  Width of sealant bead -arrows-: 2 ... 3 mm.
  Note
t  The bead of sealant must not be thicker than specified, otherwise excess sealant can enter the sump and obstruct the strainer in the oil intake pipe.
t  For fitting sealing flange with oil seal in position, attach fitting sleeve -3202/1- to end of crankshaft.
  A17-0079
–  Pre-tighten 4 bolts -arrows- so that they are finger-tight.
  A17-0074
–  Insert bolt -2- with locking fluid; Locking fluid → Parts catalogue.
–  Tighten bolts -1- to 10 Nm and bolt -2- to 30 Nm.
  A17-0156
–  Tighten the 4 bolts -arrows- fully.
–  Install sump (bottom section) → Chapter.
  A17-0074
–  Do not lubricate sealing lip and outer circumference of oil seal before pressing in.
–  Fit oil seal using fitting sleeve -3202/1-.
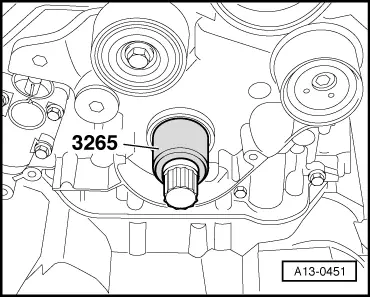
–  Press in seal until flush using fitting sleeve -3265- and central bolt.
  A13-0451
–  Install components in the specified sequence:
1 - Toothed belt tensioner -item 3-
2 - Tensioning lever -item 4-
3 - Toothed belt tensioning roller -item 1-
4 - Idler roller -item 2-
–  Pay attention to shims beneath tensioning roller and tensioning lever.
  A17-0078
–  Fit crankshaft toothed belt sprocket -2- with new central bolt -1-.
  Note
t  Contact surface between toothed belt sprocket and crankshaft must be free of oil.
t  Do not additionally lubricate bolt for crankshaft toothed belt sprocket.
–  Install toothed belt (adjust valve timing) → Anchor.
Tightening torques
  A13-0512
ComponentNm
Brackets for oil pipes to sump (top section)10
Sealing flange (front)M610
to cylinder blockM830 → Note
Sealing flange (front) to sump (top section)16
Toothed belt sprocket to crankshaft200 + 180° → Note → Note
Tensioner to sealing flange (front)10
Tensioning lever to sealing flange (front)22
Tensioning roller to sealing flange (front)22
Idler roller to sealing flange (front)43

1)  Install using locking fluid; locking fluid → Parts catalogue.
2)  Renew bolt.
3)  180° = one half turn.
   

Removing dual-mass flywheel or flywheel for automatic gearbox 01J > < Renewing crankshaft oil seal (pulley end)