audi Workshop Repair Guides

Audi Workshop Service and Repair Manuals

Stress-free alignment of exhaust system > < Removing and installing exhaust manifold (left-side)
Removing and installing exhaust manifold (right-side)
Special tools and workshop equipment required
   
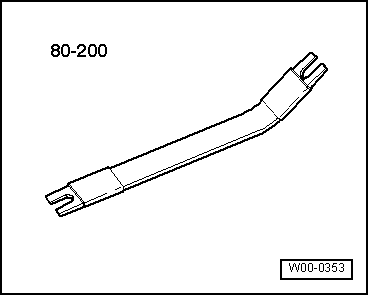
t  Removal lever -80-200-
Removing
–  Remove front exhaust pipe (right-side) → Chapter.
  W00-0353
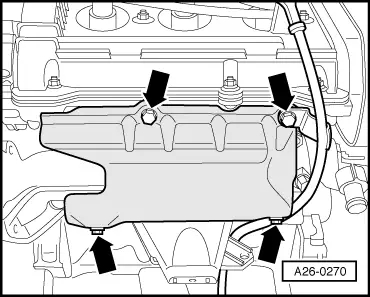
–  Unscrew bolts -bottom arrows- (accessible from below) at heat shield.
  A26-0270
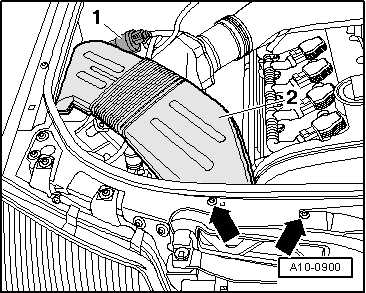
–  Remove bolts -arrows-.
–  Disengage activated charcoal filter solenoid valve 1 -N80--item 1- at air duct.
–  Remove air duct -2-.
  A10-0900
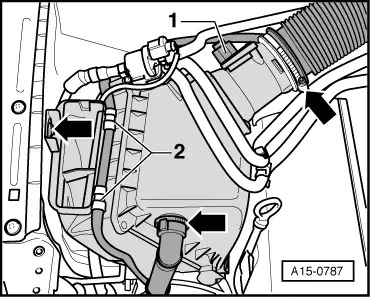
–  Pry off retaining clips -2- for wiring harness at air cleaner housing (use removal lever -80-200-).
–  Detach electrical connector -1- at air mass meter.
–  Remove air cleaner housing -arrows-.
  A15-0787
–  Unscrew bolts -top arrows- (accessible from above) at heat shield and remove heat shield.
  Note
The guide tube for the engine oil dipstick must not be lifted out completely, as otherwise the O-ring at the base of the guide tube will have to be renewed.
  A26-0270
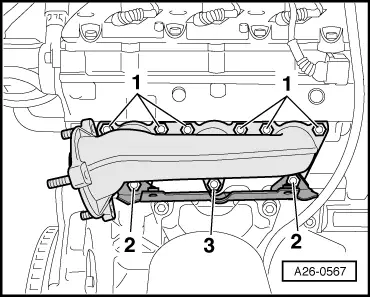
–  Unscrew bolts -1- (accessible from above) on exhaust manifold.
–  Loosen the wheel housing liner at the front.
–  Unscrew nuts -2- (accessible from below) and remove heat shield.
–  Unscrew nut -3- and remove exhaust manifold.
Installing
Installation is carried out in the reverse order; note the following:
  Note
Renew gaskets and self-locking nuts.
–  Install front exhaust pipe (right-side) → Chapter.
–  Align exhaust system so it is free of stress → Chapter.
Tightening torques
  A26-0567
ComponentNm
Exhaust manifold to cylinder head25
Heat shieldM610
for exhaust manifoldM820


Stress-free alignment of exhaust system > < Removing and installing exhaust manifold (left-side)