audi Workshop Repair Guides

Audi Workshop Service and Repair Manuals

Checking battery > < Disconnecting and connecting battery
Removing and installing battery
Removing
  Caution
On vehicles fitted with telematics system, activate service mode of telematics control unit before disconnecting battery → Rep. Gr.91.
–  Note code (obtain if necessary) for vehicles with encoded radio/radio navigation system (other manufacturers only).
–  Switch off ignition.
   
–  Detach rubber seal of plenum chamber cover in direction of -arrow-.
–  Remove plenum chamber cover -1- to front.
–  Connect battery charger to provide back-up power supply → Chapter.
  A27-0088
–  Loosen nut several turns and disconnect battery clamp -1- of earth cable from battery terminal post.
–  Loosen nut several turns and disconnect battery clamp -2- of positive cable from battery terminal post.
–  Unscrew bolt -4- using a ball head hexagon key until the bolt head just touches the body brace.
–  Leave hexagon socket head bolt and retainer plate -3- fitted and swivel out battery from underneath.
  A27-0090
–  Disconnect hose -arrow- for central gas venting system.
–  Lift battery out of plenum chamber.
  WARNING
Observe environmental requirements.
When disposing of used batteries, always observe the required disposal procedures for batteries and sulphuric acid → Electrical system; General information; Rep. Gr.27.
Installing
Installation is carried out in the reverse order; note the following:
  Note
t  Only install maintenance-free batteries with the specifications “TL82506” (from December 1997 onwards) and “VW75073” (from August 2001 onwards).
t  Batteries from the Audi parts range feature a base strip adapter for matching to different retainer flanges. The battery operating instructions give details of when and how to use the base strip adapter.
  A27-0089
–  Insert battery in battery carrier so that lug at rear of battery carrier -arrow- engages in recess in battery base strip -1-.
l  It should no longer be possible to move the battery.
  N27-0111
–  The battery has been properly inserted if the centre recess in the battery base strip aligns with the tapped hole in the battery tray -arrows-.
  N27-0110
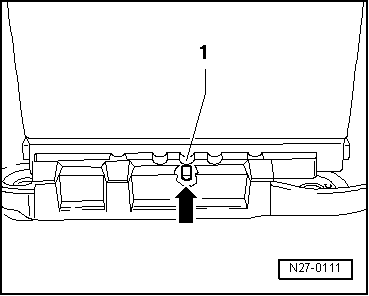
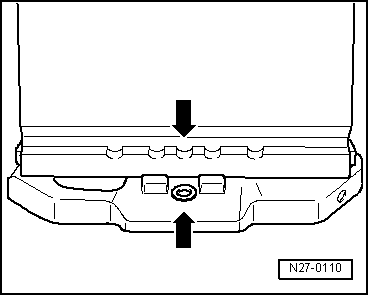
–  Secure battery retainer plate -3- with hexagon socket head bolt -4-.
  Note
Lug on battery retainer plate must engage in recess on battery base strip.
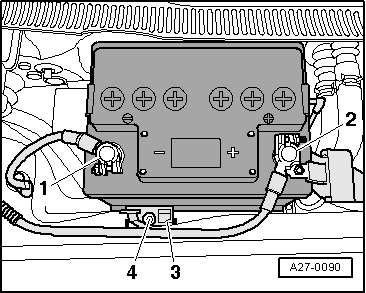
Connect up battery in the following sequence with ignition and electrical equipment switched off:
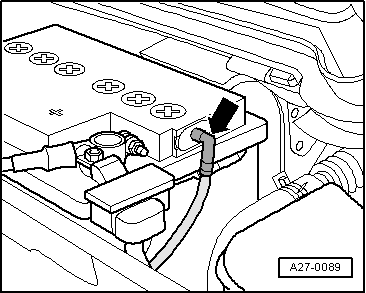
–  First connect battery clamp -2- of positive cable by hand to battery positive terminal “+” and tighten nut.
–  Attach battery clamp -1- on earth cable to negative battery terminal “–” by hand and tighten nut.
–  Connect hose for central gas venting system. Observe notes in → Electrical system; General information; Rep. Gr.27.
–  After installation, check that battery is securely attached → Electrical system; General information; Rep. Gr.27.
–  Switch off back-up power supply from battery charger.
If battery was removed and installed without back-up power supply, perform following procedures after connecting the battery:
t  Activate vehicle equipment (radio, radio/navigation system, clock, electric windows) → Owner's manual.
t  Deactivate service mode of telematics control unit → Rep. Gr.91.
t  Check proper function of remote control keys; synchronise keys if necessary. Inform customer that all additional keys must also be synchronised to ensure that the remote control works properly → Owner's Manual.
t  Interrogate fault memories of all control units and erase “Low voltage” fault if necessary → Vehicle diagnosis, testing and information system VAS 5051.
  Note
After re-connecting voltage supply the ESP warning lamp will go out only after driving a distance of several meters.
Tightening torques
  A27-0090
ComponentNm
Battery cable clamp to battery terminal7.5
Bolt to retainer plate12


Checking battery > < Disconnecting and connecting battery