audi Workshop Repair Guides

Audi Workshop Service and Repair Manuals

Adjusting door - adjustment sequence > < Removing and installing cover for door lock
General Body Assembly
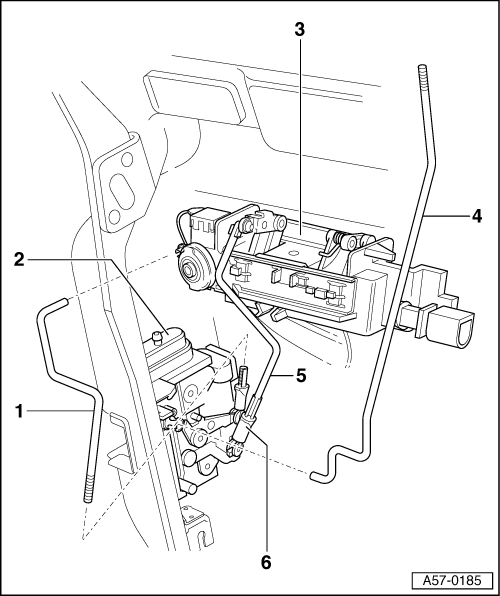
Removing and installing front door handle
Removing and installing operating rods for front door lock
 
A57-0185
  • Lock cylinder securing rod
    • ◆ Installing .
  • Door lock
    • ◆ Removing and installing => Page 57-12.
  • Door handle
    • ◆ When removing the door handle, the securing rod -1- and operating rod -5- must be detached from the door handle.
  • Operating rod
    • ◆ Unclip from door lock to remove.
  • Operating clip
    • ◆ Installing => Page 57-26.
 
A57-0191

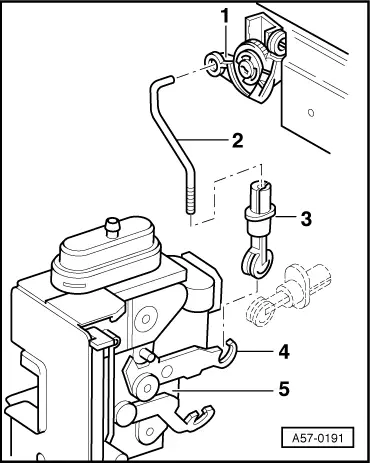
Fig.1    → Removing and installing securing rod for lock cylinder

  • ‒ Insert and clip securing rod -2- for lock cylinder in bushing on release lever -1-.
  • ‒ Tilt operating clip -3- at 90° (not visible in illustration), insert in release lever -4- and then swivel upwards.
  • ‒ Clip securing rod -2- in operating clip -3-.
  • ‒ Do not strain locking lever -4- on door lock -5- (max. play at locking lever 1 mm => Fig.2).
  • ‒ Push sleeve on operating clip -3- upwards.
 
A57-0075

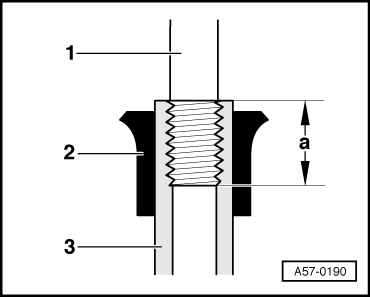
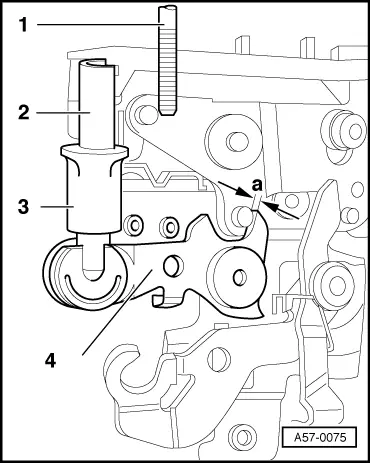
Fig.2    → Adjusting play for locking lever

  • ‒ Insert securing rod -1- in operating clip -2- such that dimension -a- at locking lever -4- is approx. 1 mm.
  • ‒ Dimension -a- = 13 mm (adjustment depth of securing rod) must be observed => Fig.3.

 
A57-0190

Fig.3    → Adjustment depth for securing rod

  • ‒ When correctly adjusted, dimension -a- of securing rod -1- must be 13 mm±3 mm.
  • ‒ After adjustment is complete, push the sliding sleeve -2- upwards from actuation clip -3-.

Adjusting door - adjustment sequence > < Removing and installing cover for door lock