audi Workshop Repair Guides

Audi Workshop Service and Repair Manuals

Removing, installing, dismantling and assembling drive pinion > < Exploded view of gearbox
6-speed manual gearbox 01E Four-wheel drive
Dismantling and assembling differential
 
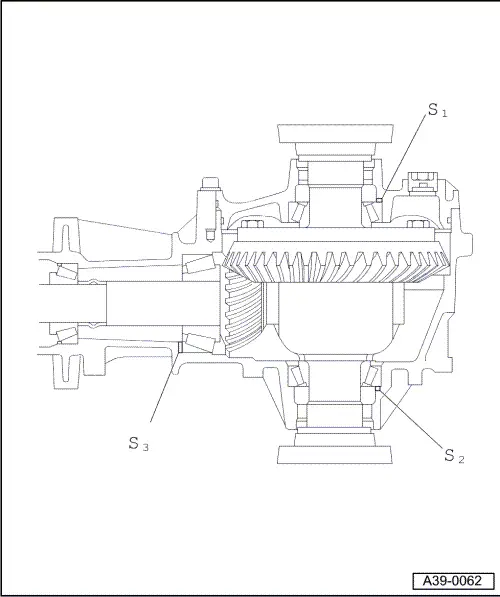
A39-0062

Special tools, testers and other items required

    • ‒ Thrust plate VW 401
    • ‒ Thrust plate VW 402
    • ‒ Press tool VW 407
    • ‒ Press tool VW 412
    • ‒ Mandrel VW 295
    • ‒ Press tool VW 408 A
 
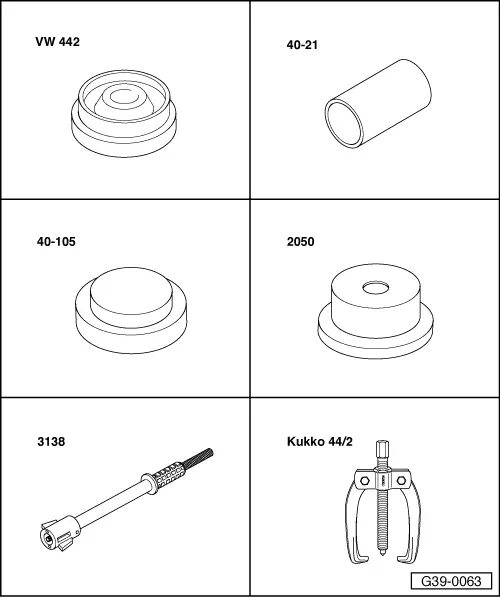
G39-0063
    • ‒ Thrust pad VW 442
    • ‒ Fitting sleeve 40-21
    • ‒ Thrust plate 40-105
    • ‒ Thrust pad 2050
    • ‒ Driving-out tool 3138
    • ‒ Two-arm puller, Kukko 44/2
 
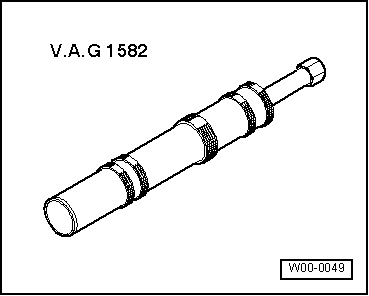
W00-0049
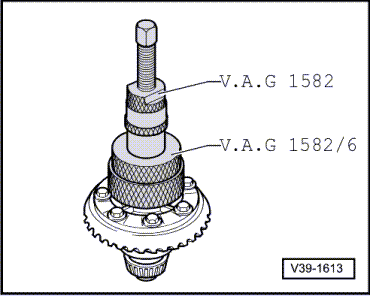
  • ◆ Taper roller bearing puller V.A.G 1582

 
W00-0049
  • ◆ Gripper V.A.G 1582/6
 
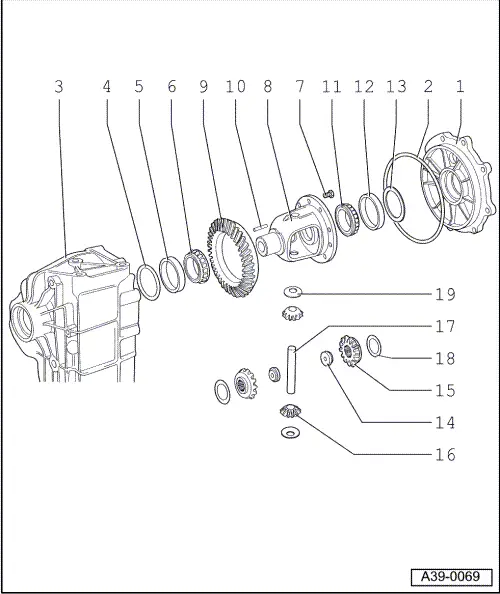
A39-0069

Notes:

  • ◆ General repair instructions .
  • ◆ Always replace both differential taper roller bearings jointly. Use same makes wherever possible.
  • ◆ Replacement of components marked 1) necessitates adjustment work => Adjustment table, Page 39-176.
  • Cover for final drive 1)
  • O-ring
    • ◆ Replace
    • ◆ Oil on insertion
  • Final drive housing 1)
 
A39-0069
  • Shim "S2"
    • ◆ Note thickness
    • ◆ Adjustment table
  • Outer race for taper roller bearing, small 1)
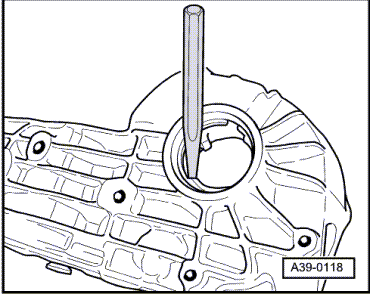
    • ◆ Driving out => Fig.1
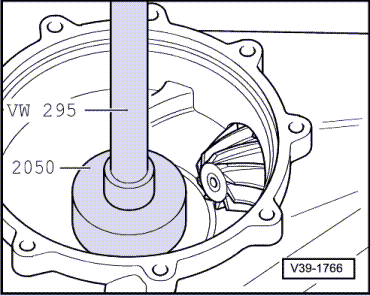
    • ◆ Pressing in => Fig.2
  • Inner race for taper roller bearing, small 1)
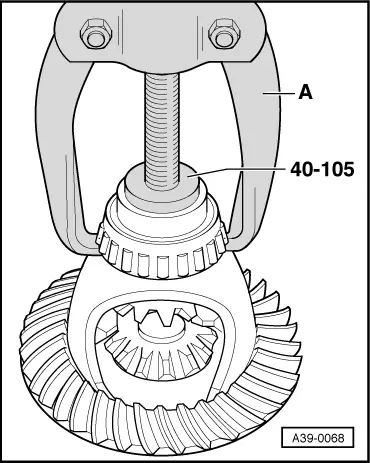
    • ◆ Pulling off => Fig.3
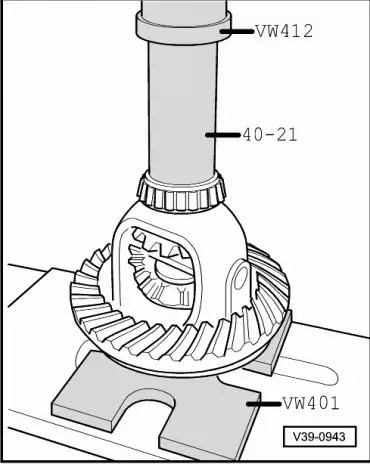
    • ◆ Pressing on => Fig. 4
  • Bolt, 60 Nm + further 45°turn
    • ◆ Replace
    • ◆ Assignment

=> Parts List

    • ◆ Tighten bolts alternately and then diagonally to torque
 
A39-0069
  • Differential housing 1)
  • Crown wheel 1)
    • ◆ Paired with drive pinion (pinion set)
    • ◆ Assignment in line with gearbox code letters

=> Parts List

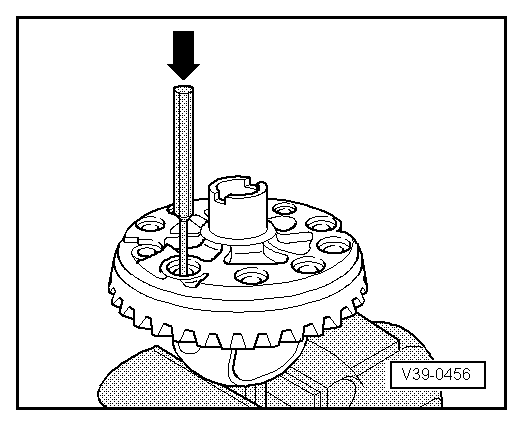
    • ◆ Driving off housing with mandrel
      => Fig.9
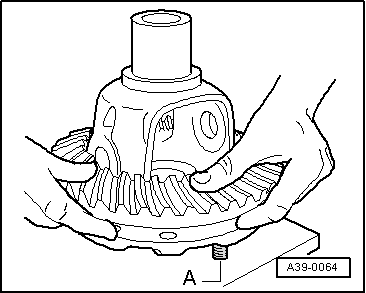
    • ◆ Fitting on differential housing
      => Fig.10
  • Spring pin
    • ◆ For securing bevel gear shaft
    • ◆ Drive in flush
  • Inner race for taper roller bearing, large 1)
    • ◆ Pulling off => Fig.5
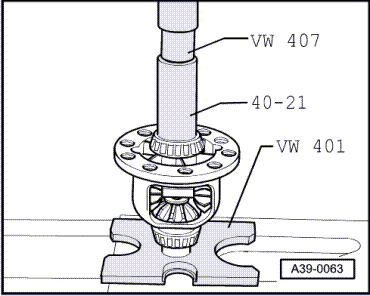
    • ◆ Pressing on => Fig. 6
 
A39-0069
  • Outer race for taper roller bearing, large 1)
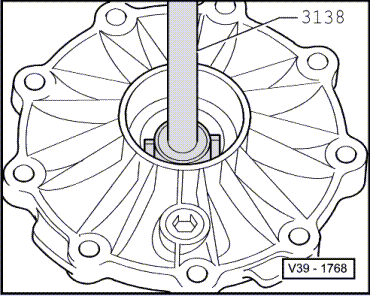
    • ◆ Driving out => Fig.7
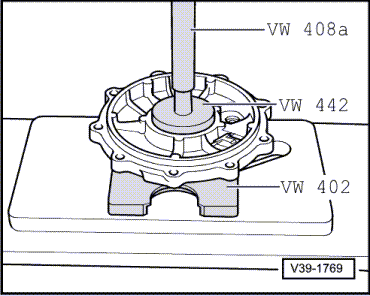
    • ◆ Pressing in => Fig.8
  • Shim "S1"
    • ◆ Note thickness
    • ◆ Adjustment table=> Page 39-176
  • Threaded piece
  • Sun wheel
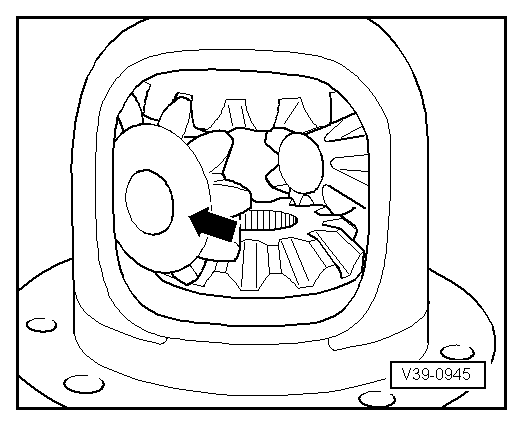
    • ◆ Installing => Fig.11
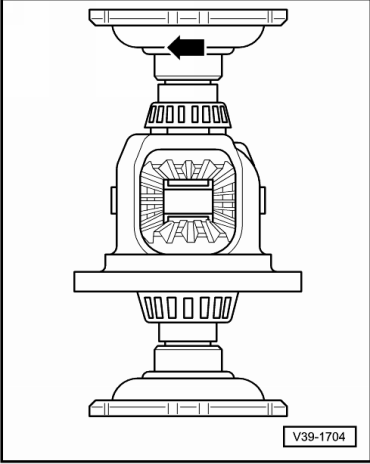
    • ◆ Adjusting => Fig.12
  • Planet pinion
    • ◆ Installing => Fig.11
 
A39-0069
  • Shaft for bevel gears
    • ◆ Drive out with mandrel
    • ◆ Drive in carefully, so as not to damage thrust washers
    • ◆ Secure with spring pin -Item 10-
  • Shim
    • ◆ Re-determining thickness => Fig.12
  • Thrust washer
    • ◆ Check for cracks
 
A39-0118

→ Fig.1    Driving outer race for taper roller bearing, small out of housing

  • ‒ Check shims for damage following removal.

 
V39-1766

→ Fig.2    Pressing home outer race for taper roller bearing, small in housing

  • ‒ Fit outer race evenly in position with VW 295 by tapping gently with hammer.
  • ‒ Then drive home as shown.
 
A39-0068

→ Fig.3    Pulling off inner race for taper roller bearing, small

  •     A -    Two-arm puller, e.g. Kukko 44/2
 
V39-0943

→ Fig.4    Pressing on inner race for taper roller bearing, small

Attention:
Wear protective gloves.
  • ‒ Heat inner race to approx. 100 °C, place in position and press home.

 
V39-1613

→ Fig.5    Pulling off inner race for taper roller bearing, large

  • ‒ Position thrust plate 40-105 on differential housing before setting up puller.
 
A39-0063

→ Fig.6    Pressing on inner race for taper roller bearing, large

Attention:
Wear protective gloves.
  • ‒ Heat inner race to approx. 100 °C, place in position and press home.

 
V39-1768

→ Fig.7    Driving outer race for taper roller bearing, large out of cover

  • ‒ Check shims for damage following removal.
 
V39-1769

→ Fig.8    Pressing outer race for taper roller bearing, large into cover

 
V39-0456

→ Fig.9    Driving crown wheel off housing

 
A39-0064

→ Fig.10    Fitting crown wheel

Attention:
Wear protective gloves.
  • ‒ When fitting, guide crown wheel with improvised centring pins -A-.
  • ‒ Heat crown wheel to approx. 100 °C and fit in position.

 
V39-0945

→ Fig.11     Installing bevel gears

  • ‒ If sun wheels are replaced, shims must be re-determined => Fig.12.
  • ‒ Fit sun wheels with shims determined.
  • ‒ Insert planet pinions with 180° offset and swivel in -arrow-.
  • ‒ Insert and align thrust washers.
  • ‒ Insert threaded pieces.
  • ‒ Drive bevel gear shaft into final position and secure.
 
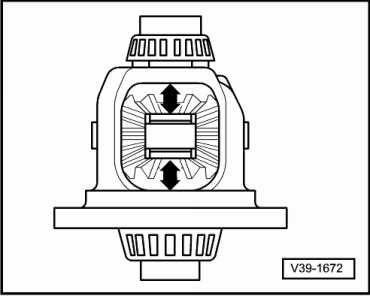
V39-1672

→ Fig.12    Adjusting bevel gears

  • ‒ Insert sun wheels with thinnest shims (0.5 mm).
  • ‒ Insert planet pinions with 180° offset with thrust washers.

Note:

From now on bevel gears and thrust washers are not to be interchanged.

  • ‒ Drive in shaft for bevel gears.
  • ‒ Press planet pinions outwards.
  • ‒ Press sun wheels in direction of arrow and check clearance.
  • ‒ Determine thickest shim which can still just be fitted for sun wheels on either side.
    • ‒ Shims for both sides should be of same thickness
  • ‒ Determine shims as per table. Part numbers

=> Parts List

Shims available:

Shim thickness (mm)

0.50

0.70

0.90

0.60

0.80

1.00

 
V39-1704

Note:

→ Correct setting has also been made if there is no perceptible clearance, but bevel gears can still just be turned -arrow-.

Removing, installing, dismantling and assembling drive pinion > < Exploded view of gearbox