A4 Mk1
 Caution
 Note!
Note!
|
|
|
|
Note!
|
|
|
|
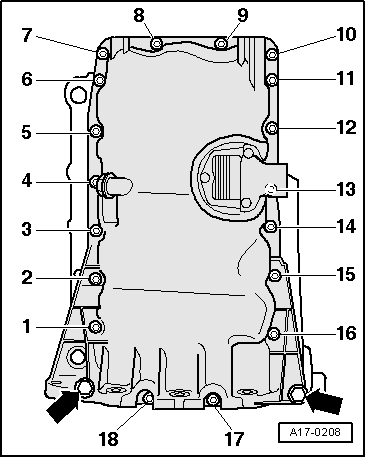
| Sequence | Tightening | ||
| 1 |
| ||
| 2 |
| ||
| 3 |
| ||
| 4 |
|
|
Note! |
|
|
|
|

Note!
|
|
|
|
Note!
|
|
|
|
| Sequence | Tightening | ||
| 1 |
| ||
| 2 |
| ||
| 3 |
| ||
| 4 |
|
|
Note! |
|
|
|
|