audi Workshop Repair Guides

Audi Workshop Service and Repair Manuals

Removing and installing dual-mass flywheel > < Renewing crankshaft oil seal (pulley end)
Removing and installing front sealing flange - “engine generation III”
   
Removing and installing front sealing flange - “engine generation III”
Special tools and workshop equipment required
t  Fitting sleeve -3202/1- from fitting sleeves -3202-
t  Fitting sleeve -3265-
t  Used oil collection and extraction unit -V.A.G 1782-
t  Electric drill with plastic brush attachment
t  Safety goggles
t  Sealant → Parts catalogue

   
Removing
l  Engine in vehicle.
–  Remove toothed belt → Chapter.
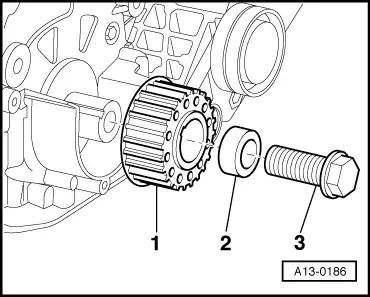
–  Unscrew central bolt -3- for crankshaft sprocket -1-.
–  Detach spacer -2- and toothed belt sprocket.
–  Place used oil collection and extraction unit -V.A.G 1782- under engine.
–  Drain off engine oil.
  A13-0186
Vehicles with automatic gearbox:
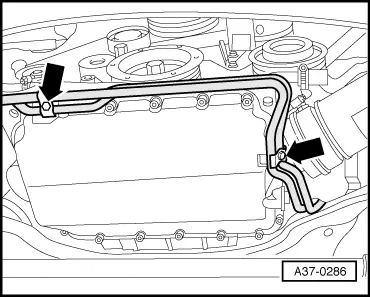
–  Remove bracket for ATF pipes -arrows-.
  A37-0286
All models:
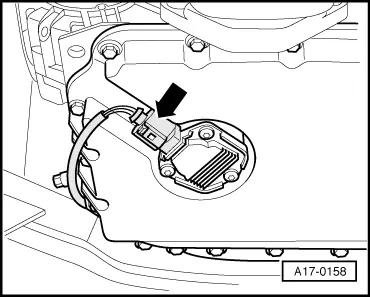
–  If fitted, unplug electrical connector -arrow- at oil level/temperature sender -G266- and move wiring clear.
  A17-0158
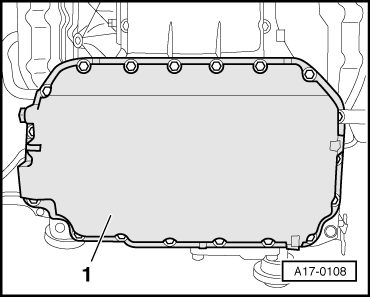
–  Remove sump (bottom section) -1-.
  A17-0108
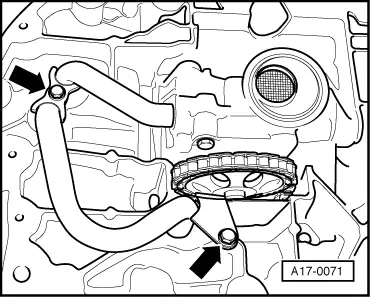
–  Unscrew brackets for oil supply pipes -arrows- and detach front (long) oil supply pipe.
  A17-0071
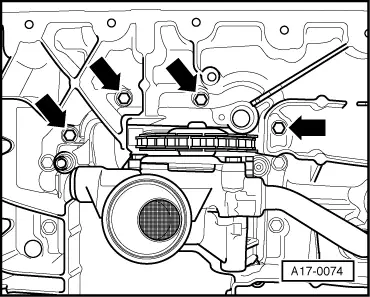
–  Unscrew 4 bolts -arrows- from sump (top section).
  A17-0074
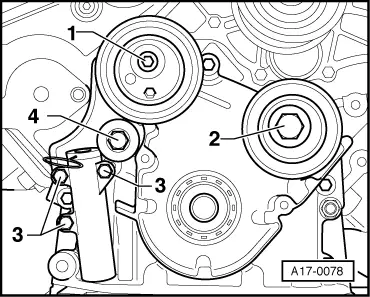
–  Remove idler roller -2-, tensioning roller -1-, tensioning lever -4- and tensioner -3-.
  A17-0078
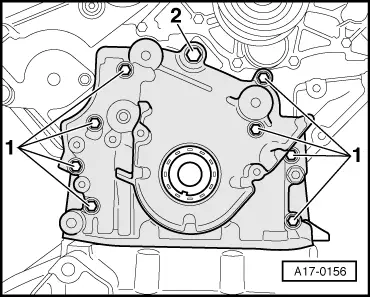
–  Remove bolts -1- and -2-.
–  Pull off sealing flange (front).
–  Drive out oil seal with flange removed.
  A17-0156
Installing
Installation is carried out in the reverse order; note the following:
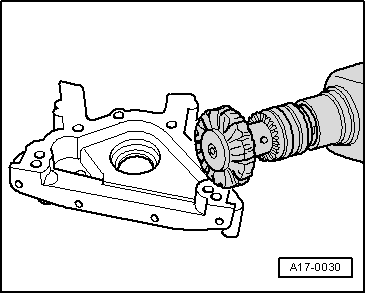
–  Remove sealant residue from sealing flange and bottom and top sections of sump with rotating plastic brush or similar.
  WARNING
Wear safety goggles.
–  Clean sealing surfaces; they must be free of oil and grease.
  A17-0030
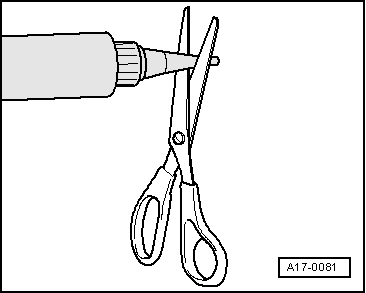
–  Cut off tube nozzle at front marking (nozzle approx. 3 mm Ø).
  A17-0081
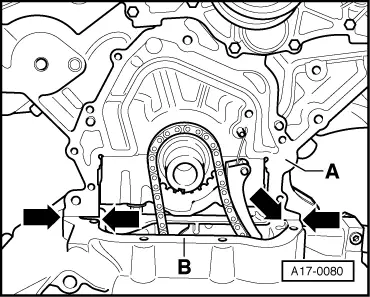
–  Fit gasket onto dowel pins on sealing surfaces -A-.
  Note
Do not apply sealant to sealing surface -A- on cylinder block.
–  After fitting gasket, apply a small sealant bead in each case to edges between -left arrows- and -right arrows-.
  Note
The sealing flange must be installed within 5 minutes after applying sealant.
  A17-0080
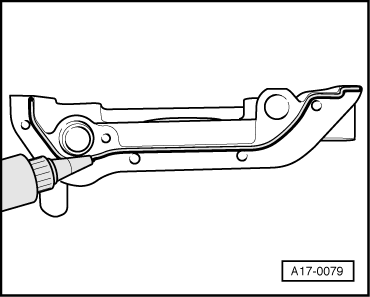
–  Apply sealant bead to clean sealing surface of sealing flange, as shown in illustration.
l  Thickness of sealant bead: 2 ... 3 mm
  Note
t  Sealant bead must not be wider than 3 mm, otherwise excess sealant could ingress into sump and clog strainer in oil intake pipe.
t  For fitting sealing flange with oil seal in position, attach fitting sleeve -3202/1- to end of crankshaft.
  A17-0079
–  Hand-tighten the 4 bolts -arrows-.
  A17-0074
–  Insert bolt -2- with locking fluid; Locking fluid → Parts catalogue.
–  Tighten bolts -1- to 10 Nm and bolt -2- to 30 Nm.
  A17-0156
–  Tighten the 4 bolts -arrows- fully.
l  M6 - 10 Nm
l  M7 - 16 Nm
  Note
  A17-0074
Do not lubricate sealing lip and outer rim of oil seal before pressing in.
–  Fit oil seal using fitting sleeve -3202/1-.
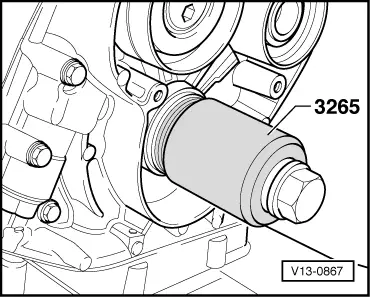
–  Press in seal until flush using fitting sleeve -3265- and central bolt.
  V13-0867
–  Install components in the specified sequence:
1.  Toothed belt tensioner -item 3-.
2.  Tensioning lever -item 4-.
3.  Toothed belt tensioning roller -item 1-.
4.  Idler roller -item 2-.
–  Pay attention to shims beneath tensioning roller and tensioning lever.
  A17-0078
–  Install crankshaft sprocket -1- with spacer -2- and new central bolt -3-.
  Note
t  Contact surface between toothed belt sprocket and crankshaft must be free of oil.
t  Do not additionally lubricate bolt for crankshaft toothed belt sprocket.
–  Fit toothed belt (adjust valve timing) → Anchor.
Tightening torques
  A13-0186
ComponentNm
Front sealing flange to cylinder blockM610
M830
Sealing flange (front) to sump (top section)M610
M716
Toothed belt sprocket to crankshaft200 + 180° 1)2)
Toothed belt tensioning roller to sealing flange (front)42
Tensioner to sealing flange (front)10
Tensioning lever to sealing flange (front)22
Tensioning roller to sealing flange (front)22
Idler roller to sealing flange (front)45
l  1) Renew bolt.
l  2) 180° = one half turn.


Removing and installing dual-mass flywheel > < Renewing crankshaft oil seal (pulley end)