audi Workshop Repair Guides

Audi Workshop Service and Repair Manuals

Removing and installing front sealing flange - "engine generation III” > < Sealing flange and dual-mass flywheel/drive plate - exploded view of components
Renewing crankshaft oil seal (pulley end)
   
Renewing crankshaft oil seal (pulley end)
Special tools and workshop equipment required
t  Fitting sleeve -3202/1-
t  Oil seal extractor -3203-
t  Fitting sleeve -3265-

   
Procedure
l  Engine in vehicle.
–  Remove toothed belt → Chapter.
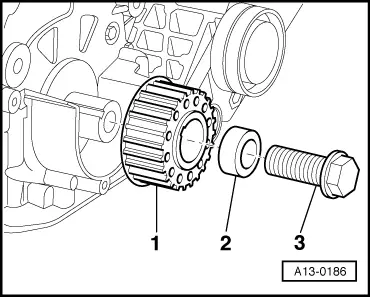
–  Unscrew central bolt -3- for crankshaft sprocket -1-.
–  Detach spacer -2- and toothed belt sprocket.
  A13-0186
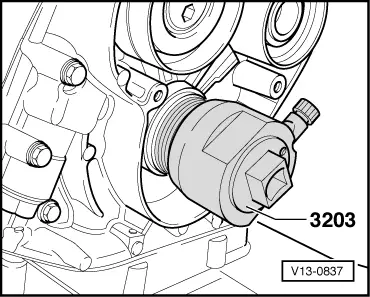
–  Unscrew inner section of oil seal extractor -3203- three turns out of outer section and lock with knurled screw.
–  Lubricate threaded head of oil seal extractor, place it in position and screw it into oil seal as far as possible (applying firm pressure).
–  Loosen knurled screw and turn inner part against crankshaft until oil seal is pulled out.
–  Clamp flats of oil seal extractor in vice.
–  Remove oil seal with pliers.
  V13-0837
–  Clean running surface and sealing surface.
  Note
Do not lubricate sealing lip and outer rim of oil seal before pressing in.
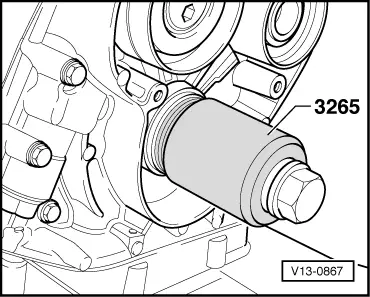
–  Fit oil seal using fitting sleeve -3202/1-.
–  Press in seal until flush using fitting sleeve -3265- and central bolt.
  V13-0867
–  Install crankshaft sprocket -1- with spacer -2- and new central bolt -3-.
  Note
t  Contact surface between toothed belt sprocket and crankshaft must be free of oil.
t  Do not additionally lubricate bolt for crankshaft toothed belt sprocket.
–  Fit toothed belt (adjust valve timing) → Anchor.
Tightening torque
  A13-0186
ComponentNm
Toothed belt sprocket to crankshaft200 + 180° 1)2)
l  1) Renew bolt.
l  2) 180° = one half turn.


Removing and installing front sealing flange - "engine generation III” > < Sealing flange and dual-mass flywheel/drive plate - exploded view of components