audi Workshop Repair Guides

Audi Workshop Service and Repair Manuals

Removing and installing fuel tank > < Overview of components: fuel tank with attachments
Fuel supply system - Diesel engines
Fuel supply system - four-wheel drive
Draining fuel tank

Observe safety precautions.

Observe rules for cleanliness => Page 20-3.

Procedure if tank is more than 3/4 full => Page 20-108.

Procedure if tank is less than 3/4 full => Page 20-111.

 
W00-1107

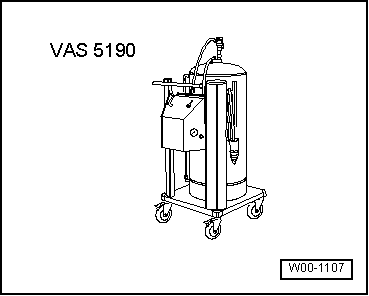
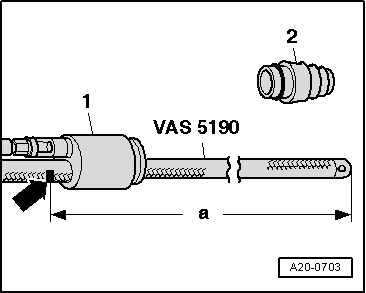
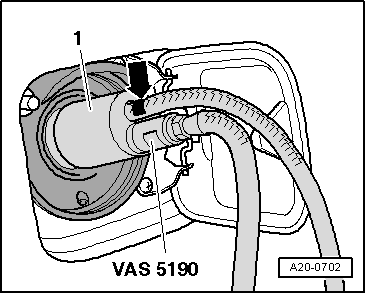
Special tools and workshop equipment required

  • ◆ VAS 5190

Work sequence

Warning
Secure earth wire of V.A.G 1433

A - Procedure if fuel tank is more than 3/4 full

 
A20-0703
  • ‒ Remove filler cap from fuel tank filler neck.
  • ‒ → Detach tapered adapter -2- from shaft end -1- of VAS 5190.
  • ‒ Make a mark -arrow- on hose using insulating tape.
    • ‒ Dimension a = 1565 mm

 
A20-0702
  • ‒ → Screw shaft end -1- of fuel extractor VAS 5190 onto fuel filler neck.
  • ‒ Push drain hose into fuel tank until marking on drain hose -arrow- coincides with shaft end.

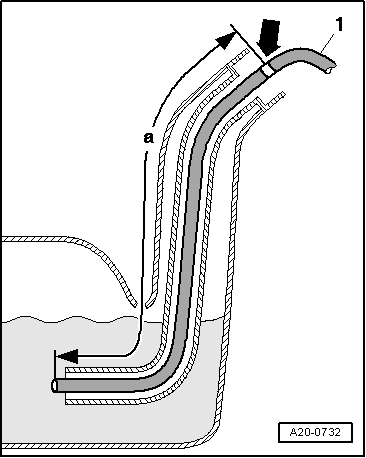
Note:

In order not to damage the fuel gauge sender or the suction jet pump, do not push the hose into fuel tank further than the applied marking.

  • ‒ Drain fuel tank as far as possible via fuel filler neck.
  • ‒ Carefully pull out drain hose.

Vehicles with 4-cylinder engine:

  • ‒ Remove flange and move clear to one side with hoses/pipes connected
    => Removing fuel delivery unit, Page 20-134.
  • ‒ Extract remaining fuel through opening for fuel delivery unit.

Vehicles with 4-cylinder engine (unit injector):

  • ‒ Remove flange and move clear to one side with hoses/pipes connected
    => Removing fuel delivery unit, Page 20-166.
  • ‒ Extract remaining fuel through opening for fuel delivery unit.

Vehicles with 6-cylinder engine:

  • ‒ Remove flange and move clear to one side with hoses/pipes connected
    => Removing fuel delivery unit, Page 20-201.
  • ‒ Extract remaining fuel through opening for fuel delivery unit.

Notes:

 
A20-0732
  • ◆ → The procedure when using a fuel extractor without shaft end is basically the same.
  • ◆ In this case make a mark -arrow- on hose using insulating tape.
    -Distance a = 1500 mm
  • ◆ Drain hose -1- is in correct position when marking on drain hose -arrow- coincides with rim of filler neck.
  • ◆ If the hose does not go in easily, lubricate lightly with engine oil. Do not use silicone lubricant.

B - Procedure if tank is less than 3/4 full

Vehicles with 4-cylinder engine:

  • ‒ Remove flange and move clear to one side with hoses/pipes connected
    => Removing fuel delivery unit, Page 20-134.
  • ‒ Extract remaining fuel through opening for fuel delivery unit.

Vehicles with 4-cylinder engine (unit injector):

  • ‒ Remove flange and move clear to one side with hoses/pipes connected
    => Removing fuel delivery unit, Page 20-166.
  • ‒ Extract remaining fuel through opening for fuel delivery unit.

Vehicles with 6-cylinder engine:

  • ‒ Remove flange and move clear to one side with hoses/pipes connected
    => Removing fuel delivery unit, Page 20-201.
  • ‒ Extract remaining fuel through opening for fuel delivery unit.

Removing and installing fuel tank > < Overview of components: fuel tank with attachments