A4 Mk1
 Note
Note
|
Note
|
|
|
|
|

|
|
|
Note
|
|
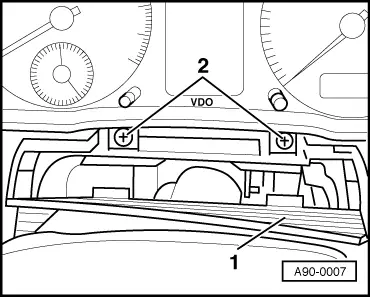
| Component | Nm |
| Instrument cluster to dash panel | 1.5 |

Note
|
Note
|
|
|
|
|
|
|
|
Note
|
|
| Component | Nm |
| Instrument cluster to dash panel | 1.5 |