
A4 Mk2
| Removing and installing door trim (rear) |

| 1 - | Door trim |
| t | Removing: |
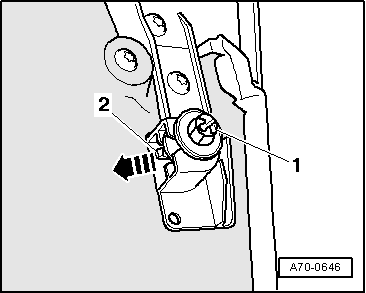
| – | Unclip trim panel -2-. |
| – | Pull off trim panel -2- to front. |
| – | Remove bolts -3, 10 and 11- from door trim -1-. |
| Vehicles with electric window regulators: |
| – | Removing and installing window regulator switch → Chapter |
| Vehicles with window winder: |
| – | Removing and installing window winder → Chapter |
| All vehicles: |
| – | Unclip door trim -1-. Renew damaged clips → Fig. |
| – | Lift door trim -1- approx. 20 cm out of door shell. |
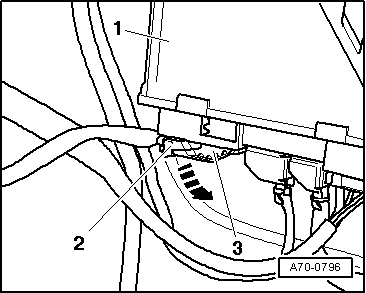
| – | Disengage Bowden cable for interior door handle → Fig.. |
| – | Unplug electrical connectors → Fig.. |
| – | Take out rear door trim. |
| t | Installing: |
| Tightening torque: |
| q | 1.5 Nm |
| Install in reverse order of removal. Observe the following: |
| Speed nuts -8- (4x) for expanding nuts -7- (4x) must be clipped in when installing. |
| When fitting, press centre of door trim towards door shell. |
| When installing, note position of window winder → Chapter. |
| 2 - | Trim panel |
| 3 - | Bolt (3x) |
| 4 - | Cover |
| 5 - | Window winder |
| 6 - | Bolt |
| 7 - | Expanding nut (4x) |
| 8 - | Speed nut (4x) |
| 9 - | Window regulator switch |
| 10 - | Bolt |
| q | Not installed on all versions |
| 11 - | Bolt |
 Note
Note
|

|
|
|
|
|