
A4 Mk2
| Dismantling and assembling Torsen housing |

| Special tools and workshop equipment required |
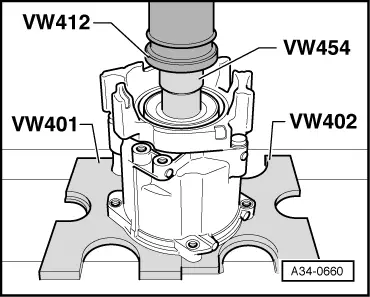
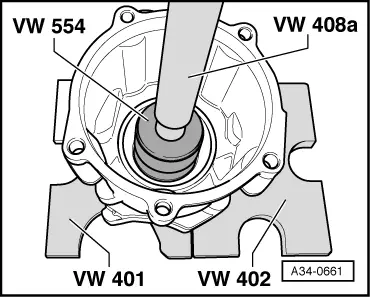
| t | Thrust plate -VW 401- |
| t | Thrust plate -VW 402- |
| t | Press tool -VW 408 A- |
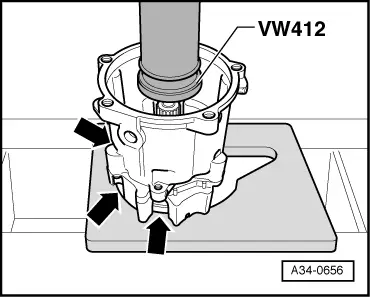
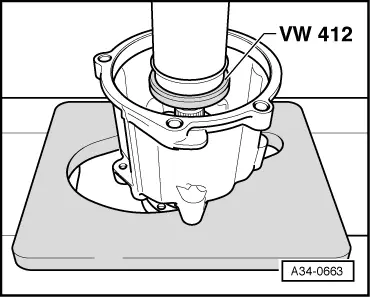
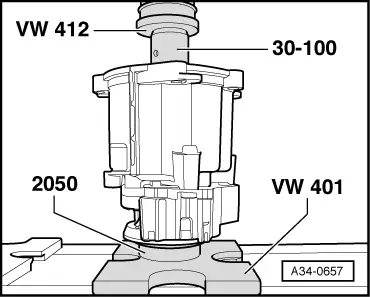
| t | Press tool -VW 412- |
| t | Press tool -VW 454- |
| t | Press tool -VW 554- |
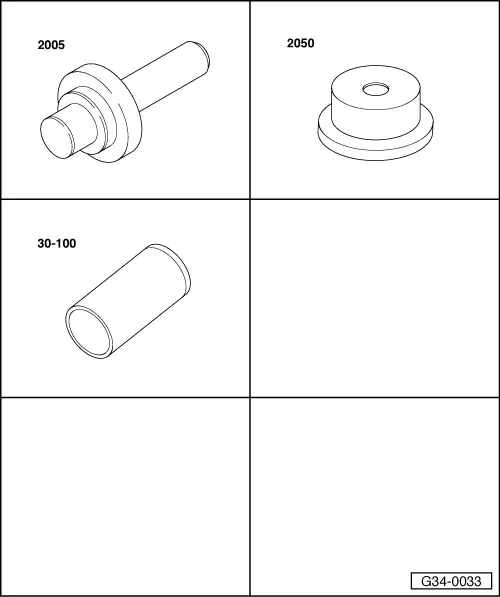
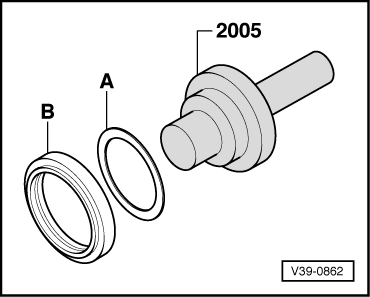
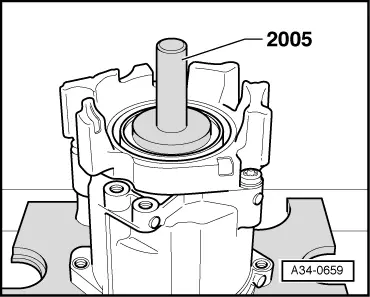
| t | Punch -2005- |
| t | Thrust piece -2050- |
| t | Drift sleeve -30 - 100- |
| t | Torque wrench -V.A.G 1331- |
| t | Extractor tool -T20143- |
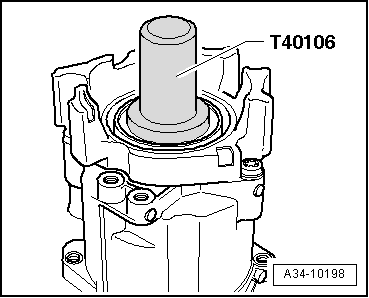
| t | Thrust piece -T40106- |
| t | Shim -016 311 391 A- |
| t | Locking fluid -AMV 185 101 A1- |
| t | Sealing grease -G 052 128 A1- |
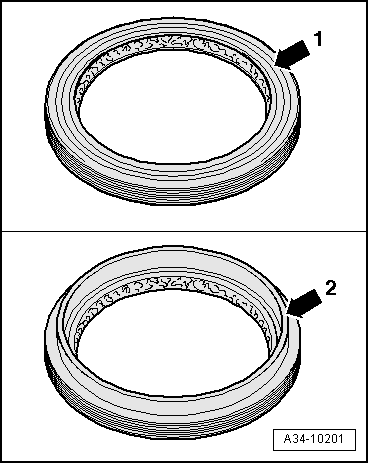
 Note
Note| Due to the introduction of an oil seal with additional dust lip (from serial no. 42987) → Fig., the flange shaft → Item was fitted with a groove. Refer to → Electronic parts catalogue “(ETKA)” to allocate components. |

| 1 - | Flange shaft |
| q | Pressing out → Fig. or → Fig. |
| q | Pressing in → Fig. |
| q | Modification: from serial no. 42987 with groove → Fig. |
| q | Select components from → Electronic parts catalogue “ETKA”. |
| 2 - | Bolt, 20 Nm + 90° |
| q | For vibration damper |
| q | 3 x |
| q | Self-locking |
| q | Renew |
| 3 - | Vibration damper |
| q | Not fitted on all versions |
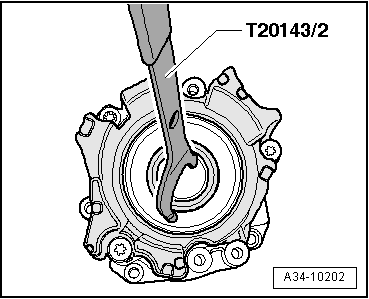
| 4 - | Oil seal |
| q | Removing → Fig. |
| q | Installation up to serial no. 42986 → Fig. |
| q | Modification: with additional dust lip from serial no. 42987 onwards → Fig. |
| q | Installation from serial no. 42987 onwards → Fig. |
| 5 - | Torsen housing |
| q | Removing and installing (with gearbox removed) → Chapter |
| q | Removing and installing is also possible with gearbox installed in vehicle → 6-speed manual gearbox 0A3, four-wheel drive; Rep. Gr.34 |
| 6 - | Ball bearing |
| q | For flange shaft |
| q | Pressing out → Fig. |
| q | Pressing in → Fig. |
| 7 - | Circlip |
|
|
Note
|
|
Note
|

|
|
|
|
|
|
|
|
|
|
|
|
|
|
|