
A4 Mk2
 Note
Note
|
Note
|
|
Note
|
|
|
|
|
|
|
|
|
|
Note
|
|
|
|
Note
|
|
|
|
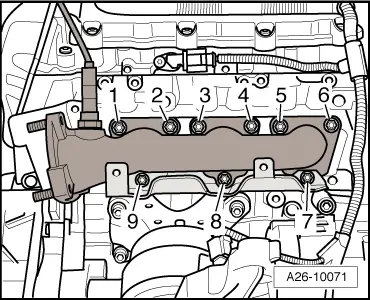
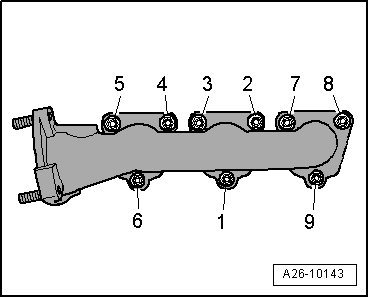
| Component | Nm | ||||
| Exhaust manifold to cylinder head | 25 1)2) | ||||
| Heat shield to bracket for heat shield | 10 | ||||
| Hose clips (9 mm wide) | 3 | ||||
| |||||