Audi Workshop Service and Repair Manuals
HOME
FEATURES
MENU
INDEX
ABOUT US
Exhaust system >
< Removing and installing charge air cooler
A4 Mk2
Power unit
6-cylinder TDI engine (2.7 ltr.; 3.0 ltr. 4-valve common rail), mechanics
Exhaust turbocharger, G-charger / Turbocharger and charge air cooler
Removing and installing charge pressure senderG31
Removing and installing charge pressure senderG31
Removing and installing charge pressure sender -G31-
Removing
–
Remove bumper cover (front)
→ Rep. gr.63
.
–
Remove left headlight
→ Rep. gr.94
.
–
Unplug electrical connector
-arrow-
at charge pressure sender -G31-.
–
Remove bolts and pull charge pressure sender -G31- out of charge air cooler.
Installing
Installation is carried out in the reverse order; note the following:
Note
Renew O-ring.
–
Install headlight (left-side)
→ Rep. gr.94
.
–
Install bumper cover (front)
→ Rep. gr.63
.
Tightening torque
Component
Nm
Charge pressure sender -G31- to charge air cooler
5
Power unit
6-cylinder TDI engine (2.7 ltr.; 3.0 ltr. 4-valve common rail), mechanics
Exhaust turbocharger, G-charger / Turbocharger and charge air cooler
Removing and installing charge pressure senderG31
Exhaust system >
< Removing and installing charge air cooler
 Note
Note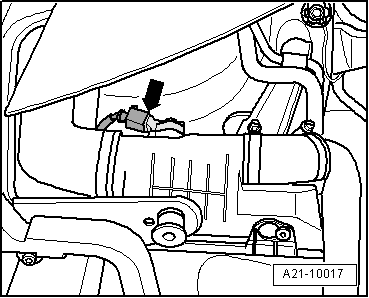
 Note
Note