audi Workshop Repair Guides

Audi Workshop Service and Repair Manuals

Exploded view - rear window (Avant) > < Exploded view - rear window (saloon)
Removing and installing rear window
Removing undamaged rear window
t  C-pillar trim removed
t  High-level brake light removed
–  Unplug electrical connectors for heated rear window and window aerial, move towards centre of window and secure with adhesive tape.
  WARNING
Always wear safety goggles and leather gloves when removing window.
–  Use wire reel -VAS 6452/1- to reel off about 6.5 metres of cutting wire (corresponding to 6 turns) and cut off.
   
–  Mask over outlet of awl at bottom of body flange with adhesive tape -1- to avoid damage.
–  Thread both ends of cutting wire -3- into awl -2- and pull through to the inside.
  A64-10244
–  Position cutting wire under glass all round rear window, as shown.
–  Position cutting wire around rear window (under window), as shown.
  Caution
The wire ends must not be twisted at the point where they pass through the adhesive bead -arrow-.
  A64-10245
–  Attach both reels to inside of window, as shown.
  A64-10246
–  Insert end of cutting wire -1- into reel -2-.
–  Tension cutting wire with reel -1- and insert plastic film -2- from removal kit -VAS 6452- as protection between wire and rear shelf.
  A64-10228
– 
  A64-10253
–  Cut clear the first area. While doing so, wire is guided into integrated idler pulley -arrow- on reel.
  A64-10229
–  Additionally insert guide awl -2- into adhesive bead, as shown, and attach it to window using suction pad so that wire runs along window as close to the glass as possible.
  A64-10254
–  Adjust reel and guide awl, as shown, and cut clear area on D-pillar.
–  Adjust reel and guide awl, as shown.
  A64-10247
–  Continue cutting window clear up to around its centre.
  A64-10248
–  Use second reel to cut clear bottom area of window.
  A64-10249
–  Move reel up and insert guide awl, as shown.
  A64-10251
–  Cut window clear upwards along D-pillar.
  A64-10250
–  Adjust reel over centre of window and adjust via first reel as shown and cut window fully clear at top.
–  Remove window from window opening using suction lifters.
Removing damaged rear window
  WARNING
Always wear safety goggles and leather gloves when removing window.
–  Protect body and interior against damage from glass splinters.
–  Remove glass fragments down to adhesive sealant.
–  Unplug electrical connectors for heated rear window and window aerial.
–  Mask flange all round with fabric-reinforced adhesive tape.
–  Cut through adhesive sealant (with glass fragments) in window opening using electric cutter -V.A.G 1561A- and offset blade -V.A.G 1561/10- (with roller stop).
Preparations before installing rear window
  Note
t  Just before re-installing an undamaged window, use electric cutter -V.A.G 1561 A- and scraper (25 mm) -V.A.G 1561/8- to cut back the remaining adhesive sealant on the window and flange for an even surface, but do not remove completely.
t  The remaining sealant is required as a base for better adhesion of the new adhesive sealant.
  Caution
t  Keep bonding surface clean and free from grease.
t  Do not cut back bonding surface until shortly before installation.
t  Do NOT apply primer to bonding surface and do NOT use cleaning solution.
If installing a new window:
–  Clean all around bonding surface with cleaning solution -D 009 401 04-.
  Caution
t  The ceramic coating on the glass is not a primer.
t  The glass must always be primed before applying adhesive sealant.
–  Apply glass/paint primer -D 009 200 02- as described below.
  A64-10252
Applying primer:
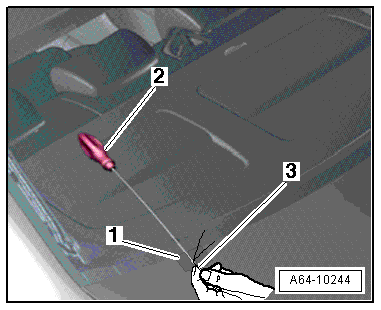
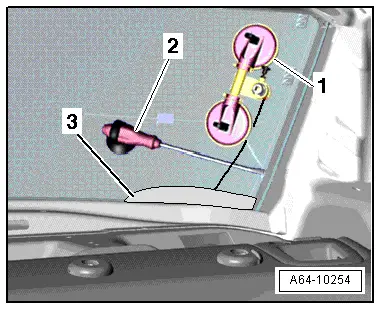
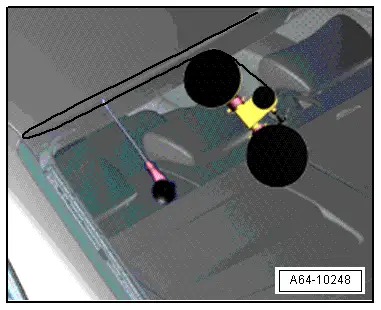
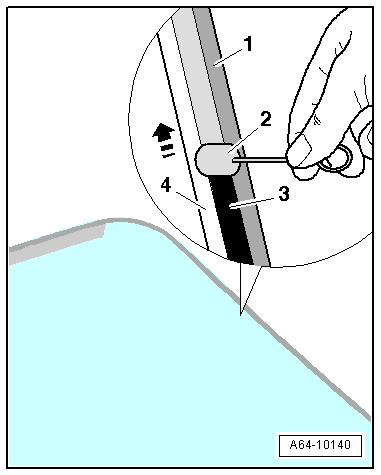
–  Use applicator -2- to apply glass/paint primer -3- evenly and in one movement to bonding surface on window -4-.
–  Start application with fully soaked felt.
l  Flash-off time: 10 minutes
  Caution
Glass/paint primer is conductive and must not come into contact with bus bar of rear window heating.
Window flange:
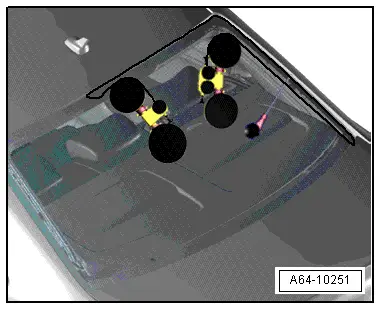
–  If window flange has been damaged, paintwork structure must be repaired and, if necessary, anti-corrosion measures must be taken → Audi Paintwork Guide.
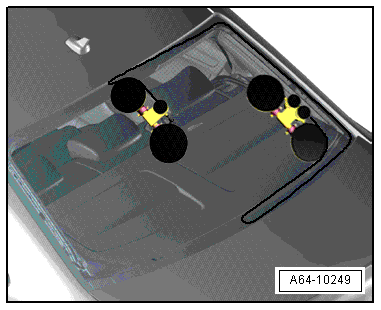
–  Clean treated area with cleaning solution -D 009 401 04- and then apply glass/paint primer -D 009 200 02-.
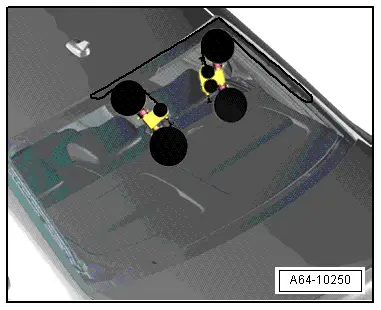
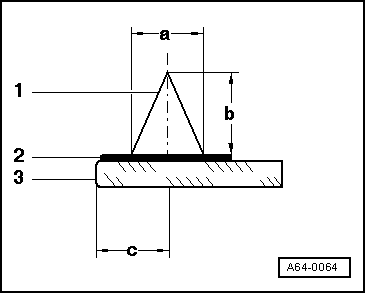
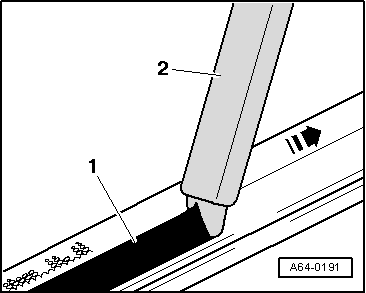
Installing
  Note
The cross-section of the adhesive bead is determined by the nozzle opening and the rate of application.
  A64-10140
Dimensions for applying adhesive:
1 - Adhesive bead
2 - Glass/paint primer
3 - Window
l  Dimension -a- = 8 mm ± 2 mm
l  Dimension -b- = 12 mm + 2 mm
l  Dimension -c-: note distances from edge of window → Item.
  A64-0064
–  Apply full surface of nozzle -2- to window.
l  Direction of application -arrow- for adhesive bead -1-.
  A64-0191
–  Apply adhesive sealant all around window.
–  When reinstalling an undamaged window, apply adhesive to remaining adhesive bead.
–  Fit rear window into window opening using suction lifters.
  Caution
The window must be fitted within 15 minutes; otherwise the adhesive properties of the adhesive sealant will be impaired.
–  Align window glass so that spacing is equal on both sides.
–  Observe distance from roof = → Item.
–  Note minimum drying time → Anchor.
  A64-10141

Exploded view - rear window (Avant) > < Exploded view - rear window (saloon)