
A4 Mk3
| Exhaust manifold - exploded view |

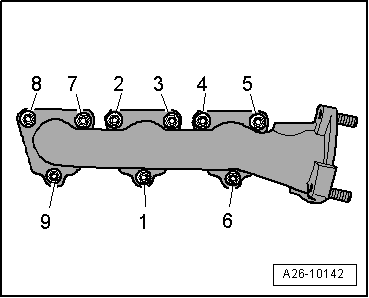
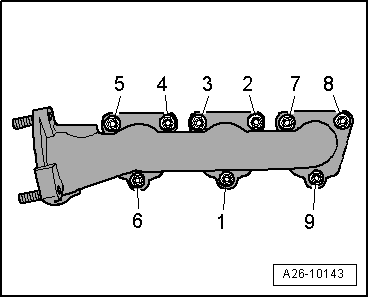
| 1 - | Nut |
| q | Renew |
| q | Coat with high-temperature paste; for high-temperature paste refer to → Electronic parts catalogue |
| q | Tightening torque and tightening sequence: left-side → Fig.; right-side → Fig. |
| 2 - | Bracket for heat shield |
| 3 - | Exhaust manifold |
| q | Removing and installing: left-side → Chapter, right-side → Chapter |
| 4 - | Gasket |
| q | Renew |
| 5 - | Heat shield |
| 6 - | Bolt |
| q | 10 Nm |
| 7 - | Lambda probe |
| q | Before catalytic converter |
| q | Removing and installing → Rep. Gr.24 |
| 8 - | Catalytic converter |
| q | Exploded view → Chapter |
| 9 - | Nut |
| q | Renew |
| q | Coat with high-temperature paste; for high-temperature paste refer to → Electronic parts catalogue |
| q | 23 Nm |
| 10 - | Gasket |
| q | Renew |
|
|
|
|
|
|