audi Workshop Repair Guides

Audi Workshop Service and Repair Manuals

Checking supercharger for leaks > < Drive unit - exploded view
Removing and installing drive unit and damper spring
Special tools and workshop equipment required
   
t  Used oil collection and extraction unit -V.A.G 1782-
t  Sealant → Electronic parts catalogue
t  Oil for supercharger drive → Electronic parts catalogue
t  Spreader tool (commercially available)
  W00-10211
Removing
l  Supercharger secured to engine and gearbox support -VAS 6095- → Chapter.
–  Detach coolant pipes from supercharger → Chapter.
–  Position supercharger vertically in engine and gearbox support.
l  Drive unit faces upwards.
  A19-10759
–  Remove bolts -arrows-.
  A21-10463
  Caution
To make sure bearing cover -1- does not come loose and remains properly sealed, always use spreader tool -arrows- to press off drive unit -2- as shown in illustration (do not use a hammer).
–  Carefully press off drive unit from bearing cover and detach.
–  Detach damper spring.
  A21-10464
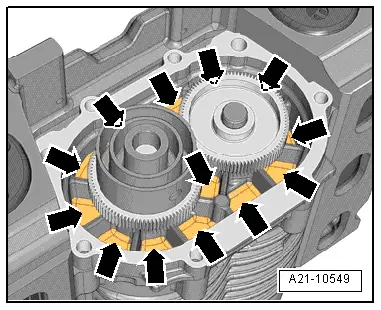
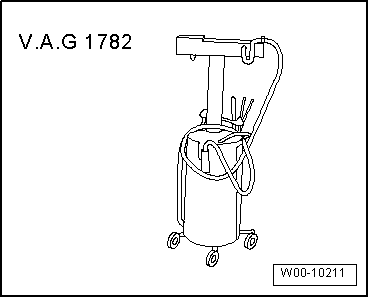
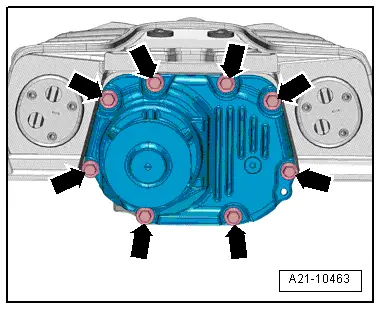
–  With the aid of used oil collection and extraction unit -V.A.G 1782-, extract all oil for supercharger drive from bearing cover (including oil chambers -arrows- between ribs).
Installing
l  Tightening torques → Chapter „Drive unit - exploded view“
  Note
t  Renew the drive unit bolts.
t  Fit self-locking bolts or insert bolts with locking fluid → Electronic parts catalogue.
–  Clean sealing surfaces; they must be free of oil and grease.
–  Before assembly, always remove residues from threaded holes for drive unit in bearing cover using a thread tap.
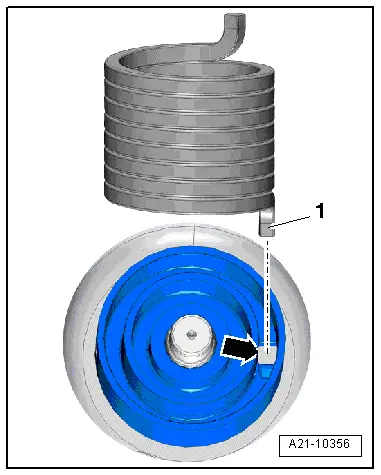
–  Fill bearing cover with oil for supercharger drive.
  Note
The container is filled with the required capacity. It is not possible to check the oil level at a later stage.
  A21-10549
–  Insert damper spring in damper element.
l  End -1- of damper spring must engage in hole -arrow- in rear damper element.
–  Apply a thin layer of sealant to sealing surface of drive unit.
–  Fit drive unit to supercharger housing (pay attention to dowel sleeves).
  Caution
Avoid damage to drive shaft.
The drive unit must not be pulled in by screwing in the bolts.
–  Simultaneously turn drive pulley until opposite end of damper spring engages in hole in drive unit.
Remaining installation steps are carried out in reverse sequence; note the following:
–  Check supercharger for leaks → Chapter.
–  Install coolant pipes on supercharger → Chapter.
  A21-10356

Checking supercharger for leaks > < Drive unit - exploded view