
A4 Mk3
| Oil pump and sump (bottom section) - exploded view |
 Note
Note| Oil spray jet for piston cooling → Fig.. |

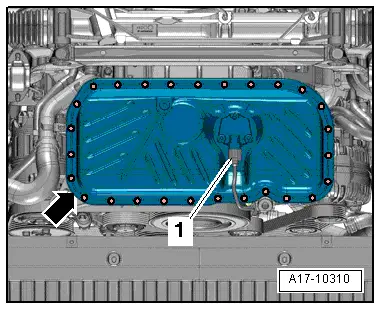
| 1 - | Sump (bottom section) |
| q | Removing and installing → Chapter |
| 2 - | Bolt |
| q | Renew |
| q | Tightening torque and sequence → Fig. |
| 3 - | Bolt |
| q | Self-locking |
| q | Renew |
| q | 8 Nm + turn 90° further |
| 4 - | Baffle plate |
| 5 - | Oil pump |
| q | Do not dismantle |
| q | With pressure relief valve for cold condition (11 bar) and pressure control valve (3.5 bar) |
| q | Removing and installing → Chapter |
| 6 - | Bolt |
| q | 23 Nm |
| 7 - | Dowel sleeves |
| 8 - | Oil pump drive shaft |
| 9 - | Coupling |
| 10 - | Compression spring |
| 11 - | Thrust washer |
| 12 - | Chain sprocket for oil pump |
| q | Installation position: Side with lettering faces engine |
| 13 - | Bolt |
| q | To loosen, use pin wrench -3212- to counterhold chain sprocket |
| q | 60 Nm |
| q | If bolt cannot be tightened to torque, remove sump (bottom section) with baffle plate and counterhold oil pump drive shaft using an open-end spanner. |
| 14 - | Seal |
| q | Renew |
| 15 - | Oil drain plug |
| q | 30 Nm |
| 16 - | Seal |
| q | Renew |
| 17 - | Nut |
| q | 9 Nm |
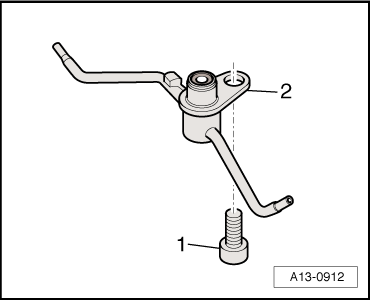
| 18 - | Oil level and oil temperature sender -G266- |
| q | Removing and installing → Chapter |
Note
|
|