audi Workshop Repair Guides

Audi Workshop Service and Repair Manuals

Fuel delivery unit and fuel gauge senders - vehicles with four-wheel drive > < Removing and installing fuel tank with attached components
Removing and installing misfuelling prevention device
Special tools and workshop equipment required
t  Release strips from repair kit
Removing
–  Observe safety precautions → Chapter.
–  Observe rules for cleanliness → Chapter.
   
–  Open tank flap.
–  Clean area around fuel filler neck.
–  Remove filler cap -arrow- for fuel filler neck.
  A20-1253
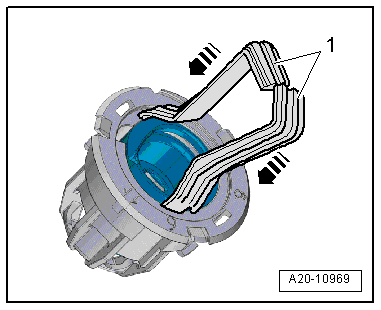
–  Insert release strips -1- into both guides in fuel filler neck as far as stop -arrows-, as shown in illustration.
l  Bent sections of release strips must point toward each other.
l  Release strips must engage audibly.
l  
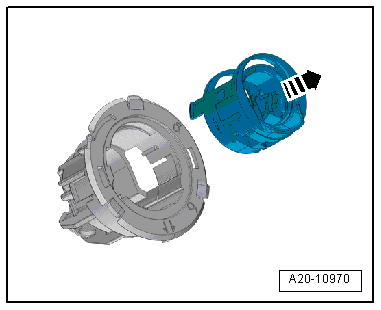
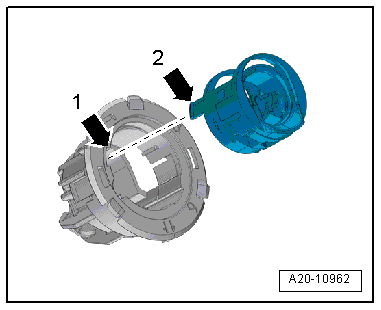
When release strips are inserted, misfuelling prevention device -1- is released and can be removed.
  A20-10969
–  Pull misfuelling prevention device out of fuel filler neck -arrow-.
  A20-10970
Installing
–  Insert misfuelling prevention device in fuel filler neck.
l  Catch -arrow 2- must engage in guide -arrow 1- on misfuelling prevention device.
l  It is not possible to insert the component the wrong way around.
–  Press misfuelling prevention device into fuel filler neck so that it engages audibly.
  Caution
Safety risk due to electrostatic discharge.
t  The fuel tank is connected to earth via the misfuelling prevention device.
t  If the misfuelling prevention device is to be rendered inoperative, it is not sufficient to merely remove it. An insert (without misfuelling prevention device) must be fitted instead to connect the fuel tank to earth; see → Electronic parts catalogue.
  A20-10962

Fuel delivery unit and fuel gauge senders - vehicles with four-wheel drive > < Removing and installing fuel tank with attached components