audi Workshop Repair Guides

Audi Workshop Service and Repair Manuals

Removing air cleaner (bottom section) > < Air cleaner - exploded view
Removing and installing air filter element
Removing
   
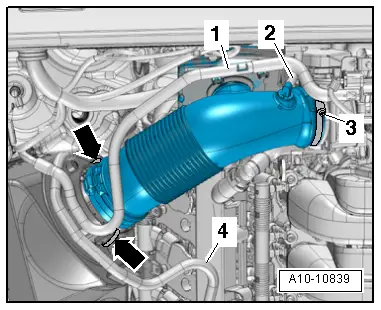
–  Release clamps -arrows- and pull air hose out of air cleaner housing.
  A10-10839
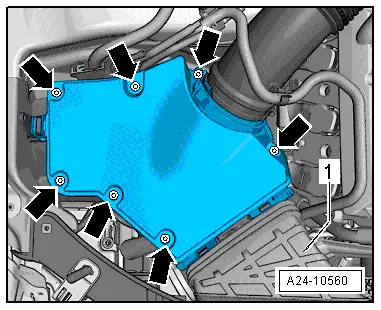
–  Remove bolts -arrows- from air cleaner (top section) and lift out air cleaner (top section).
  Note
t  Always use genuine part for air filter element.
t  Use a silicone-free lubricant when installing the air hose.
t  Secure all hose connections with the correct type of hose clips (same as original equipment) → Parts catalogue
  A24-10560
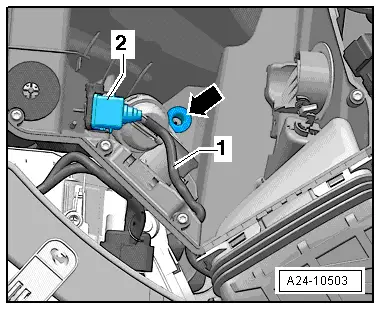
–  Check water drain hose -arrow- in air cleaner housing (bottom section) for dirt and other obstructions (clean if necessary).
–  Clean salt residue, dirt and leaves out of air cleaner housing (top and bottom sections); use a vacuum cleaner if necessary.
–  Check for dirt in air duct leading to air filter element.
–  When installing air filter element, check that it is properly centred in retainer in air cleaner (top section).
  A24-10503
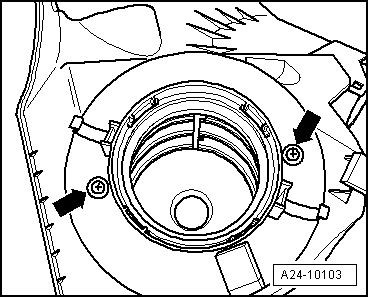
–  Screw air cleaner (top section) onto new air filter element.
  A24-10103
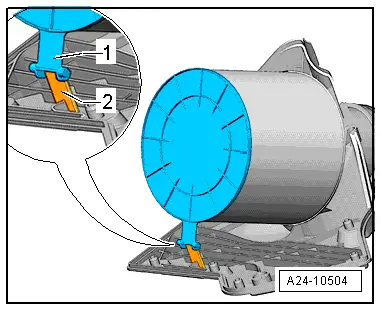
–  Lug on air filter element -1- must make contact with lug on air cleaner housing -2-.
–  Fit the top section of the air cleaner carefully on the bottom section, without using force.
  Note
Before tightening bolts, make sure that top section of air cleaner is inserted into groove on bottom section of air cleaner (to prevent air leaks).
–  Then screw top section of air cleaner back onto bottom section.
–  Make sure that air hose is securely fitted.
–  The remaining installation steps are carried out in the reverse sequence.
  A24-10504

Removing air cleaner (bottom section) > < Air cleaner - exploded view