audi Workshop Repair Guides

Audi Workshop Service and Repair Manuals

Removing and installing flange shaft (right-side) > < Exploded view - front final drive
Removing and installing flange shaft (left-side)
   
Removing
l  Gearbox is secured to engine and gearbox support -VAS 6095- → Chapter.
–  Tilt gearbox to rear on engine and gearbox support to prevent gear oil from escaping.
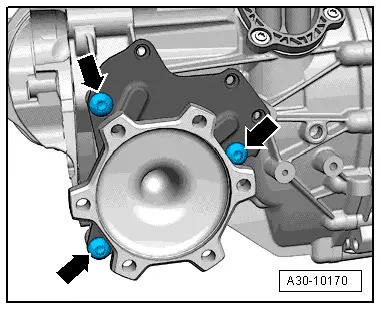
–  Unscrew bolts -arrows- on mounting bracket for flange shaft.
  A30-10170
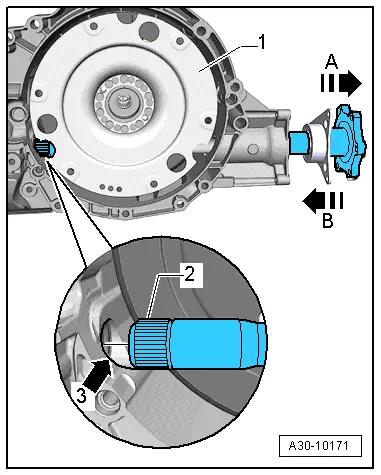
–  Remove flange shaft (left-side) -2- from gearbox in direction of -arrow A-.
  Note
-Item 1- and -arrows 3, B- can be disregarded.
–  Remove torque converter → Chapter.
  A30-10171
Installing
Installation is carried out in reverse sequence; note the following:
l  Tightening torque → Chapter
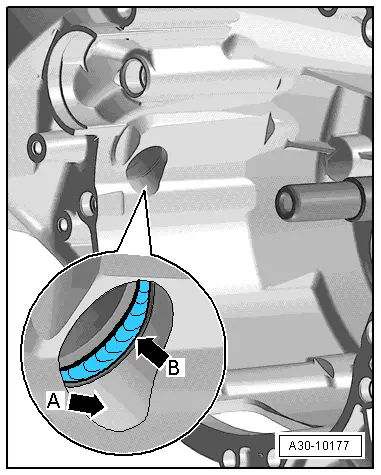
–  Thoroughly clean flange shaft (left-side), area of torque converter bellhousing leading to differential -arrow A-, and oil seal -arrow B-.
  Note
If oil seal between differential and gearbox housing -arrow B- is damaged, it must be renewed → Chapter.
–  Pack space between sealing lip and dust lip half-full with sealing grease -G 052 128 A1-.
–  Install torque converter → Chapter.
  A30-10177
–  Turn torque converter -1- so that you can see opening to differential -arrow 3-.
–  Slide flange-shaft (left-side) -2- into gearbox in direction of -arrow B- (keep end of shaft centered while guiding it into oil seal on front final drive -arrow 3-).
  Note
t  The splines -2- on the flange shaft will damage the oil seal between the final drive and the gearbox housing if you do not keep the flange shaft centered.
t  If oil seal is damaged, it must be renewed.
t  -Arrow A- can be disregarded.
  A30-10171
–  Tighten flange shaft mounting bracket -arrows-.
–  After installing gearbox refer to → Chapter „Checking oil level in front final drive and topping up“.
  A30-10170

Removing and installing flange shaft (right-side) > < Exploded view - front final drive