audi Workshop Repair Guides

Audi Workshop Service and Repair Manuals

Automatic gearbox, control, assembly, housing > < Contact corrosion!
Removing and installing torque converter
Special tools and workshop equipment required
   
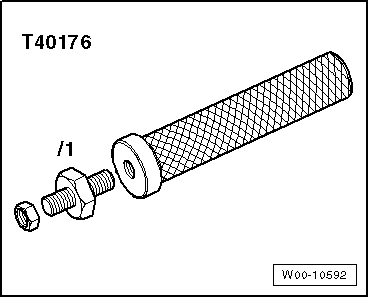
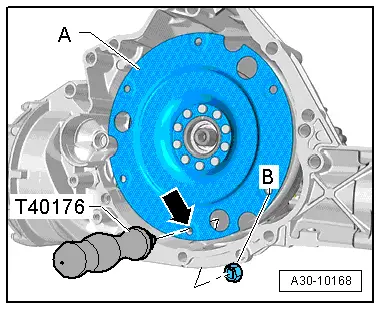
t  Extractor -T40176-
t  Grease for clutch plate splines -G 000 100-
  W00-10592
Removing
–  Remove flange shaft (left-side) → Chapter.
–  Attach extractor -T40176- to torque converter -A- using nut -B-.
  A30-10168
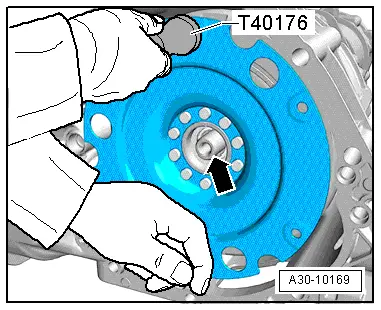
–  Turn extractor -T40176- upwards.
  Note
t  Keep hold of the bottom of the torque converter, as shown in the illustration, to prevent it from tilting over.
t  -Arrow- can be disregarded.
–  Pull torque converter off input shaft -arrow- keeping torque converter straight.
–  Put torque converter down carefully, e.g. on work bench.
  A30-10169
Installing
Installation is carried out in reverse sequence; note the following:
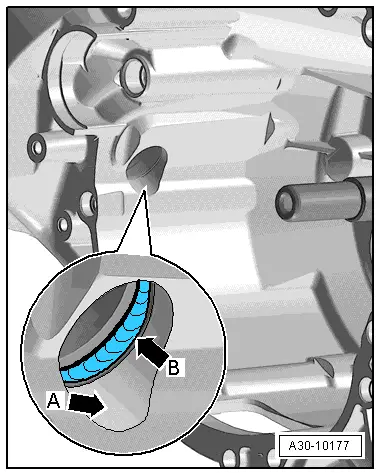
–  Thoroughly clean area of torque converter bellhousing leading to differential -arrow A-, and oil seal -arrow B-.
  Note
If oil seal between differential and gearbox housing -arrow B- is damaged, it must be renewed → Chapter.
–  Pack space between sealing lip and dust lip half-full with sealing grease -G 052 128 A1-.
  A30-10177
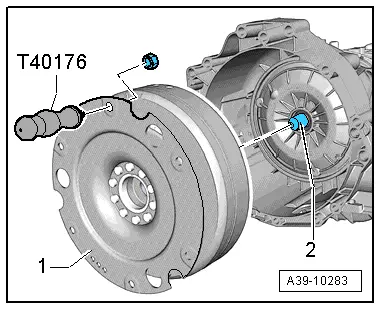
–  Clean splines on input shaft -2- and splines on torque converter. Remove corrosion and apply only a very thin coating of grease for clutch plate splines -G 000 100- to the splines. It is important to remove excess grease.
  A39-10283
–  Use extractor -T40176- to carefully slide torque converter onto input shaft -arrow-, taking care to keep torque converter straight.
  A30-10169
–  Detach extractor -T40176- from torque converter -A-.
–  Remove nut -B-.
–  Install flange shaft (left-side) → Chapter.
  A30-10168

Automatic gearbox, control, assembly, housing > < Contact corrosion!