
A5
 Note
Note
|

| 1 - | Clutch module |
| q | Removing and installing → Chapter |
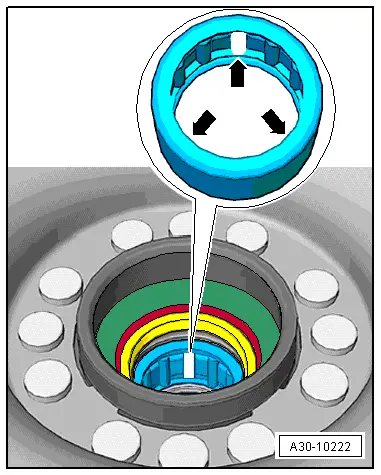
| 2 - | Oil seal |
| q | For dual-mass flywheel |
| q | Pulling out → Fig. |
| q | Driving in → Fig. |
| 3 - | Needle bearing |
| q | For dual-mass flywheel |
| q | Different versions → Fig. |
| q | Check and renew if necessary → Fig. |
| q | Pressing out → Fig. |
| q | Pressing in → Fig. |
Note| t | Always renew needle bearing if input shaft is damaged → Anchor |
| t | Depending on the version fitted, the needle bearing may have the full number of rollers, or every 4th roller may be missing. The missing rollers do not mean that the needle bearing is defective. |
| 4 - | Dual-mass flywheel |
| q | With flange for drive plate |
| q | Ensure that dowel pins fit tightly |
| q | Contact surface for clutch lining must be free of grooves, oil and grease |
| q | Removing and installing → Chapter „Removing and installing pressure plate and clutch plate (LuK version)“ |
| 5 - | Clutch plate |
| q | Removing and installing → Chapter |
| q | For correct version, refer to → Electronic parts catalogue |
| q | Installation position: marking “Getriebeseite” (gearbox side) faces towards pressure plate |
| q | If fitted, coil springs (damper assembly) face towards pressure plate |
| 6 - | SAC pressure plate |
| q | For correct version, refer to → Electronic parts catalogue |
| q | Removing and installing → Chapter |
| q | Resetting adjuster ring → Chapter |
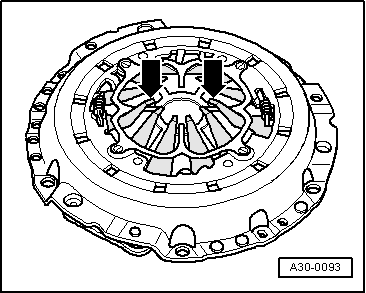
| q | Checking ends of diaphragm spring → Fig. |
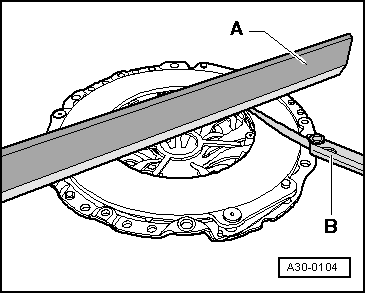
| q | Checking pressure plate for distortion → Fig. |
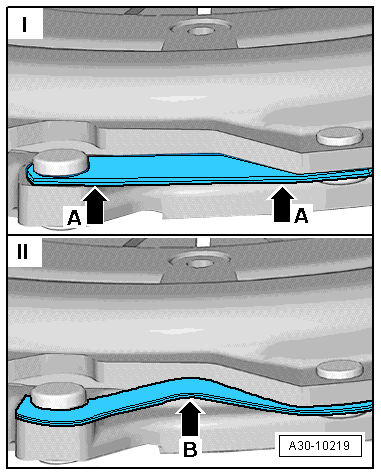
| q | Checking springs and riveting → Fig. |
| q | Contact surface for clutch lining must be free of grooves, oil and grease |
| 7 - | Bolt |
| q | 22 Nm and then turn 90° further |
| q | Always renew |
| q | Secures pressure plate to dual-mass flywheel |
| q | Observe assembly instructions → Chapter for loosening or tightening |
|
|
 Caution
|
|
|
|
|
|