audi Workshop Repair Guides

Audi Workshop Service and Repair Manuals

High-pressure pump (CAPA) > < Checking vacuum system
Removing and installing toothed belt for high-pressure pump
Special tools and workshop equipment required
   
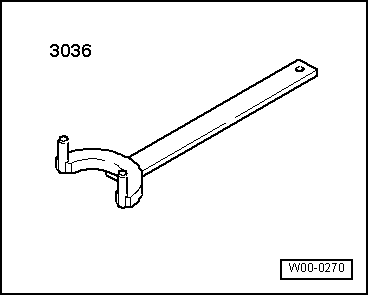
t  Counterhold tool -3036-
  W00-0270
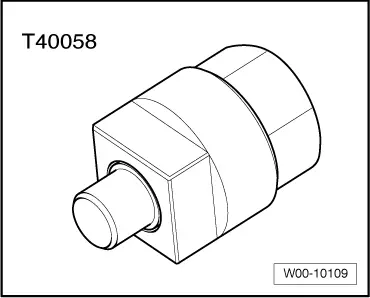
t  Adapter -T40058-
Removing
–  Remove top section of intake manifold → Chapter.
  W00-10109
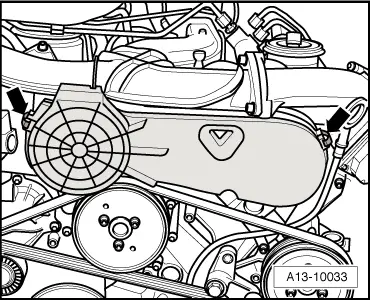
–  Release hose clips -arrows-.
–  Pivot toothed belt cover forward and disengage retaining pegs on bottom side of toothed belt cover.
–  Remove toothed belt cover.
  Note
Before removing, mark rotation direction of toothed belt with chalk or felt-tip pen. If the belt runs in the opposite direction when it is refitted, this can cause breakage.
  A13-10033
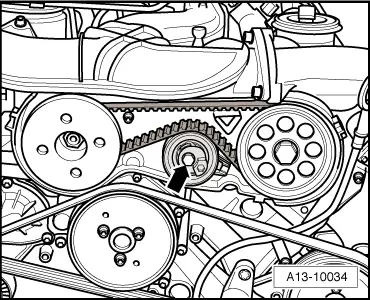
–  Loosen bolt -arrow- for toothed belt tensioning roller approx. 2 turn.
  A13-10034
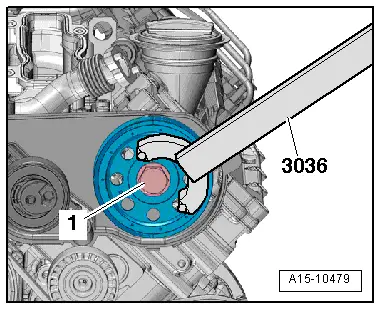
–  Loosen central bolt -1- for toothed belt drive sprocket approx. 2 turns using counterhold tool -3036-.
  A15-10479
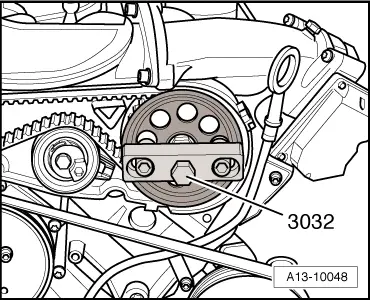
–  Use puller -3032- to pull off toothed belt drive sprocket.
–  Take off drive sprocket together with toothed belt.
Installing
Installation is carried out in the reverse order; note the following:
  A13-10048
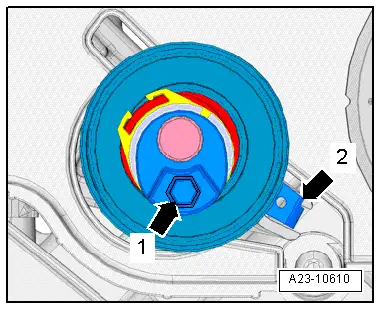
–  Check installation position of toothed belt tensioning roller:
l  Retaining lug -arrow 2- must engage in slot on bracket for high-pressure pump.
l  Tensioning roller must be slack and hexagon socket -arrow 1- must face downwards.
–  Fit toothed belt together with toothed belt drive sprocket.
–  Install toothed belt tensioning roller; to do so, screw in bolt for toothed belt tensioning roller without applying force until eccentric adjuster of toothed belt tensioning roller can just still be turned without axial movement.
–  Screw in bolt for toothed belt drive sprocket until toothed belt drive sprocket can just still be turned without axial movement.
  A23-10610
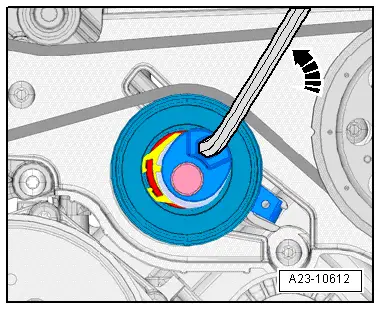
–  Tension toothed belt tensioning roller slightly by turning in direction of -arrow- using hexagon key until hexagon socket is in "1 o'clock" position.
  Caution
Do NOT turn tensioning roller up to or beyond „12 o'clock“ position.
  A23-10612
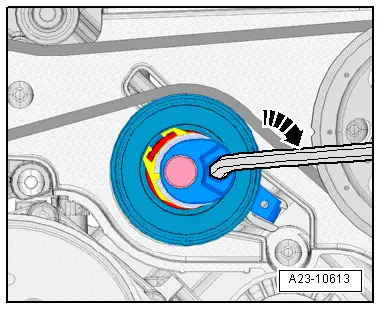
–  Now release toothed belt tensioning roller -arrow- to such an extent that hexagon socket moves into "3 o'clock" position.
  A23-10613
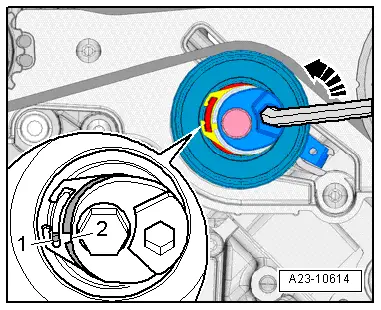
–  Tension tensioning roller slightly from "3 o'clock" position -arrow- until lug -1- and notch -2- are exactly in line.
  A23-10614
–  Hold toothed belt tensioning roller in this position and tighten bolt -arrow- → Item.
  A13-10034
–  Tighten bolt -1- for toothed belt drive sprocket using counterhold tool -3036- → Item.
  A15-10479
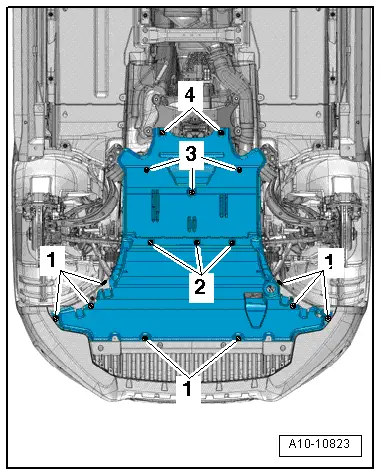
–  Release fasteners -1 ... 4- and remove noise insulation panels.
  A10-10823
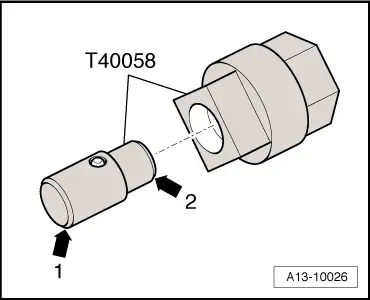
–  Insert guide pin of adapter -T40058- as follows:
l  The larger-diameter section -arrow 1- faces towards the engine.
l  The smaller-diameter section -arrow 2- faces the adapter.
  A13-10026
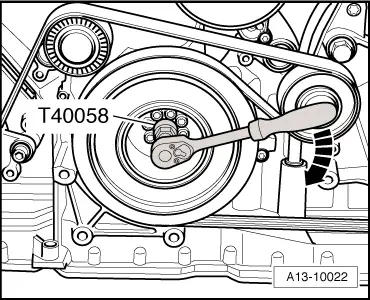
–  Turn crankshaft 1 rotation using adapter -T40058-.
  Caution
Irreparable damage can be caused if the camshaft timing chains slip.
Turn crankshaft only in direction of engine rotation -arrow-.
  A13-10022
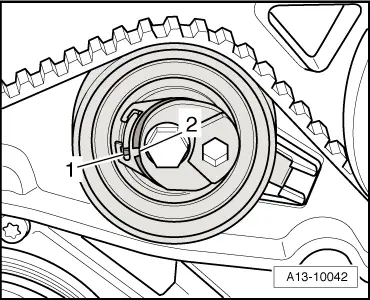
–  Check toothed belt tension:
l  Lug -1- should align with notch -2-.
–  If the specification is not attained, re-adjust toothed belt tension.
Installation is carried out in the reverse order; note the following:
–  Install top section of intake manifold → Chapter.
  A13-10042

High-pressure pump (CAPA) > < Checking vacuum system